目录
了解耳鼻喉科
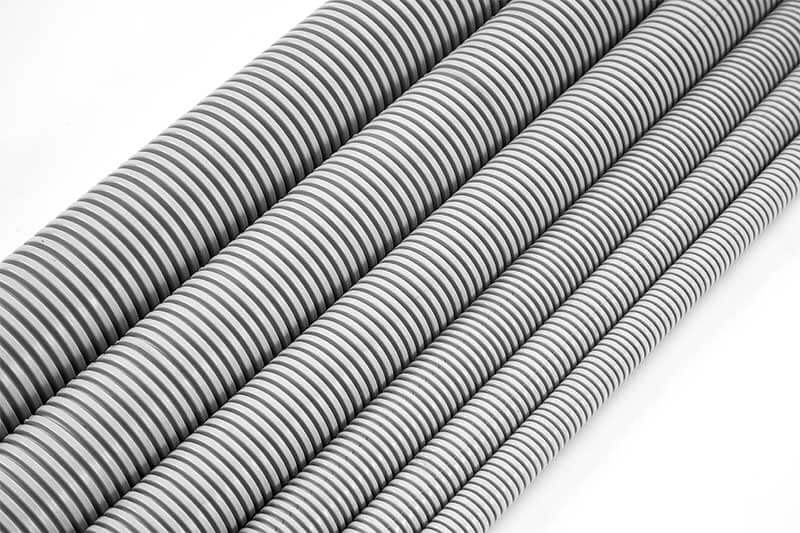
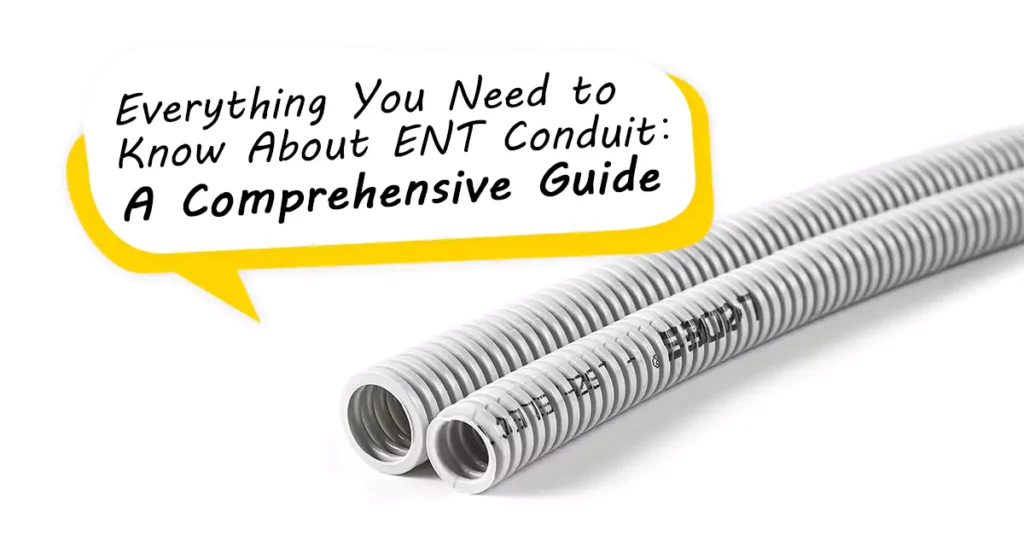
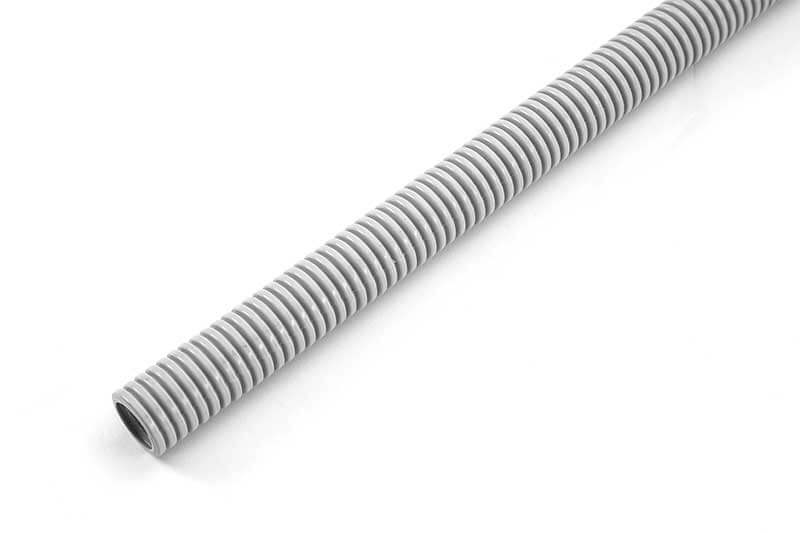
电气非金属管 (ENT) 是一种用于电气安装的导管。它是一种柔性波纹管,由非金属材料制成,通常是 PVC(聚氯乙烯)等优质塑料。与传统金属导管相比,ENT 导管具有多种优势。它重量轻、易于操作,并且可以轻松切割和弯曲以满足各种安装要求。ENT 的灵活性使其更容易在狭小空间和障碍物周围安装。ENT 旨在保护和布线电线和电缆,作为住宅和商业建筑中电线的通道。
符合的证书和测试标准
电气非金属管 (ENT) 所需的认证和测试标准可能因地区和具体电气规范而异。不过,以下是一些常用的 ENT 标准和测试:
- UL 1653:UL 1653 是公认的电气非金属管 (ENT) 标准。它涵盖了 ENT 产品的安全和性能要求,包括尺寸、结构、材料和测试方法。
- CSA C22.2 第 227.1 号: CSA C22.2 No. 227.1 是加拿大标准,概述了 用于电气的非金属管 设施,包括 ENT。它涵盖了 ENT 特有的材料、构造、尺寸、性能和测试方法。
- 金融时报4: FT4 测试并非专门针对电气非金属管道 (ENT),而是一种用于评估电缆火焰蔓延特性的耐火性测试。FT4 测试通常针对电缆进行,包括可能安装在 ENT 管道内或旁边的电缆。
FT4 测试是加拿大标准协会 (CSA) 标准 C22.2 No. 0.3 的一部分,该标准涵盖电缆的火焰蔓延和烟雾密度测试。该测试通过将电缆置于垂直火焰点火源下来测量其火焰蔓延等级。该测试评估电缆抵抗火焰蔓延的能力及其在垂直安装情况下引起火灾蔓延的可能性。
- NEC(国家电气规范):NEC 是美国广泛采用的标准,为电气安装提供指导方针和规定。它包括导管使用要求(包括 ENT),例如适当的尺寸、安装方法和接地。
在选择 ENT 导管时,满足这些标准并拥有相关的合规证书至关重要。
耳鼻喉导管的正常尺寸
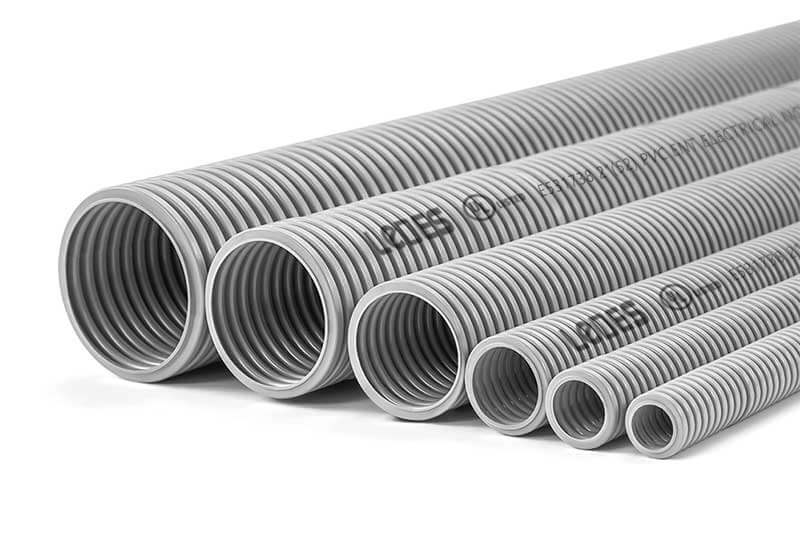
ENT 导管有多种尺寸可供选择,以满足不同的布线要求。最常见的尺寸包括 1/2 英寸至 2-1/2 英寸。这些尺寸允许灵活布线并容纳特定应用所需的电线数量。
耳鼻喉导管制造工艺
耳鼻喉导管是通过挤压工艺制造的。对于 PVC 耳鼻喉导管,您需要:
材料:
PVC树脂:PVC导管的主要原料。
稳定剂:增强 PVC 稳定性和耐久性的添加剂。
增塑剂:提高 PVC 柔韧性的物质。
润滑剂:用于促进挤压过程。
颜料:用于着色的可选添加剂。
设备:
PVC挤出机:用于将PVC树脂与添加剂熔融并混合的机器。
挤出模具:将 PVC 成型为所需的导管形状。
冷却系统:对挤出的PVC进行快速冷却、固化。
切割和定尺寸设备:将导管切割至所需长度并确保尺寸合适。
印刷设备:如有必要,可在导管上印刷产品信息或标记的设备。
制造过程 一般涉及以下步骤:
准备: 将PVC树脂、稳定剂、增塑剂、润滑剂、颜料等按照特定配方称量、混合。
挤压: 混合材料被送入 PVC 挤出机,在挤出机中加热并熔化。然后,熔化的 PVC 被强制通过挤出模具,制成导管型材。
冷却: 挤出的PVC导管经过冷却系统,快速冷却至固化形状。
切割和定尺寸: 将冷却的导管切割成所需长度,并进行定径以确保其符合要求的尺寸。
印刷(如适用):如果导管上需要产品信息或标记,可以使用印刷设备来添加它们。
质量控制: 成品 PVC ENT 导管经过质量检查,以确保其符合所需的标准和规格。
ENT导管的优点
与传统金属导管相比,ENT 导管具有多项优势。这些优势包括:
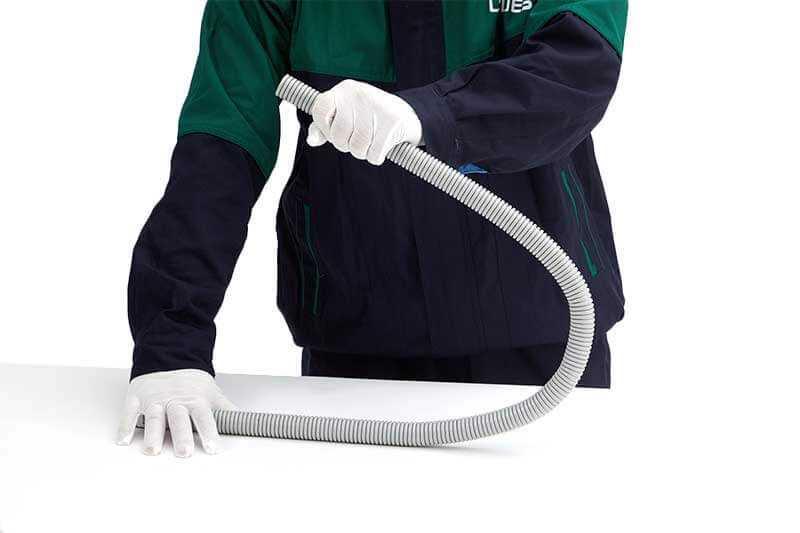
- 灵活性: ENT 导管具有高度的灵活性,可以用手轻松弯曲,从而更容易穿过狭窄空间和拐角处,减少了配件的需求并简化了安装。
- 耐腐蚀性: 与金属导管不同,ENT 导管不易腐蚀,适合用于户外和潮湿环境。
- 轻的: ENT 导管比金属导管轻得多,更容易操作和安装。
- 经济高效: ENT 导管通常比金属导管更实惠,使其成为电气安装的经济实惠的选择。
常见使用场景
非金属电气管 (ENT) 是一种用途广泛且高效的导管解决方案,广泛应用于各种布线应用。其灵活的设计和对环境因素的抵抗力使其成为住宅和商业环境的理想选择。以下是 ENT 的详细常见使用场景:
住宅布线
ENT 导管对于寻求谨慎、高效的布线解决方案的房主特别有益。
- 集成入墙系统: ENT 导管为墙内的电路布线提供了顺畅的布线,减少了绕过螺柱和其他内置障碍物的复杂重新布线的需要。
- 浴室和厨房电路: ENT 的防潮性和紧凑灵活性使其成为这些高使用率区域的理想选择,它可以安全地支持插座、照明和电器的接线。
- 家用电器专用电路: ENT 可以为大型电器提供有组织的专用电路,确保它们正确接线,同时最大限度地减少混乱,尤其是在地下室或杂物间。
商业应用
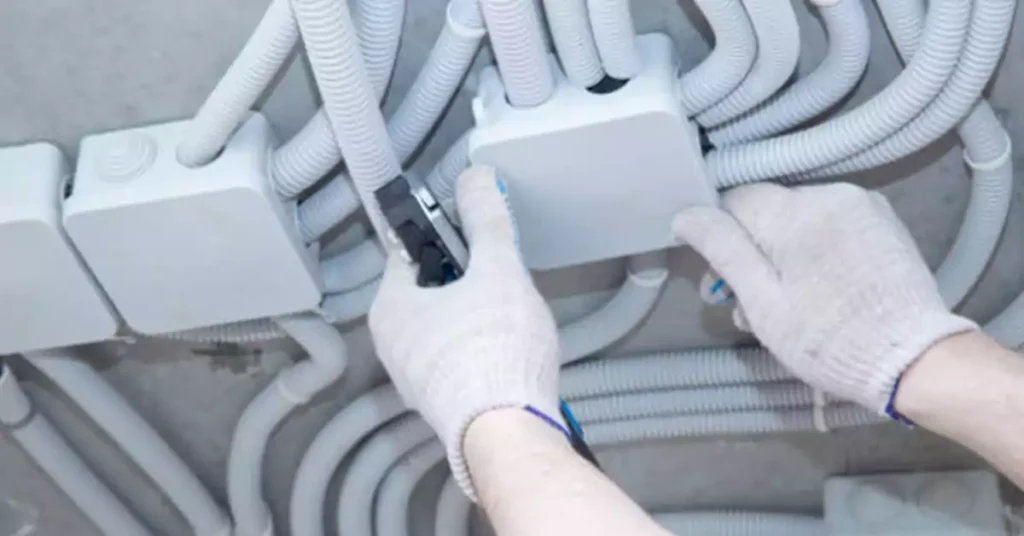
ENT 导管在商业建筑中也发挥着无价的作用,它能为各种业务需求提供高效的布线解决方案:
- 办公室布线: 在办公环境中,ENT 有助于组织工作站、照明设备和数据网络的布线。其灵活性使其能够随着办公室布局的变化而轻松进行调整和重新配置。
- 零售空间: 零售空间受益于 ENT 打造整洁有序的电气系统的能力。它支持销售点终端、展示照明、安全系统等的布线,确保电气设置不会影响购物体验。
- 轻型商业建筑: 餐馆、沙龙和诊所等小型企业使用 ENT 提供可靠的布线解决方案。其适应性使其适用于各种设置,从厨房设备到照明和 HVAC 系统。
工业环境
虽然由于强度有限,ENT 可能不是重型工业应用的首选,但它仍然有特定的应用领域:
- 低压系统: ENT 导管为控制系统、仪器仪表和监控设备提供安全、适应性强的布线,从而允许灵活地放置和调整传感器。
- 轻型机械和输送机: 在受控环境中,ENT 导管可以容纳较轻的机械、传感器和控制面板的接线,提供保护和组织,同时允许未来的适应性。
- 数据和通信线路: ENT 越来越多地用于受控工业设置中的低压数据和通信线路,支持电气和数据混合管理。
户外应用
ENT 导管也适用于户外安装,可防止潮湿和环境因素。这使其成为户外照明、景观照明和其他外部电气需求的可靠选择。
混凝土板安装
ENT 是安装在混凝土板下的热门选择。其设计使其能够承受混凝土的重量,并抵抗固化过程中的损坏,确保电气解决方案经久耐用。
ENT 导管与液密导管:主要区别
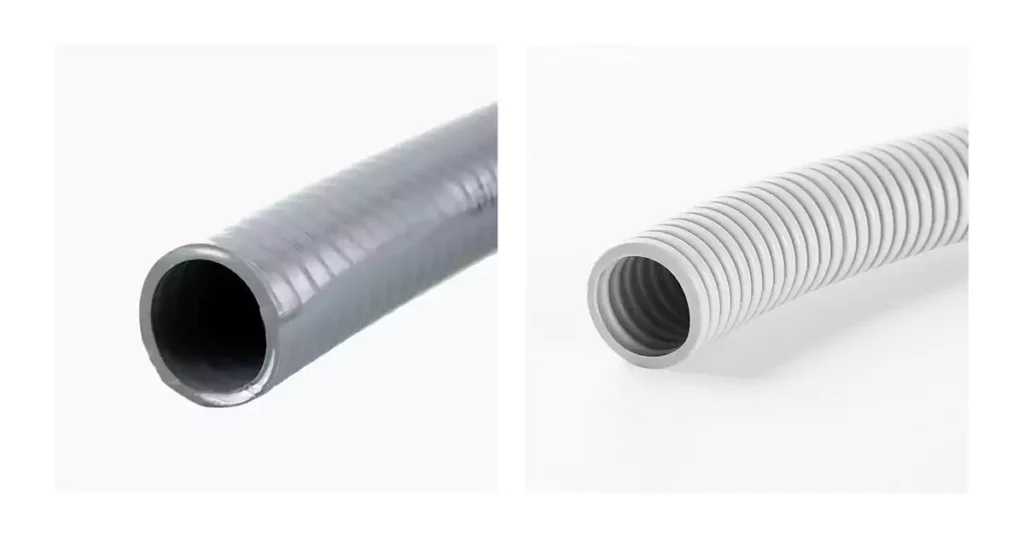
在电气安装方面,导管的选择对于确保安全性、耐用性和符合电气规范至关重要。两种常见的导管类型是电气非金属管 (ENT) 和液密导管。虽然两者都用于保护电线,但它们具有不同的特性,使其适用于不同的应用。
ENT 导管与液密导管的 6 个区别
- 材质成分:
- ENT 导管: ENT 导管由耐用塑料制成,重量轻且灵活,通常用于室内应用。
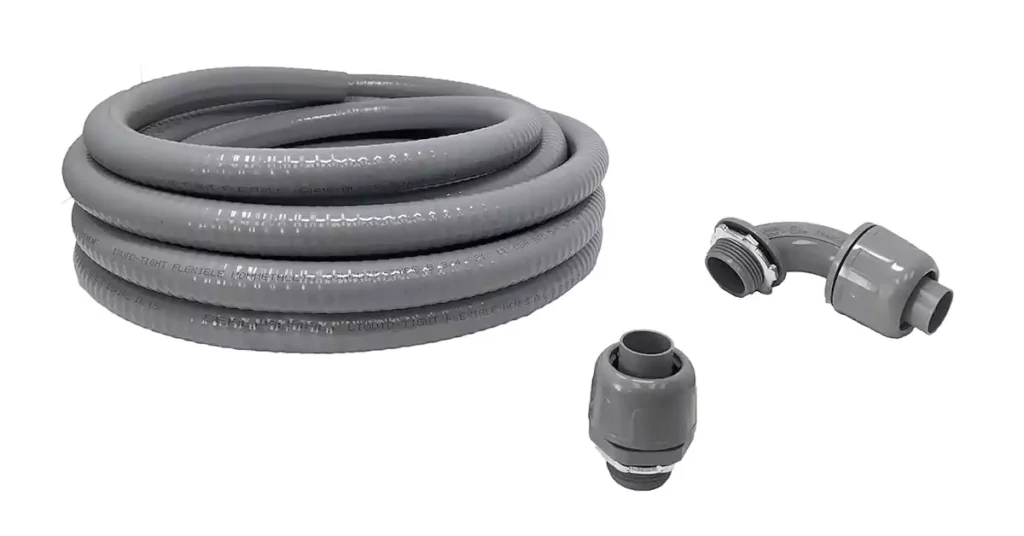
- 液密导管: 它由柔性金属芯和保护外层构成,具有很强的防水、防油、防化学品性能,适用于户外和潮湿环境。
- 建造
- 耳鼻喉科: 具有光滑的内表面,便于拉线,并且通常具有各种直径。
- 液密导管: 采用具有光滑或波纹外观的防水设计,可提供针对环境因素的额外保护。
- 防火性能
- 耳鼻喉科: 一般具有较低的耐火等级,主要取决于具体产品和制造商。
- 液密导管: 通常具有更好的耐火性,特别是金属选项,使其更适合高风险环境。
- 耐腐蚀
- 耳鼻喉科: 天然耐腐蚀,非常适合潮湿或潮湿的地方。
- 液密导管: 也耐腐蚀,但是如果暴露于刺激性化学物质中,金属版本可能会随着时间的推移而变得敏感。
- 灵活性和力量
- 耳鼻喉科: 它以高灵活性著称,可轻松绕过障碍物和墙内。然而,它缺乏金属导管的结构强度。
- 液密导管: 具有适度的灵活性和额外的耐用性,在需要抵抗物理冲击的环境中表现良好。
- 耐温性
- 耳鼻喉科: 在温控环境中表现最佳,在极端温度下会变脆。
- 液密导管: 它可处理更大范围的温度,适合在室内和室外条件下使用,包括暴露在温度波动中。
最适合的应用
电气非金属管 (ENT)
ENT 最适合于优先考虑灵活性和安装简易性的室内应用。常见用途包括:
- 墙壁和天花板内的住宅布线。
- 低压应用。
- 有水分但不过分的区域。
防液导管
防水导管非常适合担心暴露于湿气、化学物质或物理损坏的环境。常见应用包括:
- 室外设施和暴露区域。
- 工业环境中,电气设备可能会受到溢出或严苛的清洁过程的影响。
- 按照国家电气规范 (NEC) 定义的潮湿场所。
ENT 安装的电气规范要求
正确安装不仅对导管的使用寿命至关重要,而且对电气系统的安全性和功能性也至关重要。以下是一些必要的安装步骤和注意事项,以确保 ENT 系统的安装安全且合规。
ENT 安装的关键步骤
安装 ENT 导管的过程通常遵循以下基本步骤,以确保功能性并符合国家电气规范 (NEC) 和任何当地法规:
- 规划布局: 确定导管的路线,考虑墙柱、托梁和其他结构部件,并确保尽量减少弯曲以减少布线压力。
- 切割和安装导管: 使用导管切割器将导管切割成适当的长度,然后使用认可的配件连接各部分并形成所需的角度。
- 固定导管: 使用适当的夹具、支架或吊架安装导管,遵守支撑的间距要求 - 通常每 3-4 英尺或按照 NEC 的规定。
- 连接至箱子和固定装置: 使用认可的连接器将导管固定到接线盒或固定装置上,确保连接紧密且防潮,以确保耐用性和安全性。
- 拉线: 小心地将电线穿过 ENT,注意绝缘完整性。规范指南可能会限制在 ENT 导管内使用的特定电缆类型或尺寸,因此请验证兼容性。
- 检查和测试: 安装完成后,在完成接线之前,检查整个导管路径的连续性、配件是否牢固以及是否符合规范。
Key Considerations for ENT Conduit Installation
支撑和间距: Adhere to the required support spacing to prevent sagging or conduit movement, which can lead to wiring strain or insulation damage. Mount securely, especially in horizontal runs, where additional support may be necessary.
Bending Radius: Follow code guidelines on maximum bending radius to avoid wire damage or excessive friction during pulls. Consider using pull boxes for long runs or runs with multiple bends to facilitate smooth wire installation and reduce potential wear.
Environmental Limitations: ENT conduit is ideal for indoor and dry applications but may require specific conduit ratings or protection for outdoor, high-heat, or damp locations. Consult code restrictions based on location to ensure environmental compatibility.
Connection Quality: Properly tighten all connections to prevent loosening over time. Loose fittings can expose wires or cause electrical faults, so secure each connection according to NEC requirements.
接地和接合: In some cases, ENT may require grounding, particularly in installations where conduit continuity is essential. Consult the NEC or local codes to determine if additional grounding measures are necessary based on the application.
Labeling and Identification: For complex installations, labeling conduit sections and junction boxes improves maintenance efficiency and complies with code requirements for traceability.
Troubleshooting Common ENT Conduit Installation Issues
Even with careful planning, ENT installations can encounter challenges. Here are some common issues and how to address them:
Loose Fittings or Connections: Loose connections can lead to conduit displacement or gaps, compromising the integrity of the installation. Recheck fittings and connectors, ensuring they are code-approved and securely fastened.
Difficult Wire Pulling: If wires are difficult to pull through, check for excessive bends, long conduit runs without pull boxes, or rough-cut edges. Lubricate wires if allowed by code, or add pull boxes as needed.
Conduit Sagging: If ENT conduit sags between supports, review the spacing and add additional supports if necessary. Sagging can place strain on the wiring, increasing the risk of insulation damage or wire abrasion.
Moisture Intrusion in Outdoor or Wet Locations: For installations in damp environments, ensure all fittings and seals are waterproof and adhere to code requirements for moisture protection. ENT conduit is generally recommended for dry locations, so use caution when planning for damp or outdoor settings.
Conduit Damage: ENT conduit can be damaged during installation or if subjected to high-impact areas. Inspect the conduit for any cracks or abrasions, and replace damaged sections to maintain electrical safety.
Cutting ENT Conduit: Tips and Techniques
Achieving clean, accurate cuts on ENT conduit is vital for a smooth installation. Improper cuts can lead to irregular edges, causing difficulties in fitting connections and potentially compromising the conduit’s integrity over time. Additionally, precise cuts ensure a secure connection with fittings, reducing the risk of electrical hazards, moisture intrusion, and maintaining NEC compliance.
Tools for Cutting ENT Conduit
Several tools can effectively cut ENT conduit, each with unique advantages. Here’s a breakdown:
- ENT Conduit Cutters: These cutters are specifically designed for the task, delivering smooth cuts quickly and with minimal effort.
- 钢锯: A more accessible tool, though it can leave rough edges requiring additional deburring.
- Rotary Pipe Cutters: Known for precision, these cutters are often preferred for small-diameter conduit. They work well with softer plastic materials.
- Utility Knife: Useful for scoring smaller conduit diameters; it’s not the most efficient but can be a practical option in a pinch.
Key Techniques for an Efficient Cut
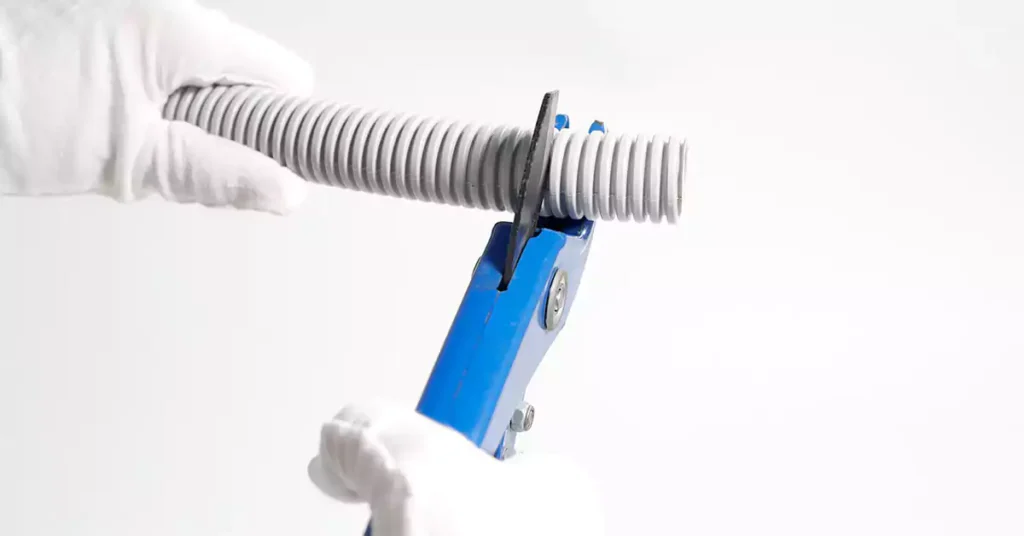
To ensure that ENT conduit cuts are smooth and precise, here are some best practices:
- Measure Twice, Cut Once: Accuracy in measuring is essential for proper installation. Mark your desired cut line clearly with a pencil or marker.
- Stabilize the Conduit: Secure the conduit firmly to prevent movement during cutting, which can lead to uneven edges.
- Rotate the Conduit (If Applicable): For certain cutting methods, rotating the conduit while applying gentle pressure can yield a smoother cut.
- 去毛刺边缘: After cutting, use a deburring tool or sandpaper to smooth any rough edges, which can prevent injuries and ensure a snug fit with fittings.
Safety First
When working with ENT conduit, safety should always be a priority. Here are a few safety tips:
Wear Protective Gear: Safety goggles, gloves, and a dust mask protect you from sharp edges, debris, and any small particles that may become airborne during cutting.
Secure the Workspace: Ensure your workspace is clear of any obstructions and has good lighting to prevent accidental injuries.
Handle Blades Carefully: Sharp tools require cautious handling, so always use proper technique and store tools securely when not in use.
Securing ENT Conduit to Surfaces: Clamps & Supports
Why Proper Conduit Securing is Essential
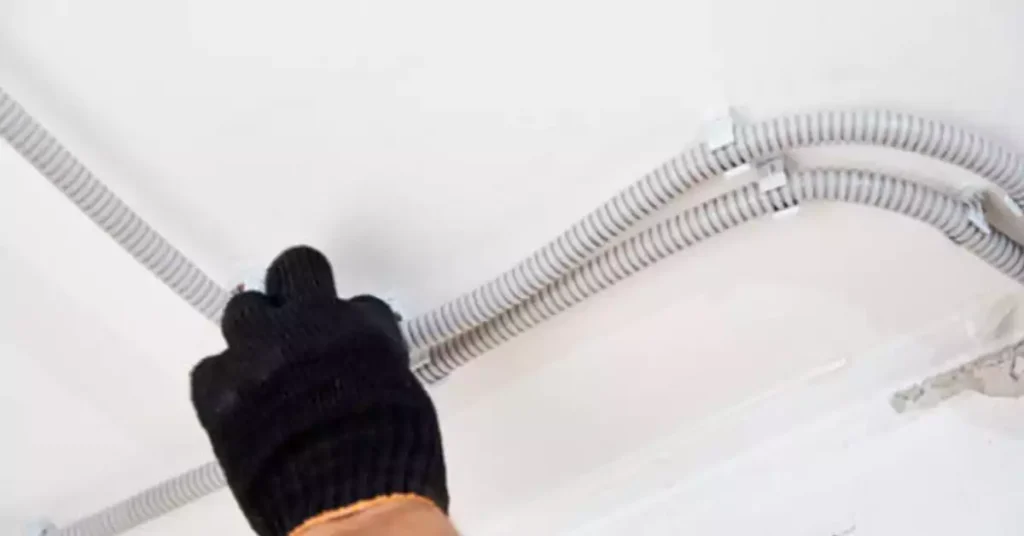
Correctly mounted conduit not only safeguards electrical wiring but also prevents various physical stresses that could otherwise lead to safety risks. ENT conduit that is not adequately secured may swing, sag, or chafe against surfaces, which can damage both the conduit and wiring inside. This type of movement introduces risk factors for electrical hazards and mechanical wear over time, making a reliable mounting strategy crucial.
Functional Stability and Safety
To maintain system integrity, ENT conduit must be fixed securely to resist movement, bending, and sagging. This is particularly critical for heavier wiring loads, as the added weight can pull the conduit downward if left unsupported. Reliable securing minimizes these risks and extends the lifespan of the installation, keeping wiring protected and functional.
Essential Tools and Types of Clamps and Supports
A range of clamps and hangers are designed specifically to keep ENT conduit firmly mounted on surfaces like walls, ceilings, and structural beams. Here’s a look at the most commonly used mounting tools:
Strap Clamps: These versatile, wrap-around clamps provide a straightforward way to secure ENT conduit, typically fastening with a single screw or bolt for quick installation.
C-Clamps: C-shaped clamps offer additional gripping power for stability, particularly useful on installations that may face minor vibrations or pressure.
Conduit Hangers: When ENT conduit is suspended from above (e.g., in basements or under floors), conduit hangers are essential. These come in various types, including:
- Wire Hangers: Loops of wire threaded through the conduit that provide a minimalist solution, often used in lighter load applications.
- Metal Conduit Hangers: For heavier-duty applications, metal hangers offer adjustable arms for precise positioning and secure support, suitable for larger conduit runs.
To attach these components, a drill and correctly sized drill bits are necessary for creating mounting holes in the surfaces and attaching screws or bolts without damaging the conduit or its surrounding materials.
Mounting Techniques for Optimal Stability
For a reliable installation, consider these mounting strategies that enhance security and performance:
Spacing Requirements: Space clamps and hangers appropriately—usually every 4-6 feet—for effective support and to keep the conduit level. This spacing prevents sagging, especially for runs that extend over longer distances.
Adapting to Surface Type: Choose the right mounting hardware based on the type of surface (e.g., masonry, wood, drywall) to prevent mounting failures or slippage.
Avoiding Over-Tightening: Tighten fasteners securely but avoid over-tightening, which can damage both the conduit and the mounting surface, potentially leading to premature failure.
Fittings and Junction Boxes for Professional-Grade Installations
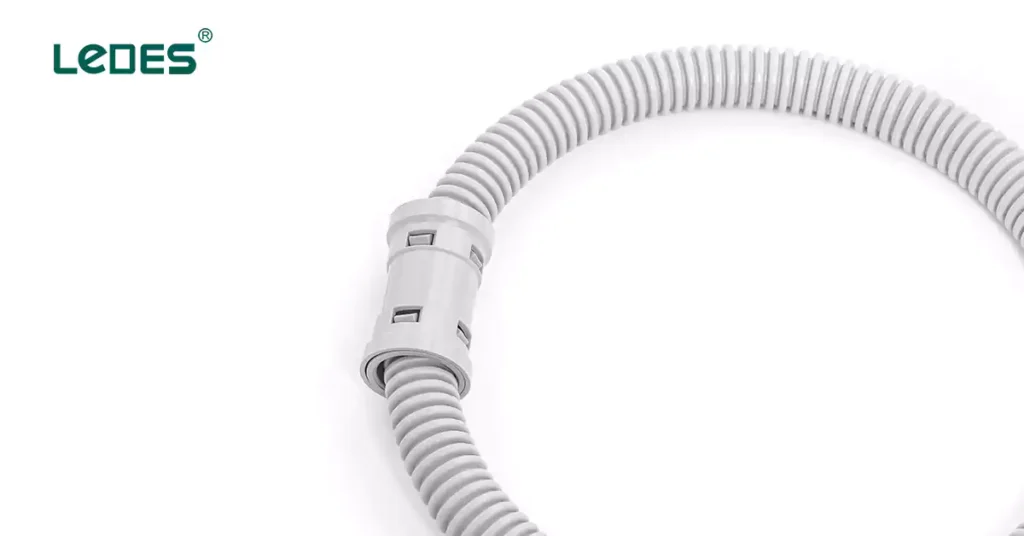
To complete a secure conduit system, fittings and junction boxes are critical components that ensure stable connections and directional changes:
ENT Fittings: Designed to lock conduit in place at joints, corners, and bends, these fittings keep ENT conduit well-aligned and prevent disconnection. Many fittings are also available with weatherproof and corrosion-resistant features for durability.
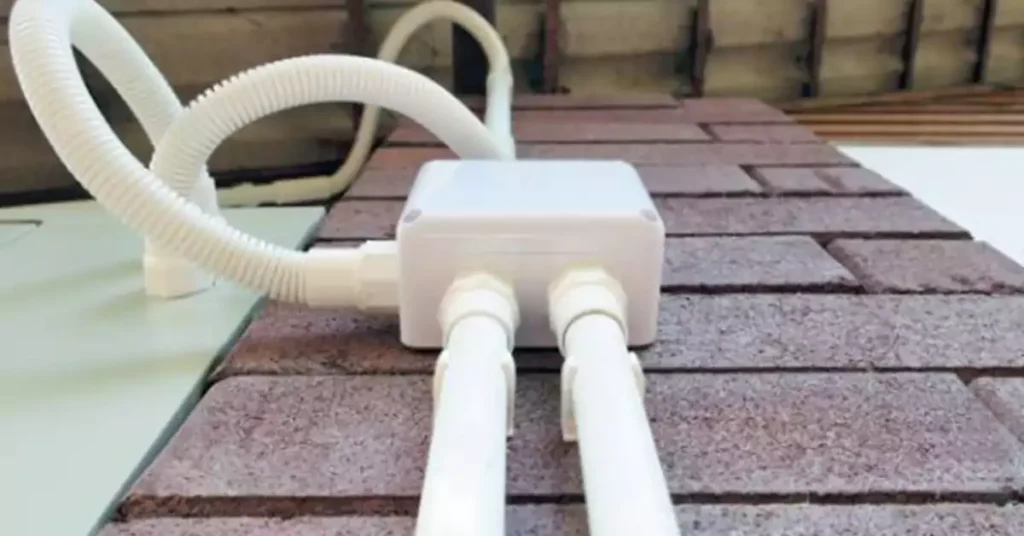
Junction Boxes: Often installed where multiple conduit runs meet or diverge, junction boxes house wiring connections safely and streamline wiring organization. For convenience, pre-wired junction boxes with integrated support for conduit runs can reduce installation time and simplify wiring configurations.
Installation Tips for Long-Term Reliability
To get the most out of your ENT conduit system, consider the following tips:
Consult Building Codes: Local building codes provide specific requirements on conduit spacing, mounting methods, and securing materials to ensure safe and compliant installations.
Weather and Environment Considerations: In outdoor or high-moisture environments, opt for UV-resistant or moisture-proof supports to maintain longevity and avoid damage from exposure.
避免急弯: Use gradual bends and avoid sharp angles in the conduit to protect the wiring from stress or abrasion that can lead to insulation wear.
Junction Boxes and Their Use with ENT Conduit
What is a Junction Box?
A junction box is a protective enclosure where electrical wiring connections are housed. Commonly made from durable materials like metal or plastic, these boxes shield electrical connections from physical damage, environmental hazards, and unauthorized tampering. When working with ENT (Electrical Nonmetallic Tubing) conduit, junction boxes become essential for both safety and functionality, providing secure junctions where wires meet or branch out. In this guide, we’ll explore why junction boxes are crucial when installing ENT conduit, how to select the best box for your needs, and the steps to safely install them.
Why Use Junction Boxes with ENT Conduit?
Safety
Junction boxes reduce electrical hazards by providing a secure enclosure for wire connections, lowering the risk of electrical shocks or fire. They also prevent accidental contact with live wires and protect against physical wear.
Simplified Maintenance
By centralizing connections, junction boxes allow for easier access to wiring for repairs or upgrades. This is especially useful in large installations where numerous wires converge.
遵守
In most regions, electrical code compliance requires junction boxes for all wiring splices or joints. This ensures that installations are safe, orderly, and protected from external factors like dust, moisture, and physical damage.
Choosing the Right Junction Box for ENT Conduit
Selecting a suitable junction box involves considering factors like location, size, material, and connection types:
材料: Plastic junction boxes are often used with ENT conduit due to their corrosion resistance, while metal boxes are better for areas with high temperatures or stringent fire safety requirements. Ledes’ junction boxes are made from high quality PVC, which are resistant to corrosion, sunlight, and non-conductive, ensuring a safe and reliable electrical installation.
Size: Choose a box large enough to accommodate all wires and fittings without crowding. Crowded boxes can increase heat buildup and make maintenance more challenging.
Ingress Protection (IP) Rating: In damp or outdoor locations, select a box with a high IP rating to ensure it can withstand exposure to moisture or dust.
Installation Steps for Junction Boxes with ENT Conduit
- Plan the Location: Determine where the junction box will be installed, making sure it is easily accessible for future maintenance. For secure installation, use a stud or other structural support.
- Prepare the Conduit and Box: Measure the conduit and cut it to the appropriate length for connecting to the junction box. Use ENT specific fittings for a seamless connection.
- 固定盒子: Attach the junction box to the mounting surface using screws or bolts, ensuring it is level and secure.
- Connect the Conduit: Insert the ENT conduit into the box openings and fasten with appropriate connectors. Make sure all connections are tight and follow NEC (National Electrical Code) requirements.
- Wire and Close: Inside the box, connect and organize the wiring as required, using wire nuts to cap connections. Carefully fold wires into the box and secure the cover tightly to prevent tampering and protect from dust or moisture.
Safety Tips
Turn Off Power: Always switch off power at the circuit breaker before handling electrical components to prevent shock or injury.
Use Proper Tools: Use tools designed for electrical work, such as insulated screwdrivers and wire strippers, to enhance safety.
Avoid Overcrowding: Ensure that the box is large enough for all wires and connectors. An overcrowded box can lead to overheating and increases fire risk.
Verify Grounding: Proper grounding is essential to prevent electrical shocks and ensure that all connections are secure.
Pulling Wire Through ENT Conduit: Essential Techniques
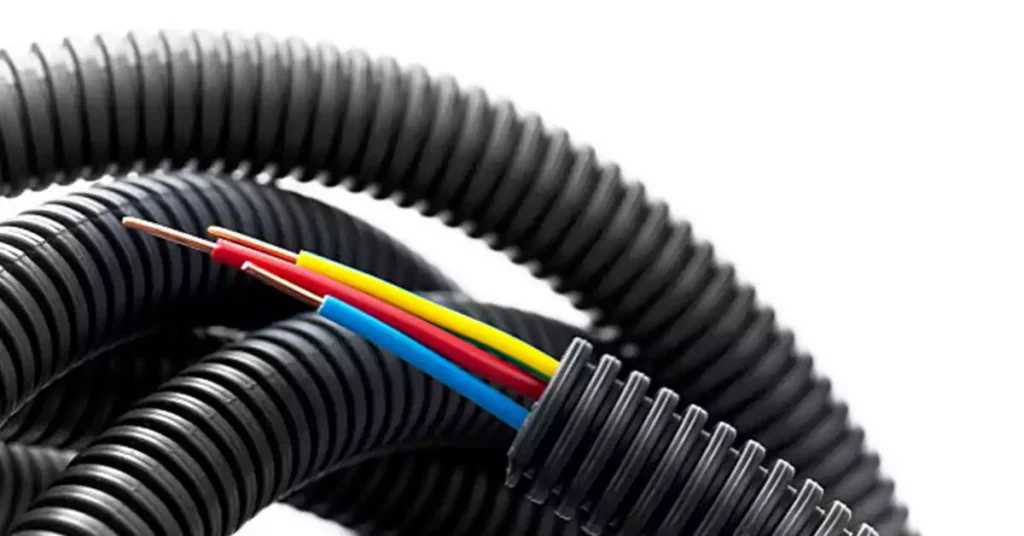
Pulling wire through Electrical Nonmetallic Tubing (ENT) conduit requires careful planning and technique to ensure a smooth, safe installation. ENT conduit, known for its flexibility and lightweight design, can simplify wiring runs, but it also requires specific handling to avoid wire damage or snags. This guide will briefly cover key techniques and tools for efficiently pulling wire through ENT conduit.
Key Techniques for Pulling Wire Through ENT Conduit
- Prepare the Conduit Path
Start by ensuring the conduit is free of obstructions and tightly secured along its path. Properly spaced clamps help keep the conduit straight and prevent unwanted bends or kinks during wire pulling. - Use Pulling Lubricant
Applying a wire-pulling lubricant can reduce friction, especially on longer or complex runs. This helps the wires slide smoothly through the conduit without risking insulation damage. - Select the Right Tools
Use a fish tape or pull line to guide wires through the conduit. Fish tape is particularly useful for shorter runs, while pull lines work well for longer distances or bends. Attach the wires securely and feed them slowly to avoid twists and tangles. - Pull Gently and Consistently
Apply steady, even pressure when pulling to prevent wire binding. If resistance increases, stop and check for obstructions or tight bends in the conduit that may need adjusting. - Avoid Overloading the Conduit
Refer to NEC guidelines to ensure the conduit size matches the wire fill requirements. Overloading can lead to overheating and make future maintenance difficult.
For a more detailed about the wire pulling, please refer to the previous article for how to pull wire through the conduit.
Conduit Fill Calculator: Determining Maximum Capacity
When planning electrical conduit installations, calculating conduit fill is essential to ensure compliance with safety codes and to prevent issues related to overheating or overcrowded wires. A conduit fill calculator helps electricians and installers determine the maximum capacity of wires for each conduit size, factoring in wire type, size, and insulation. Here’s a quick overview of how conduit fill calculations work and why they matter.
Key Points for Using a Conduit Fill Calculator
- Calculate Based on Conduit Type and Size
Different conduit materials (like PVC, ENT, and metal) have varying fill capacities, which change depending on the conduit’s diameter. Conduit fill calculators simplify this by providing tailored calculations for each type and size. - Consider Wire Size and Insulation Type
Wire gauge (size) and insulation type affect how much space each wire occupies within the conduit. Calculators take these into account to ensure wires aren’t packed too tightly, reducing the risk of overheating. - Comply with NEC Guidelines
Conduit fill calculators help ensure compliance with National Electrical Code (NEC) guidelines, which specify maximum fill percentages based on the number of wires. Following these guidelines is critical for a safe and functional installation. - Prevent Overheating and Facilitate Maintenance
Proper conduit fill not only helps in preventing wire insulation damage but also makes future repairs and upgrades easier by allowing sufficient room for wire movement.
For a detailed guide on using a conduit fill calculator and practical examples of conduit fill calculations, please refer to the previous post how to calculating conduit fill.
Repairing Damaged ENT Conduit: Patching Techniques
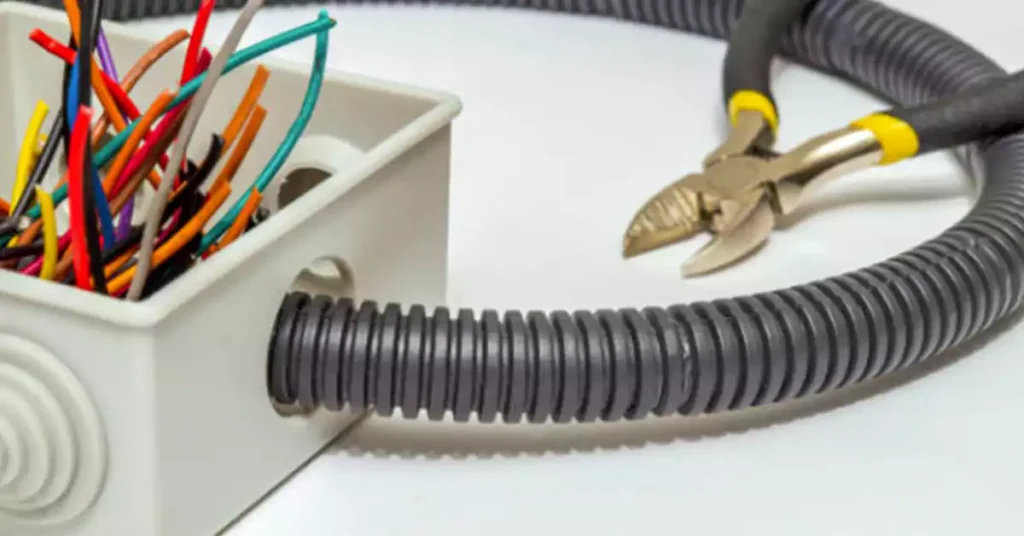
Key Steps for Repairing Damaged ENT Conduit
- Damage Assessment
Begin by evaluating the severity of the damage. Minor cracks or surface scratches can often be addressed with an epoxy-based sealant, designed for quick and secure repairs on small surfaces. For more substantial cuts or breaks, repair sleeves or specialized conduit tape may be necessary, while severely damaged sections should generally be replaced to ensure long-term reliability.
- Safety Precautions
Safety is paramount when working on any electrical component. Before beginning repairs, disconnect power at the circuit breaker to avoid shock hazards. Using insulated gloves and eye protection further minimizes the risk of injury during repairs, especially when handling sharp edges or adhesives.
- Patching Techniques
Various techniques are used depending on the extent of the damage:
Epoxy Sealant Repair (for Small Cracks and Scratches): Clean the damaged area thoroughly, apply epoxy sealant evenly, and allow it to cure fully for a strong, permanent seal.
Conduit Repair Sleeve (for Larger Cuts or Breaks): Remove the damaged section, place the sleeve over the area, and secure it per the manufacturer’s instructions, ensuring a tight seal on both ends.
Conduit Tape Repair (for Larger Gaps): Wrap the damaged area with layers of specialized PVC tape, creating an overlapping, press-tight seal that reinforces structural integrity.
- Post-Repair Inspections
After completing the repair, conduct a visual inspection to verify that all connections are secure and that there are no gaps or weaknesses in the repaired area. If necessary, consult an electrician to test the repair for functionality, ensuring it meets safety standards.
ENT Conduit Buying Guide
When purchasing ENT conduit, it is important to consider the following factors:
Quality and Compliance: When choosing the ENT, ensuring they compliance with relevant local or international safety and quality regulations.
Size and Length: Determine the appropriate size and length of conduit needed for your specific application.
等级: Ensure the conduit is rated for the intended application, such as indoor or outdoor use.
成本: Compare prices from different suppliers while considering the conduit’s quality and compliance.
Brand Considerations: Brand reputation can be an important factor in your buying decision. Look for established brands with a track record of manufacturing high-quality electrical products. Consider brands known for their expertise, experience, and commitment to product excellence.
Future Trends in Flexible PVC Conduit Technology
Flexible PVC conduit technology is rapidly evolving, with new advancements addressing the growing demands for safer, smarter, and more sustainable electrical installations. As buildings and infrastructure adopt modern requirements, flexible PVC conduits are being transformed to meet these challenges with innovations in material science, environmental resilience, and integration with smart technologies.
- Enhanced Fire Safety Standards
With fire safety becoming an increasingly critical aspect of construction codes, flexible PVC conduits are being developed with improved fire-retardant properties. Advanced fire-resistant coatings and materials are in the works to provide additional layers of safety, helping to slow down fire spread in sensitive environments. - Smart Technology Integration
The future of flexible PVC conduits includes seamless integration with smart systems for real-time monitoring and diagnostics. Future conduits could feature embedded sensors capable of tracking conditions like temperature and current flow, which would feed data directly into smart building management systems. This capability not only enhances safety but also allows for predictive maintenance, reducing downtime and improving energy efficiency. - Sustainability and Environmental Responsibility
Environmental sustainability is reshaping PVC production, with a shift toward recyclable, eco-friendly materials and processes. Efforts are being directed toward PVC compounds that can be more easily recycled, reducing waste, and promoting responsible resource use. Some manufacturers are even exploring bio-based or low-impact PVC alternatives, allowing for environmentally-conscious installations. - Advanced Durability and Weather Resistance
As installations are increasingly required to endure harsh weather and exposure to outdoor elements, flexible PVC conduits are being optimized for greater UV and corrosion resistance. These advancements ensure that conduits can withstand both physical impacts and environmental wear, offering reliable performance even in challenging conditions. - Customization and On-Demand Solutions
Flexible PVC conduit technology is moving toward greater customization options, supported by advanced manufacturing techniques like 3D printing. This allows contractors to produce specialized conduit shapes and sizes as needed, streamlining the installation process and reducing material waste. Customization makes it possible to tailor solutions for unique building needs and complex electrical layouts.
结论
Overall ENT conduit offers a reliable and flexible solution for protecting electrical wiring in various applications. With its excellent physical and chemical performance, it could be a good choice for no matter residential or commercial electrical systems. When selecting ENT conduit, consider the size, length, compliance code, project requirements and other necessary factors to ensure it meets your specific needs.
That’s all of the post. If you have any questions about the ENT electrical conduit, feel free to submit the contact form or write an email to us.


