目录
Embarking on a DIY electrical conduit installation can be rewarding, allowing you to customize your home and potentially save money. Installing conduit provides a safe and organized pathway for wiring, enhancing both aesthetics and safety. This guide will walk you through the process of installing PVC conduit, ensuring a successful outcome while prioritizing safety and code compliance.
什么是电气导管?
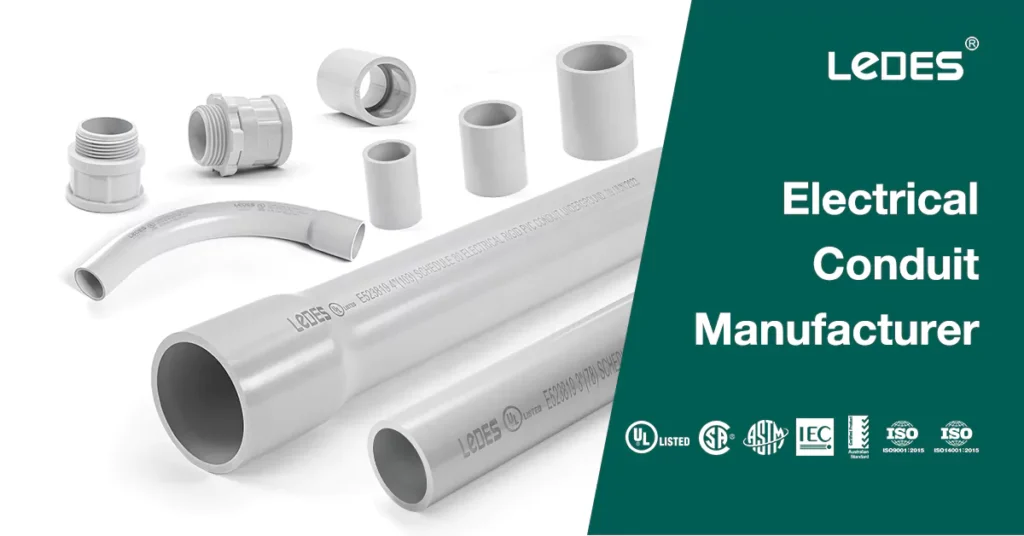
Electrical conduit is a tube-like structure used to enclose and protect electrical wires and cables within buildings, structures, and various applications. Think of it like a highway system for electricity, keeping wires organized, safe, and shielded from damage.
6 Common Types of Electrical Conduit
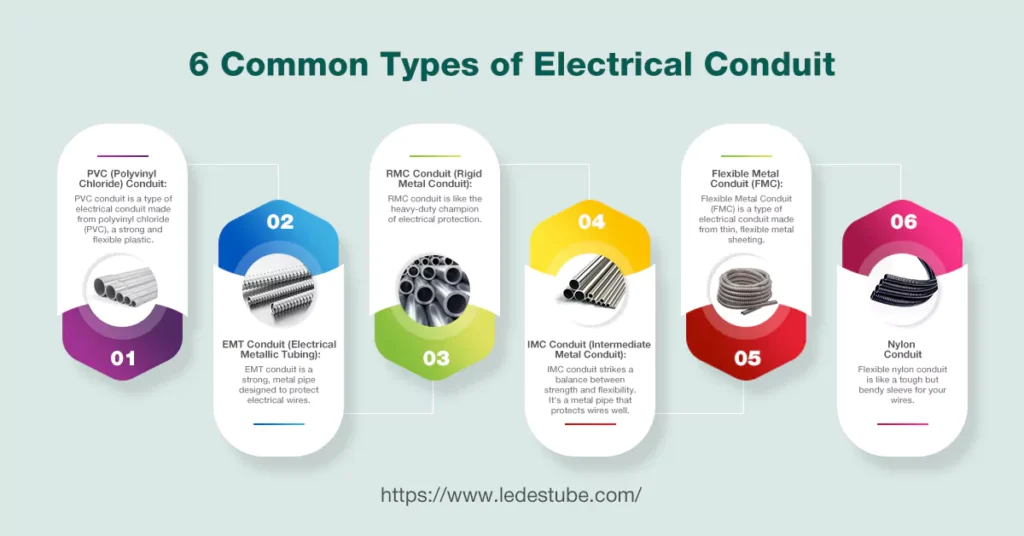
Here are 6 common types of electrical conduit, exploring their pros, cons, and typical applications:
1. PVC (Polyvinyl Chloride) Conduit:
PVC 导管 is a type of electrical conduit made from polyvinyl chloride (PVC), a strong and flexible plastic. It’s used to protect electrical wiring inside buildings and structures. PVC is lightweight, moisture-resistant, and relatively inexpensive, making it popular for residential and some commercial applications.
优点: Lightweight, inexpensive, easy to work with, moisture-resistant, corrosion-resistant.
缺点: Not as strong as metal conduits, can become brittle in extreme temperatures, limited fire resistance.
应用: Residential wiring, general purpose electrical installations, dry indoor locations.
2. EMT Conduit (Electrical Metallic Tubing):
EMT conduit is a strong, metal pipe designed to protect electrical wires. Think of it like a sturdy shield keeping your wiring safe and organized!
优点: Durable, relatively inexpensive, easy to bend and install, provides a good level of grounding.
缺点: Can be heavier than PVC, susceptible to corrosion in harsh environments, not as fire-resistant as some other types.
应用: Residential and commercial wiring, light industrial applications, areas requiring some degree of grounding.
3. RMC Conduit (Rigid Metal Conduit):
RMC conduit is like the heavy-duty champion of electrical protection. It’s a super strong metal pipe built to keep your wiring safe from even tough conditions.
优点: Extremely durable, strong, highly resistant to fire and impact, provides excellent electrical protection and grounding.
缺点: More expensive than PVC or EMT, heavier and more challenging to bend, requires specialized tools for installation.
应用: Heavy-duty industrial applications, outdoor installations, areas with high vibration or risk of physical damage.
4. IMC Conduit (Intermediate Metal Conduit):
IMC conduit strikes a balance between strength and flexibility. It’s a metal pipe that protects wires well, but it’s lighter and easier to work with than its super-strong cousin, RMC.
优点: Stronger than EMT but lighter than RMC, good balance between durability and ease of installation.
缺点: More expensive than PVC or EMT, not as fire-resistant as RMC.
应用: Commercial buildings, industrial applications requiring medium-duty protection, outdoor installations in less harsh environments.
5. Flexible Metal Conduit (FMC):
Flexible Metal Conduit (FMC) is a type of electrical conduit made from thin, flexible metal sheeting. It allows for easy routing around bends and tight spaces, making it ideal for applications where rigidity isn’t necessary.
优点: Highly flexible, allowing it to be easily routed around obstacles and in tight spaces.
缺点: Less durable than rigid conduit types, not as strong for heavy loads or high vibration applications.
应用: Appliance wiring, outdoor installations where flexibility is crucial, areas with limited space.
6. Nylon Conduit (also known as "liquid-tight" conduit):
Flexible nylon conduit is like a tough but bendy sleeve for your wires. It’s made of strong nylon and great for keeping wires organized and safe,
优点: Highly flexible, resistant to chemicals and moisture, lightweight, good for bundling multiple wires.
缺点: Not as strong as metal conduits, lower fire resistance compared to some metals.
Applications: Automotive wiring, marine applications, control panels, outdoor installations in non-hazardous environments.
Remember: When choosing the right conduit, consider factors like environment, load capacity, required protection levels, and local building codes.
How to Choose the Right Conduit for Your Project?

Choosing the right conduit for your project is crucial for safety, performance, and longevity. Here’s a breakdown of factors to consider:
1. Application:
住宅布线: PVC is often the go-to choice due to its affordability, ease of installation, and good general protection for typical household wiring needs.
商业建筑: EMT or IMC might be preferred depending on load requirements and local code regulations. RMC is used in areas with higher vibration or physical stress.
工业应用: RMC and IMC excel in demanding environments due to their strength and durability. FMC can be useful for machinery wiring where flexibility is needed.
户外设施: Consider moisture resistance, UV protection (PVC, some metals), and potential impact from weather elements. EMT, IMC, or specific metal alloys are often chosen.
2. Environmental Factors:
Moisture Exposure: PVC and nylon offer good moisture resistance, while metals can corrode in damp environments. Choose galvanized steel or stainless steel for outdoor or humid settings.
Temperature Variations: Extreme temperatures can affect conduit flexibility and strength. Opt for materials with a wide operating temperature range if needed.
3. Fire Resistance:
安全第一: RMC and some metal alloys offer superior fire resistance compared to PVC or nylon. Consider this crucial in areas with high fire risk.
Building Codes: Many regions mandate specific fire ratings for conduit based on its intended use. Check local codes before making a decision, such as NEC or related.
4. Electrical Load Capacity:
Heavy Loads: RMC and IMC are better suited for higher amperage wiring as they can handle the increased heat generated.
Light Loads: PVC or EMT are often sufficient for standard residential or low-power applications.
5. Installation Requirements:
Ease of Bending: Flexible metal conduit (FMC) is designed for easy routing, while rigid conduits like RMC require specialized tools and expertise for bending.
可访问性: Consider future maintenance needs. PVC and some metals are easier to access and modify than tightly sealed or heavily embedded conduits.
6. Budget Considerations:
PVC: Generally the most affordable option.
EMT: Mid-range in cost.
IMC: More expensive than EMT but less costly than RMC.
RMC: Typically the most expensive due to its strength and durability.
7. Local Building Codes:
Always consult your local building codes for specific requirements regarding conduit type, size, and installation methods.
By carefully considering these factors, you can select the best electrical conduit for your project, ensuring safety, performance, and long-term reliability.
We suggest you double check with your local electrican or electrical wholesaler if you don’t understand this.
Why Electrical Conduit?
Beyond its tidy appearance, electrical conduit offers several benefits:
安全第一:
Protects wires from physical damage, moisture, and potential grounding hazards.
Organization & Accessibility: Keeps wiring neat and labeled for easier troubleshooting and future maintenance.
防火性:
Many conduit materials offer fire-resistant properties, enhancing overall home safety.
耐用性:
Provides a long-lasting solution that withstands wear and tear, preserving your electrical system’s integrity.
Sustainable Choices:
Opt for recycled or recyclable PVC conduit to minimize environmental impact.
Smart Wiring Integration:
Explore smart conduits with integrated sensors for future-proofing your electrical setup.
Essential Safety Precautions:
Before starting any electrical work, always prioritize safety:
Turn Off Power: Disconnect the power supply to the circuit you’re working on at the breaker box. Use a non-contact voltage tester to double-check for live wires.
Wear Protective Gear: Gloves, safety glasses, and long sleeves protect against electrical shock and potential debris.
Use Proper Tools: Invest in quality tools like wire strippers, conduit benders, and a utility knife for accurate and safe work.
Work with a Partner: Having someone assist can enhance safety and provide a second set of eyes.
Step-by-Step Installation Guide:
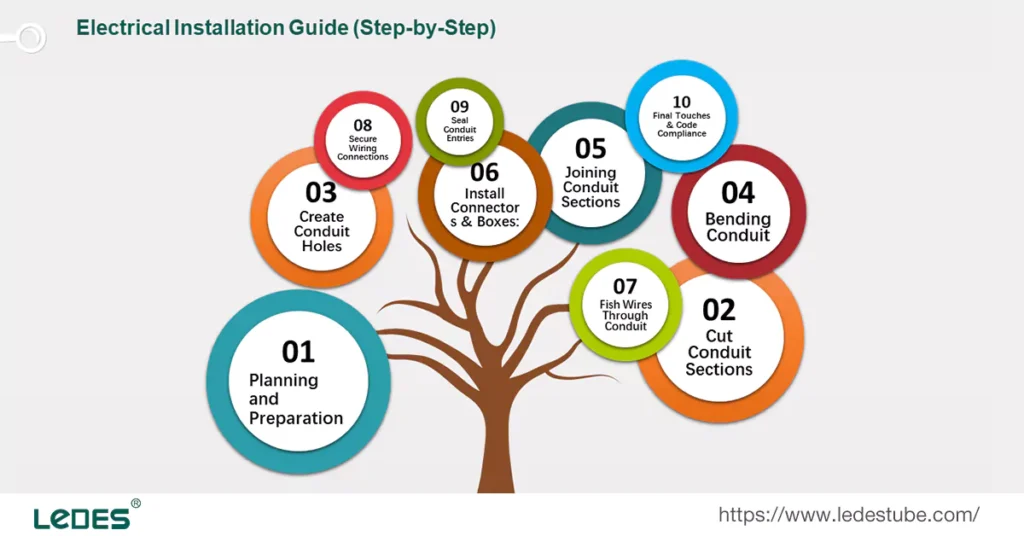
Planning & Preparation:
Determine the conduit run, measure lengths accurately, and mark your desired pathway on walls or ceilings.
Cut Conduit Sections:
Use a conduit cutter to make clean, straight cuts. Avoid jagged edges that can damage wires.
Create Conduit Holes:
Drill pilot holes where necessary, ensuring they’re slightly larger than the conduit diameter for smooth insertion.
Bending Conduit:
For curves, use a conduit bender according to the manufacturer’s instructions. Mark the bend angle and ensure a consistent radius.
Joining Conduit Sections:
Use threaded conduit fittings (elbows, connectors) and appropriate sealant or thread compound for secure connections.
Install Connectors & Boxes:
Secure junction boxes and outlet/switch boxes within your conduit runs using appropriate mounting hardware.
Fish Wires Through Conduit:
Carefully thread wires through the conduit using a fish tape or similar tool. Ensure sufficient slack to avoid strain on connections.
Secure Wiring Connections:
Make secure wire terminations within junction boxes, adhering to proper wiring color codes and electrical code standards (NEC).
Seal Conduit Entries:
Use appropriate sealant or grommets around conduit entrances into enclosures to prevent moisture ingress.
Final Touches & Code Compliance:
Conceal Conduit Runs: Cover exposed conduit with raceways, plaster, or paint for a clean and finished look.
标签: Clearly label junction boxes and wire runs for easy identification during future work.
Always consult local electrical codes and seek professional assistance if you encounter complex installations or uncertainties.
Compliance the Local Code

Ensuring your electrical conduit installations comply with local codes is crucial for safety, functionality, and avoiding potential fines or issues down the line. Here’s a breakdown of key code resources and compliance strategies for both the United States and Canada.
United States:
National Electrical Code (NEC): The NEC, published by the National Fire Protection Association (NFPA), is the primary electrical code standard adopted by most states in the US. While states may have their own amendments, the NEC provides a comprehensive framework for safe wiring practices.
Key Conduit-Related Requirements:
Material Selection: Specific conduit types are designated for various applications based on factors like environment (wet locations), fire resistance, and load capacity.
Sizing & Capacity: The NEC dictates minimum conduit sizes based on the number of wires run inside, their amperage rating, and other factors. Overcrowding can cause overheating and hazards.
Bending Radius & Spacing: Minimum bend radii are set to prevent wire damage and ensure proper cable movement within the conduit.
Installation Techniques: Secure fastening methods, grounding requirements, and junction box configurations are standardized.
Where to Find Local Codes:
State Electrical Codes: Contact your state’s licensing board or Department of Labor for specific codes adopted within your region.
Local Building Departments: Your city or county building department will have the most up-to-date local code requirements, often incorporating the NEC and any additional amendments.
Compliance Strategies:
Consult Local Experts: Reach out to licensed electricians familiar with your area’s codes for guidance on specific installations.
Refer to Code Books: Acquire copies of the NEC and relevant local codes to familiarize yourself with the detailed requirements.
Online Resources: NFPA offers online resources and code interpretations, while various websites provide searchable code databases.
Canada:
加拿大电气规范 (CEC):
Published by CSA Group, the CEC is Canada’s national electrical standard, similarly comprehensive to the NEC. Provincial/territorial jurisdictions may have amendments or additions to the CEC.
Key Conduit-Related Requirements (Similar to US NEC):
* Material selection based on application
* Sizing & capacity regulations
* Bending and spacing guidelines
* Installation techniques and grounding requirements
Compliance in Canada:
Provincial Electrical Codes: Each province and territory has its electrical code office or regulatory body. Contact them directly for specific code requirements within your jurisdiction.
CSA Group Website: CSA Group provides access to the CEC, amendments, technical bulletins, and other resources on their website.
Electrician Licensing: Engage licensed electricians familiar with Canadian codes for professional installation.
General Tips for Compliance:
Stay Updated: Electrical codes are regularly reviewed and updated. Stay informed about revisions and amendments by subscribing to code publications or visiting relevant websites.
By diligently researching, understanding, and adhering to both national and local electrical codes, you can ensure your conduit installations are safe, compliant, and meet the highest industry standards.
How to Bending Electrical Conduit?

Properly bending electrical conduit is essential for creating clean, organized installations while ensuring wires remain protected and accessible. This guide will walk you through essential techniques and tools for achieving professional-looking bends every time.
1. Gather Your Tools:
Bending Tool: The cornerstone of the process! Choose a bender appropriate for your chosen conduit material (EMT, RMC, or IMC) and its size. Common types include hand benders, hydraulic benders, and powered benders. As to PVC conduit, you just need bend spring in usually.
Measuring Tape: Accurate measurements are crucial for consistent bends.
Marker/Pencil: Mark your desired bend locations clearly.
Safety Glasses: Protect your eyes from flying debris during bending.
2. Planning Your Bends:
Blueprint Review: Study your wiring plan and identify all required bends, noting their angles and positions.
Measure Twice, Bend Once: Double-check measurements before making any cuts or bends.
Visualize the Layout: Before you start bending, lay out a practice run with similar conduit to ensure your planned bends flow smoothly.
3. Conduit Preparation:
Cut Straight & Clean: Ensure clean, square cuts using a conduit cutter for accurate bending. Remove any burrs or sharp edges with a file.
Mark Your Bend Points: Use a marker/pencil to clearly indicate the bend angle and location on your conduit.
4. Bending Techniques:
Hand Benders:
- Align the conduit in the bender die, ensuring it sits securely.
- Apply consistent pressure, bending smoothly through the full arc of the desired angle. Avoid jerking or forcing the conduit.
- Release the pressure gradually to prevent kinks or uneven bends.
Hydraulic Benders:
- Position the conduit in the bender’s die and secure it with clamps.
- Pump the hydraulic lever slowly and steadily, controlling the bending force.
- Release the lever carefully once the desired angle is achieved.
5. Achieving Accurate Angles:
Angle Guides: Many benders include built-in angle guides to help achieve precise bends. Utilize these for consistent results.
Practice Makes Perfect: Experiment with different bending techniques and practice on scrap conduit until you achieve consistently accurate angles.
6. Post-Bending Inspection:
Visual Check: Inspect each bend carefully for kinks, sharp edges, or any deviation from the desired angle.
Measure Again: Use a protractor or ruler to verify that your bends meet the planned specifications.
7. Finishing Touches:
De-burring: Remove any remaining burrs or sharp edges with a file to prevent injury and ensure smooth conduit transitions.
By mastering these conduit bending techniques, you’ll elevate your electrical installations from basic wiring to professional-grade craftsmanship. Remember, practice, attention to detail, and the right tools are key to success!
Electrical Conduit Repair: Troubleshooting & Fixing Common Issues
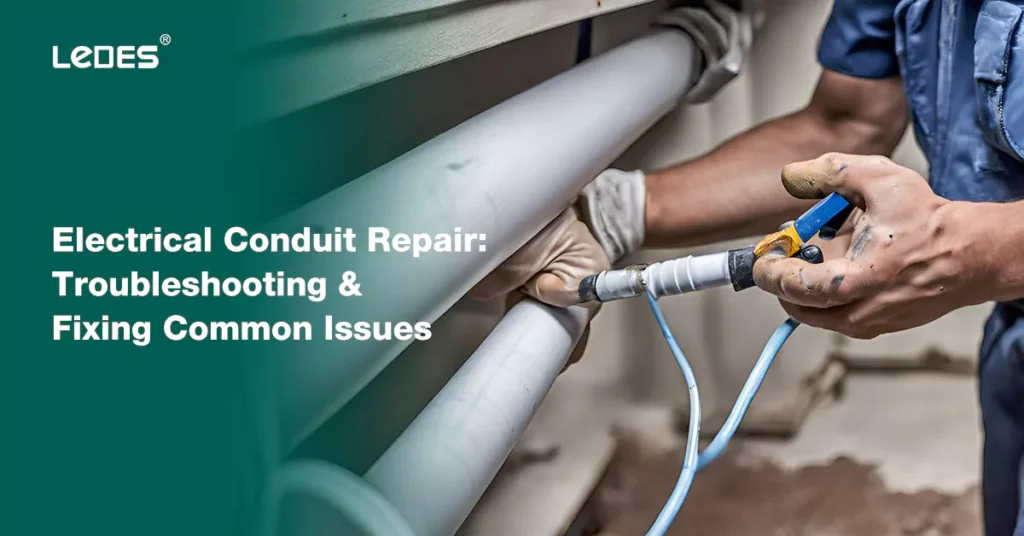
Dealing with damaged or malfunctioning conduit can seem daunting, but with the right knowledge and tools, you can tackle these problems safely and effectively. This step-by-step guide will walk you through identifying common issues and provide solutions for a successful repair.
1. Safety First:
Turn Off Power: Before working on any electrical system, always disconnect power to the affected circuit at the breaker box. Double-check with a non-contact voltage tester to ensure the wires are de-energized.
Protective Gear: Wear safety glasses and insulated gloves to protect yourself from electrical shock and potential debris.
2. Identify the Issue:
Cracks & Punctures: Look for any visible cracks, holes, or punctures in the conduit that could expose wiring. These compromise protection and may lead to short circuits or damage.
Loose Connections: Check junction boxes and connections within the conduit for loose wires, screws, or fittings. This can cause voltage drop and potential sparking hazards.
Corrosion & Rust: Inspect for rust or corrosion on metal conduits, especially in humid environments. This weakens the structure and may require replacement sections.
3. Repair Techniques:
Cracks & Punctures (PVC Conduit):
There are 3 steps to fix the cracks in PVC conduit,
- Clean the damaged area thoroughly with a wire brush or sandpaper.
- Apply a PVC bonding cement to both surfaces of the crack, ensuring good contact.
- Press the pieces together firmly and clamp them for the curing time specified by the cement manufacturer.
Cracks & Punctures (Metal Conduit):
The easy 3 steps to fix the cracks of metal conduit,
- For minor cracks: Use metal conduit repair tape or a sealant compatible with the metal type. Apply according to product instructions.
- For larger punctures or damaged sections: Cut out the affected section and replace it with a new piece of conduit.
- Secure new conduit using couplings, threaded connectors, or approved bonding methods for your specific conduit material.
Loose Connections:
Tighten all screws and nuts securely using a screwdriver or wrench.
If wires are loose in the terminal blocks within the junction box, use wire strippers to remove any insulation and tighten the connections using appropriate terminals or connectors.
For damaged wiring: Carefully replace frayed or burnt sections with new wire of the same gauge. Ensure proper insulation and secure connections.
Corrosion & Rust:
Remove loose rust or corrosion with a wire brush, sandpaper, or specialized rust remover.
Apply a protective coating like rust-preventative paint or primer to prevent further corrosion.
For severe cases, replacement of the conduit may be necessary.
4. Final Inspection:
Test Connections: After repairs, double-check all connections for tightness and proper function using a multimeter if needed.
Visual Check: Inspect your work again for any remaining loose wires or damaged areas.
Restore Power: Carefully turn the power back on at the breaker box and test the functionality of the circuits.
Remember: If you encounter complex repairs, are unsure about safety procedures, or lack experience working with electrical systems, consult a qualified electrician to ensure a safe and successful outcome.
Conclusion:
DIY electrical conduit installation is achievable with careful planning, adherence to safety practices, and these step-by-step instructions. By prioritizing safety and code compliance, you can upgrade your home’s wiring system while enhancing both functionality and aesthetics.
If you still have any questions, you can send an email to us; our expert will work with you in 1 business day.


