Índice
Compreendendo otorrinolaringologia
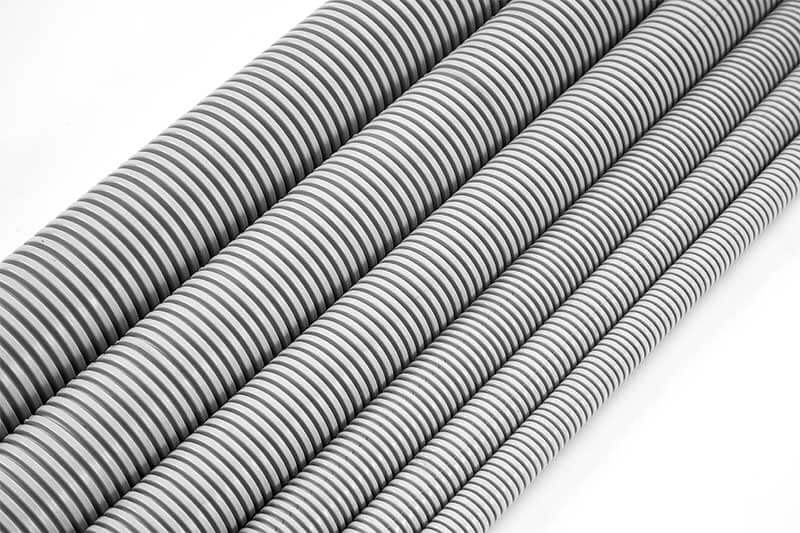
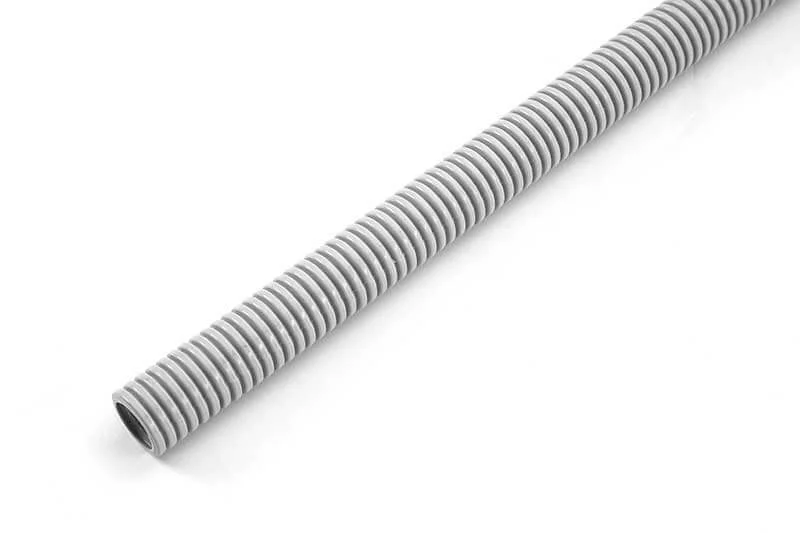
Tubulação elétrica não metálica (ENT) is a type of conduit used for electrical installations. It is a flexible, corrugated tube made of a non-metallic material, typically a high-quality plastic such as PVC (polyvinyl chloride).ENT conduit offers several advantages over traditional metallic conduits. It is lightweight, easy to handle, and can be easily cut and bent to fit various installation requirements. The flexibility of ENT allows for easier installation in tight spaces and around obstacles. ENT is designed to protect and route electrical wires and cables, serving as a pathway for electrical wiring in residential and commercial buildings.
Certificados e padrões de teste em conformidade
Os padrões de certificação e teste exigidos para tubos elétricos não metálicos (ENT) podem variar dependendo da região e dos códigos elétricos específicos. No entanto, aqui estão alguns padrões e testes comumente referenciados para otorrinolaringologia:
- UL 1653: UL 1653 é o padrão reconhecido para tubos elétricos não metálicos (ENT). Abrange os requisitos de segurança e desempenho para produtos otorrinolaringológicos, incluindo dimensões, construção, materiais e métodos de teste.
- CSA C22.2 Nº 227.1: CSA C22.2 No. 227.1 is a Canadian standard that outlines the requirements for nonmetallic tubing used for electrical installations, including ENT. It covers materials, construction, dimensions, performance, and testing methods specific to ENT.
- FT4: O teste FT4 não é específico para tubos elétricos não metálicos (ENT), mas é um teste de resistência ao fogo usado para avaliar as características de propagação de chamas dos cabos. O teste FT4 é normalmente realizado em cabos, incluindo aqueles que podem ser instalados dentro ou ao lado de conduítes ENT.
O teste FT4 faz parte da norma C22.2 No. 0.3 da Canadian Standards Association (CSA), que abrange testes de propagação de chama e densidade de fumaça para cabos. O teste mede a taxa de propagação da chama de um cabo submetendo-o a uma fonte vertical de ignição de chama. O teste avalia a capacidade do cabo de resistir à propagação de chamas e seu potencial de causar propagação de incêndio em um cenário de instalação vertical.
- NEC (Código Elétrico Nacional): O NEC é um padrão amplamente adotado nos Estados Unidos que fornece diretrizes e regulamentos para instalações elétricas. Inclui requisitos para uso de conduíte, incluindo ENT, como dimensionamento adequado, métodos de instalação e aterramento.
Atender a esses padrões e possuir os certificados de conformidade relevantes é crucial ao selecionar o conduíte ORL.
Tamanhos normais de conduíte ENT
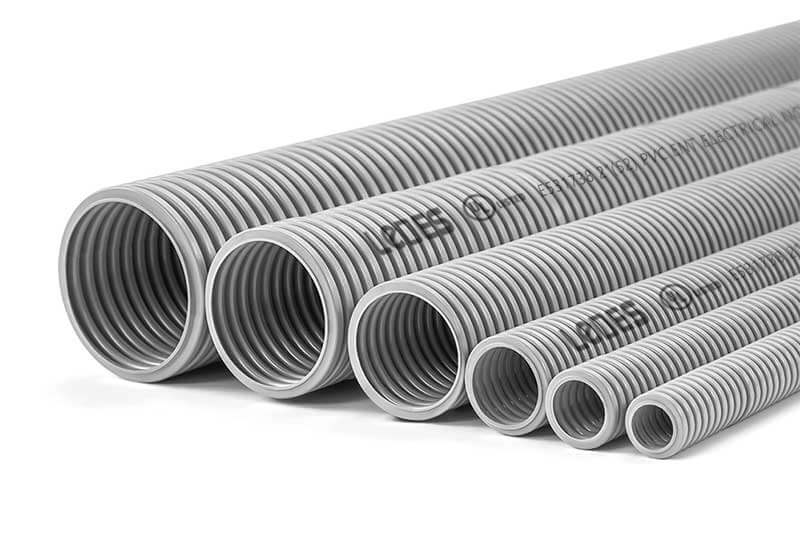
O conduíte ENT está disponível em vários tamanhos para acomodar diferentes requisitos de fiação. Os tamanhos mais comuns incluem 1/2 polegada a 2-1/2 polegada. Esses tamanhos permitem flexibilidade no roteamento e acomodação do número de fios necessários para uma aplicação específica.
ENT Conduit Manufacturing Process
O conduíte ENT é fabricado através de um processo de extrusão. Para conduíte ENT de PVC, você precisaria de:
Materiais:
PVC resin: The primary raw material for PVC conduit.
Stabilizers: Additives that enhance the stability and durability of the PVC.
Plasticizers: Substances that improve the flexibility of the PVC.
Lubricants: Used to facilitate the extrusion process.
Pigments: Optional additives for coloration.
Equipamento:
PVC extruder: A machine used to melt and mix the PVC resin with additives.
Extrusion die: Forms the PVC into the desired conduit shape.
Cooling system: Rapidly cools and solidifies the extruded PVC.
Cutting and sizing equipment: Cuts the conduit to the desired length and ensures proper sizing.
Printing equipment: If necessary, equipment for printing product information or markings on the conduit.
The manufacturing process generally involves the following steps:
Preparação: The PVC resin, stabilizers, plasticizers, lubricants, and pigments are weighed and mixed according to specific formulations.
Extrusão: Os materiais misturados são alimentados na extrusora de PVC, onde são aquecidos e derretidos. O PVC fundido é então forçado através da matriz de extrusão, que o molda no perfil do conduíte.
Resfriamento: O conduíte de PVC extrudado passa por um sistema de resfriamento, que o resfria rapidamente para solidificar a forma.
Cutting and sizing: The cooled conduit is cut to the desired length and undergoes sizing to ensure it meets the required dimensions.
Printing (if applicable): If product information or markings are required on the conduit, printing equipment can be used to add them.
Quality control: The finished PVC ENT conduit undergoes quality checks to ensure it meets the required standards and specifications.
Vantagens do conduíte ENT
O conduíte ENT oferece diversas vantagens em relação às opções tradicionais de conduíte metálico. Esses incluem:
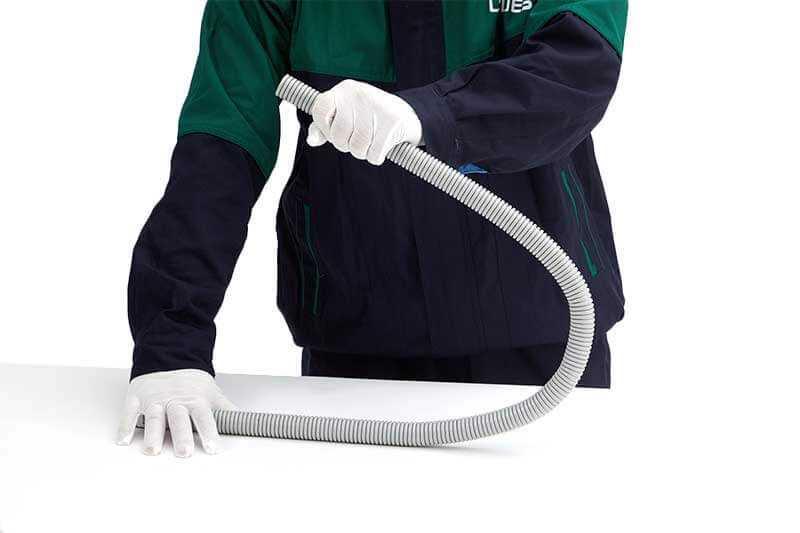
- Flexibilidade: O conduíte ENT é altamente flexível e pode ser facilmente dobrado à mão, facilitando a passagem em espaços apertados e em cantos, reduzindo a necessidade de acessórios e simplificando a instalação.
- Resistência à corrosão: Unlike metal conduits, ENT conduit is immune to corrosion, making it suitable for outdoor and damp environments.
- Leve: ENT conduit is significantly lighter than metal conduits, allowing for easier handling and installation.
- Custo-benefício: ENT conduit is generally more affordable than metal conduits, making it a cost-effective choice for electrical installations.
Cenários de uso comuns
Electrical Nonmetallic Tubing (ENT) is a versatile and efficient conduit solution widely used in various wiring applications. Its flexible design and resistance to environmental factors make it an ideal choice for both residential and commercial settings. Below are detailed common usage scenarios for ENT:
Fiação Residencial
ENT conduit is particularly beneficial for homeowners looking for discreet and efficient wiring solutions.
- Integrated In-Wall Systems: ENT conduit provides smooth routing for electrical runs within walls, reducing the need for complex re-routing around studs and other built-in obstacles.
- Bathroom and Kitchen Circuits: ENT’s moisture resistance and compact flexibility make it ideal for these high-use areas, where it safely supports wiring for outlets, lighting, and appliances.
- Dedicated Circuits for Appliances: ENT allows for organized, dedicated circuits for large appliances, ensuring they are correctly wired while minimizing clutter, especially in basements or utility rooms.
Commercial Applications
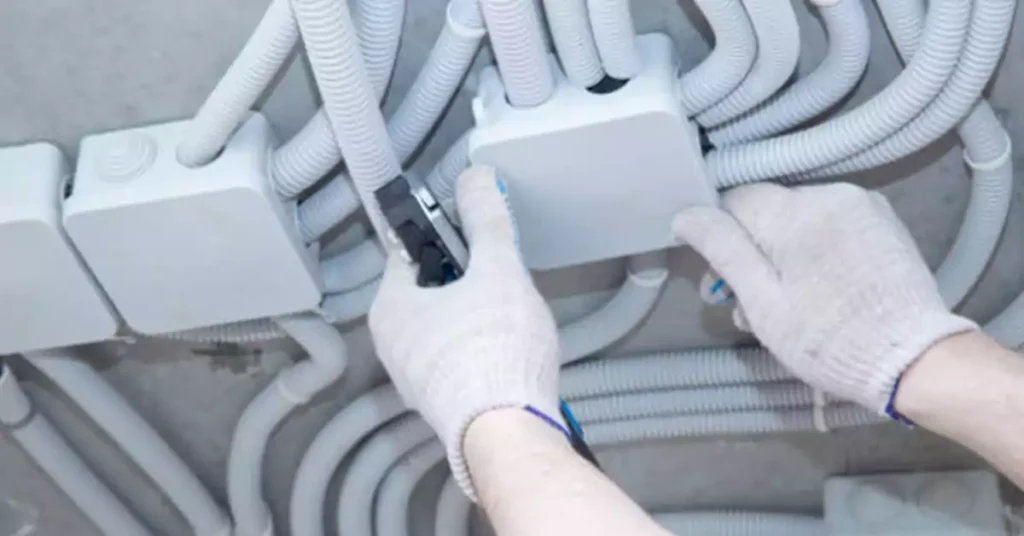
ENT conduit is also invaluable in commercial buildings, providing efficient wiring solutions for various business needs:
- Office Wiring: In office environments, ENT facilitates the organization of wiring for workstations, lighting fixtures, and data networks. Its flexibility allows for easy adjustments and reconfigurations as office layouts change.
- Retail Spaces: Retail spaces benefit from ENT’s ability to create a clean and organized electrical system. It supports wiring for point-of-sale terminals, display lighting, security systems, and more, ensuring that the electrical setup does not detract from the shopping experience.
- Light Commercial Buildings: Smaller businesses, such as restaurants, salons, and clinics, utilize ENT for reliable wiring solutions. Its adaptability makes it suitable for various setups, from kitchen equipment to lighting and HVAC systems.
Industrial Settings
While ENT may not be the first choice for heavy-duty industrial applications due to its limited strength, it still finds specific niches:
- Low-Voltage Systems: ENT conduit provides safe, adaptable routing for control systems, instrumentation, and monitoring equipment, allowing for flexibility in sensor placements and adjustments.
- Light Machinery and Conveyors: In controlled environments, ENT conduit can house wiring for lighter machinery, sensors, and control panels, providing protection and organization while allowing for future adaptability.
- Data and Communication Lines: ENT is increasingly used for low-voltage data and communication lines within controlled industrial setups, supporting a hybrid of electrical and data management.
Aplicações externas
ENT conduit is also suitable for outdoor installations, providing protection against moisture and environmental factors. This makes it a reliable choice for outdoor lighting, landscape lighting, and other exterior electrical needs.
Concrete Slab Installations
ENT is a popular choice for installations beneath concrete slabs. Its design allows it to withstand the weight of concrete and resist damage during the curing process, ensuring a durable electrical solution.
ENT Conduit vs Liquid-tight Conduit: Key Differences
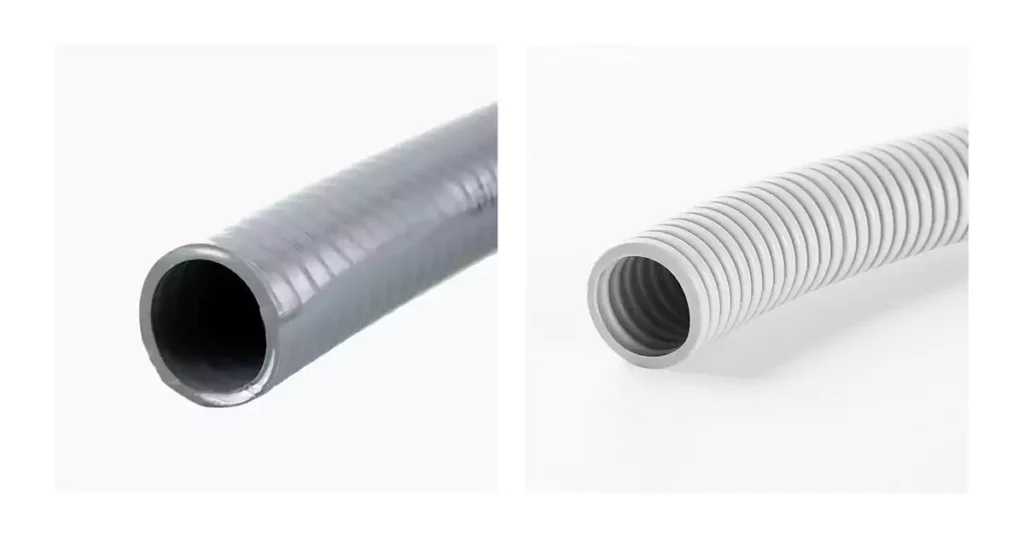
When it comes to electrical installations, the choice of conduit is crucial for ensuring safety, durability, and compliance with electrical codes. Two common types of conduit are Electrical Nonmetallic Tubing (ENT) and Liquid-tight Conduit. While both serve the purpose of protecting electrical wiring, they possess distinct characteristics that make them suitable for different applications.
6 Differences of ENT Conduit vs Liquid-tight Conduit
- Composição do material:
- ENT Conduit: Made from durable plastic, ENT conduit is lightweight and flexible, often chosen for indoor applications.
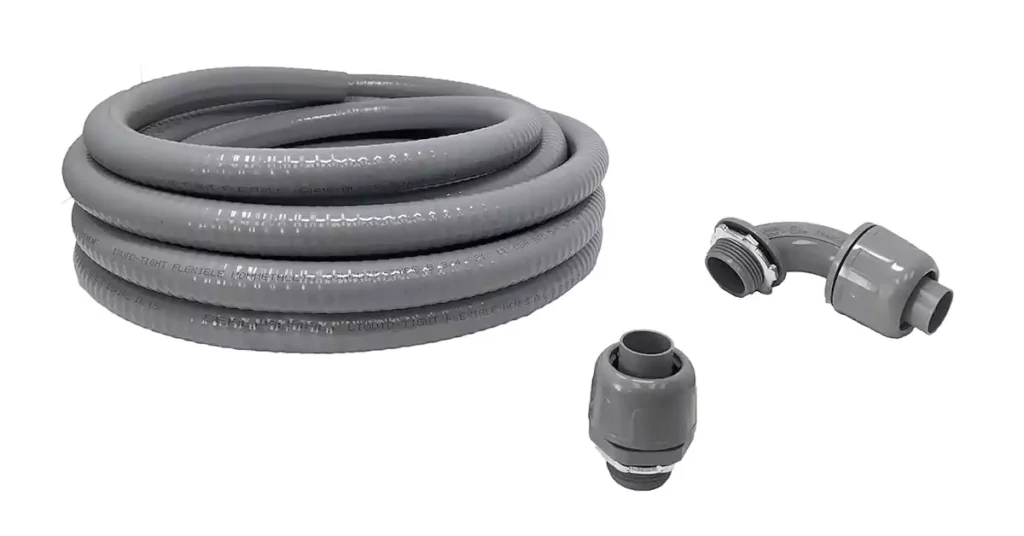
- Conduíte estanque a líquidos: Constructed with a flexible metal core and a protective outer layer, it is highly resistant to water, oil, and chemicals, suitable for outdoor and wet environments.
- Construction
- ENT: Features a smooth interior surface that facilitates wire pulling and is often available in various diameters.
- Conduíte estanque a líquidos: Includes a watertight design with a smooth or corrugated exterior, providing additional protection against environmental factors.
- Resistência ao fogo
- ENT: Generally has a lower fire resistance rating, primarily depending on the specific product and manufacturer.
- Conduíte estanque a líquidos: Typically offers better fire resistance, particularly in metal options, making it more suitable for high-risk environments.
- Resistência à corrosão
- ENT: Naturally resistant to corrosion, making it ideal for damp or wet locations.
- Conduíte estanque a líquidos: Also resistant to corrosion, but metal versions may be susceptible over time if exposed to harsh chemicals.
- Flexibility and Strength
- ENT: Known for its high flexibility, it’s easy to route around obstacles and within walls. However, it lacks the structural strength of metal conduits.
- Conduíte estanque a líquidos: Offers moderate flexibility with added durability, holding up well in environments requiring resistance to physical impacts.
- Temperature Tolerance
- ENT: Performs best in temperature-controlled environments and can become brittle in extreme temperatures.
- Conduíte estanque a líquidos: Built to handle a broader range of temperatures, it’s suitable for use in both indoor and outdoor conditions, including exposure to temperature fluctuations.
Best Suited Applications
Tubos elétricos não metálicos (ENT)
ENT is best suited for indoor applications where flexibility and ease of installation are prioritized. Common uses include:
- Residential wiring in walls and ceilings.
- Low-voltage applications.
- Areas where moisture is present but not excessive.
Liquid-tight Conduit
Liquid-tight conduit is ideal for environments where exposure to moisture, chemicals, or physical damage is a concern. Common applications include:
- Outdoor installations and exposed areas.
- Industrial settings where electrical equipment may be subject to spills or harsh cleaning processes.
- Wet locations as defined by the National Electrical Code (NEC).
Electrical Code Requirements for ENT Installation
Proper installation is crucial not only for the longevity of the conduit but also for the safety and functionality of the electrical system. Here are some essential installation steps and considerations to ensure a safe and compliant setup of ENT systems.
Key Steps in ENT Installation
The process for installing ENT conduit typically follows these essential steps to ensure both functionality and compliance with the National Electrical Code (NEC) and any local regulations:
- Planning the Layout: Determine the route for the conduit, considering wall studs, joists, and other structural components, and ensuring minimal bends to reduce stress on wiring.
- Cutting and Fitting the Conduit: Cut the conduit to appropriate lengths using a conduit cutter, then use approved fittings to connect sections and form desired angles.
- Securing the Conduit: Mount the conduit using appropriate clamps, brackets, or hangers, adhering to spacing requirements for support—typically every 3-4 feet or as specified by the NEC.
- Connecting to Boxes and Fixtures: Secure conduit to junction boxes or fixtures with approved connectors, making sure connections are tight and moisture-resistant for durability and safety.
- Pulling Wires: Carefully pull wiring through the ENT, being mindful of insulation integrity. Code guidelines may restrict specific cable types or sizes for use within ENT conduit, so verify compatibility.
- Inspecting and Testing: Once installed, inspect the entire conduit path for continuity, secure fittings, and adherence to code before finalizing wiring.
Key Considerations for ENT Conduit Installation
Support and Spacing: Adhere to the required support spacing to prevent sagging or conduit movement, which can lead to wiring strain or insulation damage. Mount securely, especially in horizontal runs, where additional support may be necessary.
Raio de curvatura: Follow code guidelines on maximum bending radius to avoid wire damage or excessive friction during pulls. Consider using pull boxes for long runs or runs with multiple bends to facilitate smooth wire installation and reduce potential wear.
Environmental Limitations: ENT conduit is ideal for indoor and dry applications but may require specific conduit ratings or protection for outdoor, high-heat, or damp locations. Consult code restrictions based on location to ensure environmental compatibility.
Connection Quality: Properly tighten all connections to prevent loosening over time. Loose fittings can expose wires or cause electrical faults, so secure each connection according to NEC requirements.
Aterramento e ligação: In some cases, ENT may require grounding, particularly in installations where conduit continuity is essential. Consult the NEC or local codes to determine if additional grounding measures are necessary based on the application.
Labeling and Identification: For complex installations, labeling conduit sections and junction boxes improves maintenance efficiency and complies with code requirements for traceability.
Troubleshooting Common ENT Conduit Installation Issues
Even with careful planning, ENT installations can encounter challenges. Here are some common issues and how to address them:
Loose Fittings or Connections: Loose connections can lead to conduit displacement or gaps, compromising the integrity of the installation. Recheck fittings and connectors, ensuring they are code-approved and securely fastened.
Difficult Wire Pulling: If wires are difficult to pull through, check for excessive bends, long conduit runs without pull boxes, or rough-cut edges. Lubricate wires if allowed by code, or add pull boxes as needed.
Conduit Sagging: If ENT conduit sags between supports, review the spacing and add additional supports if necessary. Sagging can place strain on the wiring, increasing the risk of insulation damage or wire abrasion.
Moisture Intrusion in Outdoor or Wet Locations: For installations in damp environments, ensure all fittings and seals are waterproof and adhere to code requirements for moisture protection. ENT conduit is generally recommended for dry locations, so use caution when planning for damp or outdoor settings.
Conduit Damage: ENT conduit can be damaged during installation or if subjected to high-impact areas. Inspect the conduit for any cracks or abrasions, and replace damaged sections to maintain electrical safety.
Cutting ENT Conduit: Tips and Techniques
Achieving clean, accurate cuts on ENT conduit is vital for a smooth installation. Improper cuts can lead to irregular edges, causing difficulties in fitting connections and potentially compromising the conduit’s integrity over time. Additionally, precise cuts ensure a secure connection with fittings, reducing the risk of electrical hazards, moisture intrusion, and maintaining NEC compliance.
Tools for Cutting ENT Conduit
Several tools can effectively cut ENT conduit, each with unique advantages. Here’s a breakdown:
- ENT Conduit Cutters: These cutters are specifically designed for the task, delivering smooth cuts quickly and with minimal effort.
- Serra: A more accessible tool, though it can leave rough edges requiring additional deburring.
- Rotary Pipe Cutters: Known for precision, these cutters are often preferred for small-diameter conduit. They work well with softer plastic materials.
- Utility Knife: Useful for scoring smaller conduit diameters; it’s not the most efficient but can be a practical option in a pinch.
Key Techniques for an Efficient Cut
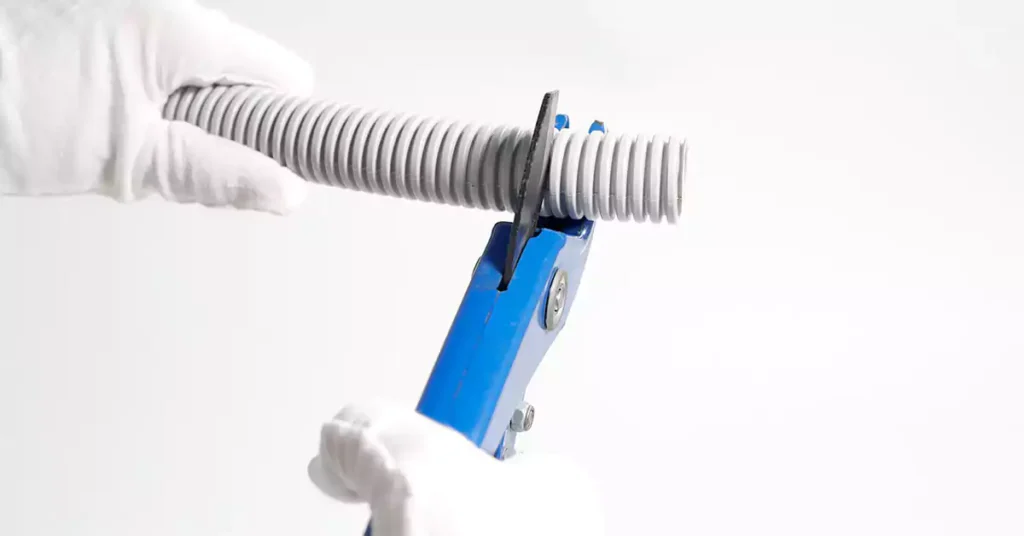
To ensure that ENT conduit cuts are smooth and precise, here are some best practices:
- Measure Twice, Cut Once: Accuracy in measuring is essential for proper installation. Mark your desired cut line clearly with a pencil or marker.
- Stabilize the Conduit: Secure the conduit firmly to prevent movement during cutting, which can lead to uneven edges.
- Rotate the Conduit (If Applicable): For certain cutting methods, rotating the conduit while applying gentle pressure can yield a smoother cut.
- Rebarbe as bordas: After cutting, use a deburring tool or sandpaper to smooth any rough edges, which can prevent injuries and ensure a snug fit with fittings.
Safety First
When working with ENT conduit, safety should always be a priority. Here are a few safety tips:
Use equipamento de proteção: Safety goggles, gloves, and a dust mask protect you from sharp edges, debris, and any small particles that may become airborne during cutting.
Secure the Workspace: Ensure your workspace is clear of any obstructions and has good lighting to prevent accidental injuries.
Handle Blades Carefully: Sharp tools require cautious handling, so always use proper technique and store tools securely when not in use.
Securing ENT Conduit to Surfaces: Clamps & Supports
Why Proper Conduit Securing is Essential
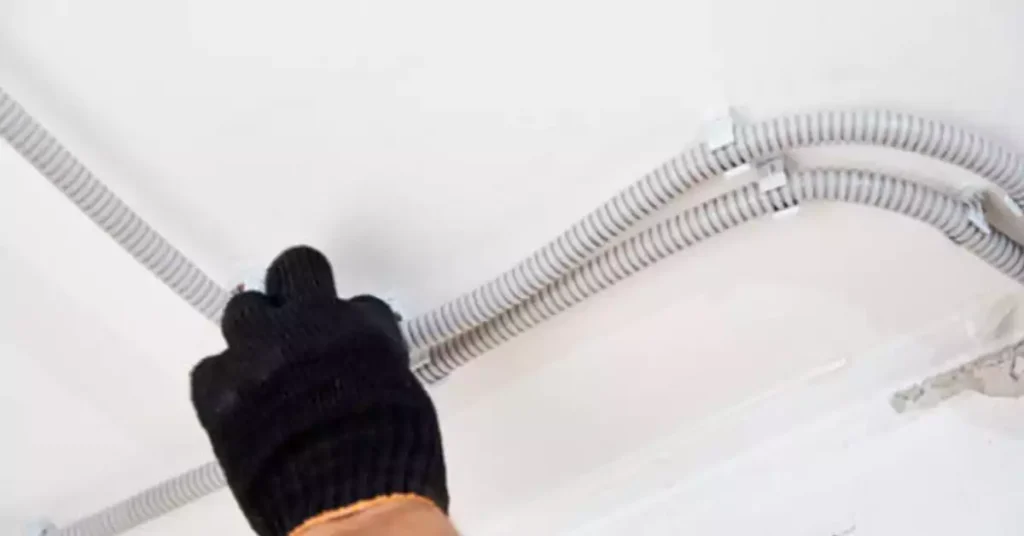
Correctly mounted conduit not only safeguards electrical wiring but also prevents various physical stresses that could otherwise lead to safety risks. ENT conduit that is not adequately secured may swing, sag, or chafe against surfaces, which can damage both the conduit and wiring inside. This type of movement introduces risk factors for electrical hazards and mechanical wear over time, making a reliable mounting strategy crucial.
Functional Stability and Safety
To maintain system integrity, ENT conduit must be fixed securely to resist movement, bending, and sagging. This is particularly critical for heavier wiring loads, as the added weight can pull the conduit downward if left unsupported. Reliable securing minimizes these risks and extends the lifespan of the installation, keeping wiring protected and functional.
Essential Tools and Types of Clamps and Supports
A range of clamps and hangers are designed specifically to keep ENT conduit firmly mounted on surfaces like walls, ceilings, and structural beams. Here’s a look at the most commonly used mounting tools:
Strap Clamps: These versatile, wrap-around clamps provide a straightforward way to secure ENT conduit, typically fastening with a single screw or bolt for quick installation.
C-Clamps: C-shaped clamps offer additional gripping power for stability, particularly useful on installations that may face minor vibrations or pressure.
Conduit Hangers: When ENT conduit is suspended from above (e.g., in basements or under floors), conduit hangers are essential. These come in various types, including:
- Wire Hangers: Loops of wire threaded through the conduit that provide a minimalist solution, often used in lighter load applications.
- Metal Conduit Hangers: For heavier-duty applications, metal hangers offer adjustable arms for precise positioning and secure support, suitable for larger conduit runs.
To attach these components, a drill and correctly sized drill bits are necessary for creating mounting holes in the surfaces and attaching screws or bolts without damaging the conduit or its surrounding materials.
Mounting Techniques for Optimal Stability
For a reliable installation, consider these mounting strategies that enhance security and performance:
Spacing Requirements: Space clamps and hangers appropriately—usually every 4-6 feet—for effective support and to keep the conduit level. This spacing prevents sagging, especially for runs that extend over longer distances.
Adapting to Surface Type: Choose the right mounting hardware based on the type of surface (e.g., masonry, wood, drywall) to prevent mounting failures or slippage.
Avoiding Over-Tightening: Tighten fasteners securely but avoid over-tightening, which can damage both the conduit and the mounting surface, potentially leading to premature failure.
Fittings and Junction Boxes for Professional-Grade Installations
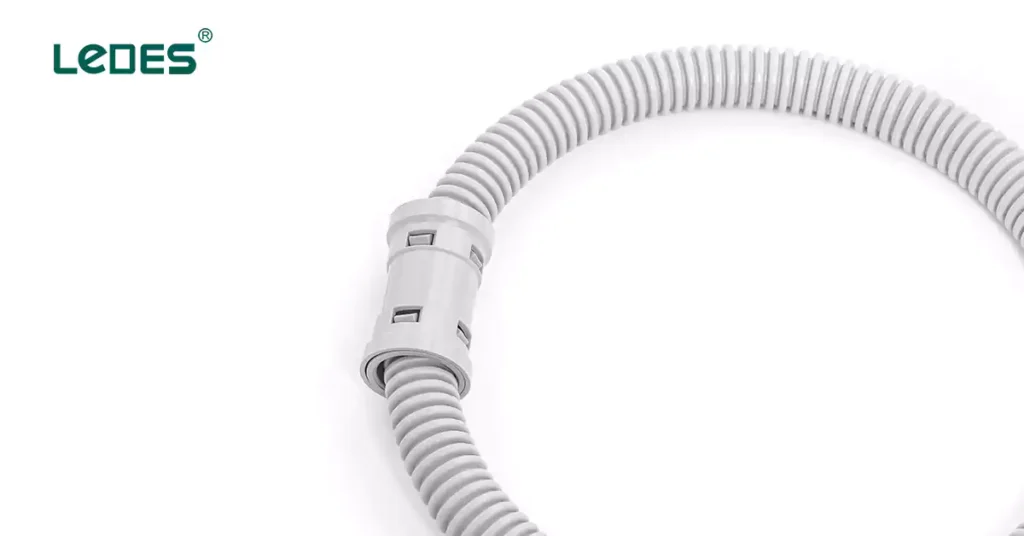
To complete a secure conduit system, fittings and junction boxes are critical components that ensure stable connections and directional changes:
ENT Fittings: Designed to lock conduit in place at joints, corners, and bends, these fittings keep ENT conduit well-aligned and prevent disconnection. Many fittings are also available with weatherproof and corrosion-resistant features for durability.
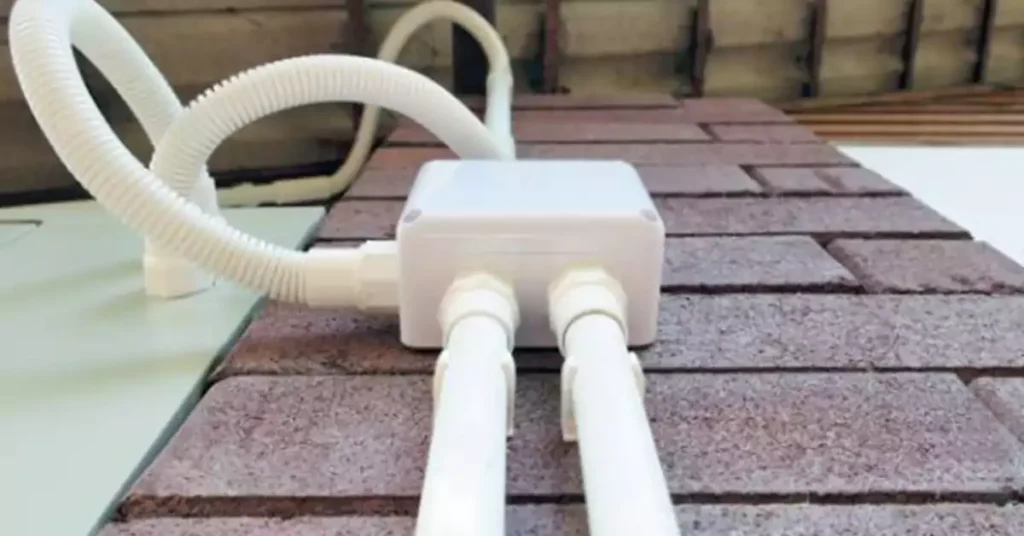
Caixas de junção: Often installed where multiple conduit runs meet or diverge, junction boxes house wiring connections safely and streamline wiring organization. For convenience, pre-wired junction boxes with integrated support for conduit runs can reduce installation time and simplify wiring configurations.
Installation Tips for Long-Term Reliability
To get the most out of your ENT conduit system, consider the following tips:
Consult Building Codes: Local building codes provide specific requirements on conduit spacing, mounting methods, and securing materials to ensure safe and compliant installations.
Weather and Environment Considerations: In outdoor or high-moisture environments, opt for UV-resistant or moisture-proof supports to maintain longevity and avoid damage from exposure.
Avoid Sharp Bends: Use gradual bends and avoid sharp angles in the conduit to protect the wiring from stress or abrasion that can lead to insulation wear.
Junction Boxes and Their Use with ENT Conduit
What is a Junction Box?
A junction box is a protective enclosure where electrical wiring connections are housed. Commonly made from durable materials like metal or plastic, these boxes shield electrical connections from physical damage, environmental hazards, and unauthorized tampering. When working with ENT (Electrical Nonmetallic Tubing) conduit, junction boxes become essential for both safety and functionality, providing secure junctions where wires meet or branch out. In this guide, we’ll explore why junction boxes are crucial when installing ENT conduit, how to select the best box for your needs, and the steps to safely install them.
Why Use Junction Boxes with ENT Conduit?
Safety
Junction boxes reduce electrical hazards by providing a secure enclosure for wire connections, lowering the risk of electrical shocks or fire. They also prevent accidental contact with live wires and protect against physical wear.
Simplified Maintenance
By centralizing connections, junction boxes allow for easier access to wiring for repairs or upgrades. This is especially useful in large installations where numerous wires converge.
Conformidade
In most regions, electrical code compliance requires junction boxes for all wiring splices or joints. This ensures that installations are safe, orderly, and protected from external factors like dust, moisture, and physical damage.
Choosing the Right Junction Box for ENT Conduit
Selecting a suitable junction box involves considering factors like location, size, material, and connection types:
Material: Plastic junction boxes are often used with ENT conduit due to their corrosion resistance, while metal boxes are better for areas with high temperatures or stringent fire safety requirements. Ledes’ junction boxes are made from high quality PVC, which are resistant to corrosion, sunlight, and non-conductive, ensuring a safe and reliable electrical installation.
Size: Choose a box large enough to accommodate all wires and fittings without crowding. Crowded boxes can increase heat buildup and make maintenance more challenging.
Ingress Protection (IP) Rating: In damp or outdoor locations, select a box with a high IP rating to ensure it can withstand exposure to moisture or dust.
Installation Steps for Junction Boxes with ENT Conduit
- Plan the Location: Determine where the junction box will be installed, making sure it is easily accessible for future maintenance. For secure installation, use a stud or other structural support.
- Prepare the Conduit and Box: Measure the conduit and cut it to the appropriate length for connecting to the junction box. Use ENT specific fittings for a seamless connection.
- Secure the Box: Attach the junction box to the mounting surface using screws or bolts, ensuring it is level and secure.
- Connect the Conduit: Insert the ENT conduit into the box openings and fasten with appropriate connectors. Make sure all connections are tight and follow NEC (National Electrical Code) requirements.
- Wire and Close: Inside the box, connect and organize the wiring as required, using wire nuts to cap connections. Carefully fold wires into the box and secure the cover tightly to prevent tampering and protect from dust or moisture.
Safety Tips
Desligar a energia: Always switch off power at the circuit breaker before handling electrical components to prevent shock or injury.
Use ferramentas adequadas: Use tools designed for electrical work, such as insulated screwdrivers and wire strippers, to enhance safety.
Avoid Overcrowding: Ensure that the box is large enough for all wires and connectors. An overcrowded box can lead to overheating and increases fire risk.
Verify Grounding: Proper grounding is essential to prevent electrical shocks and ensure that all connections are secure.
Pulling Wire Through ENT Conduit: Essential Techniques
Pulling wire through Electrical Nonmetallic Tubing (ENT) conduit requires careful planning and technique to ensure a smooth, safe installation. ENT conduit, known for its flexibility and lightweight design, can simplify wiring runs, but it also requires specific handling to avoid wire damage or snags. This guide will briefly cover key techniques and tools for efficiently pulling wire through ENT conduit.
Key Techniques for Pulling Wire Through ENT Conduit
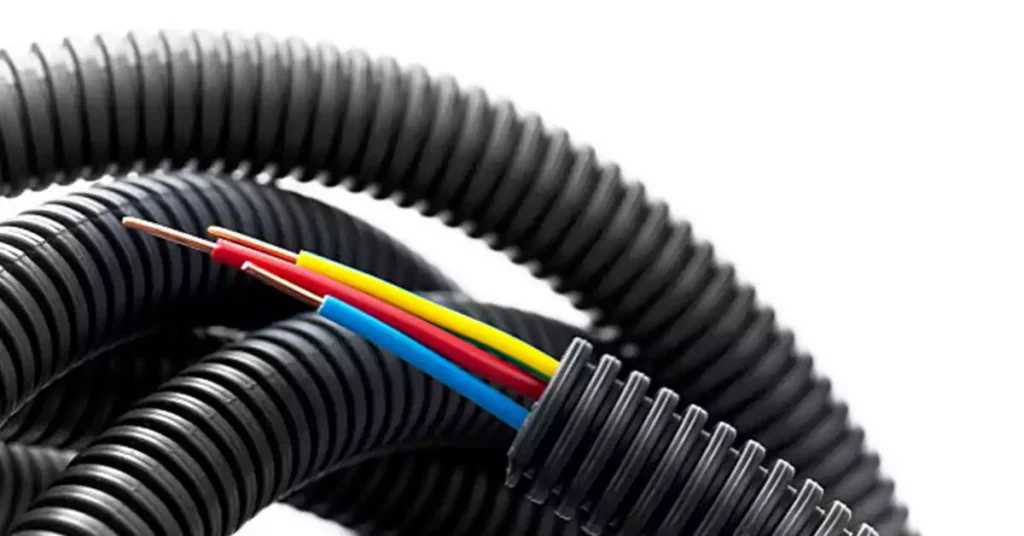
- Prepare the Conduit Path
Start by ensuring the conduit is free of obstructions and tightly secured along its path. Properly spaced clamps help keep the conduit straight and prevent unwanted bends or kinks during wire pulling. - Use Pulling Lubricant
Applying a wire-pulling lubricant can reduce friction, especially on longer or complex runs. This helps the wires slide smoothly through the conduit without risking insulation damage. - Select the Right Tools
Use a fish tape or pull line to guide wires through the conduit. Fish tape is particularly useful for shorter runs, while pull lines work well for longer distances or bends. Attach the wires securely and feed them slowly to avoid twists and tangles. - Pull Gently and Consistently
Apply steady, even pressure when pulling to prevent wire binding. If resistance increases, stop and check for obstructions or tight bends in the conduit that may need adjusting. - Avoid Overloading the Conduit
Refer to NEC guidelines to ensure the conduit size matches the wire fill requirements. Overloading can lead to overheating and make future maintenance difficult.
For a more detailed about the wire pulling, please refer to the previous article for how to pull wire through the conduit.
Conduit Fill Calculator: Determining Maximum Capacity
When planning electrical conduit installations, calculating conduit fill is essential to ensure compliance with safety codes and to prevent issues related to overheating or overcrowded wires. A conduit fill calculator helps electricians and installers determine the maximum capacity of wires for each conduit size, factoring in wire type, size, and insulation. Here’s a quick overview of how conduit fill calculations work and why they matter.
Key Points for Using a Conduit Fill Calculator
- Calculate Based on Conduit Type and Size
Different conduit materials (like PVC, ENT, and metal) have varying fill capacities, which change depending on the conduit’s diameter. Conduit fill calculators simplify this by providing tailored calculations for each type and size. - Consider Wire Size and Insulation Type
Wire gauge (size) and insulation type affect how much space each wire occupies within the conduit. Calculators take these into account to ensure wires aren’t packed too tightly, reducing the risk of overheating. - Comply with NEC Guidelines
Conduit fill calculators help ensure compliance with National Electrical Code (NEC) guidelines, which specify maximum fill percentages based on the number of wires. Following these guidelines is critical for a safe and functional installation. - Prevent Overheating and Facilitate Maintenance
Proper conduit fill not only helps in preventing wire insulation damage but also makes future repairs and upgrades easier by allowing sufficient room for wire movement.
For a detailed guide on using a conduit fill calculator and practical examples of conduit fill calculations, please refer to the previous post how to calculating conduit fill.
Repairing Damaged ENT Conduit: Patching Techniques
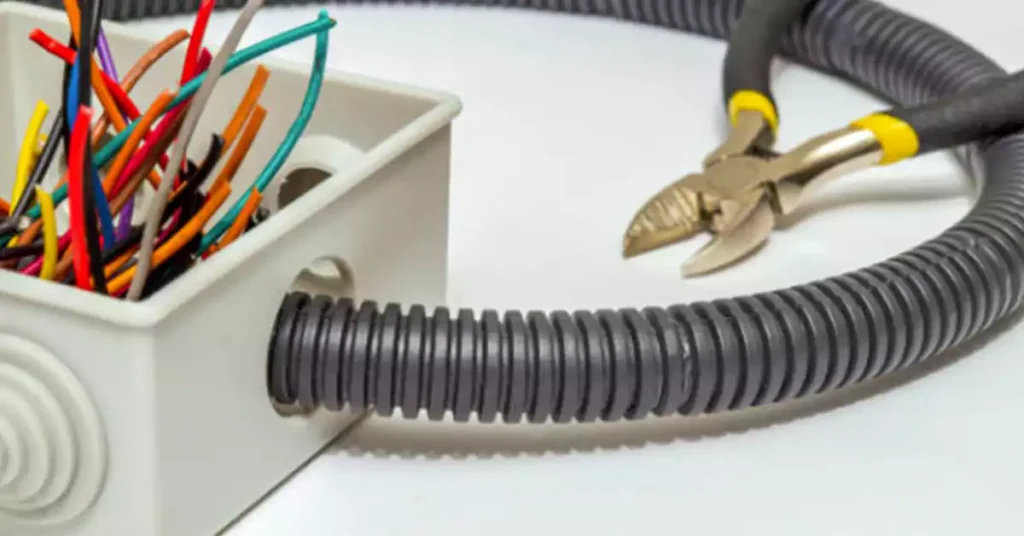
Key Steps for Repairing Damaged ENT Conduit
- Damage Assessment
Begin by evaluating the severity of the damage. Minor cracks or surface scratches can often be addressed with an epoxy-based sealant, designed for quick and secure repairs on small surfaces. For more substantial cuts or breaks, repair sleeves or specialized conduit tape may be necessary, while severely damaged sections should generally be replaced to ensure long-term reliability.
- Precauções de segurança
A segurança é primordial ao trabalhar em qualquer componente elétrico. Antes de começar os reparos, desconecte a energia do disjuntor para evitar riscos de choque. Usar luvas isolantes e proteção ocular minimiza ainda mais o risco de ferimentos durante os reparos, especialmente ao manusear bordas afiadas ou adesivos.
- Técnicas de Patching
Várias técnicas são usadas dependendo da extensão do dano:
Reparo com selante epóxi (para pequenas rachaduras e arranhões): Limpe bem a área danificada, aplique selante epóxi uniformemente e deixe curar completamente para obter uma vedação forte e permanente.
Manga de reparo de conduíte (para cortes ou quebras maiores): Remova a seção danificada, coloque a luva sobre a área e prenda-a conforme as instruções do fabricante, garantindo uma vedação firme em ambas as extremidades.
Reparo de fita de conduíte (para vãos maiores): Enrole a área danificada com camadas de fita de PVC especializada, criando uma vedação sobreposta e firme que reforça a integridade estrutural.
- Inspeções pós-reparo
Após concluir o reparo, faça uma inspeção visual para verificar se todas as conexões estão seguras e se não há lacunas ou fraquezas na área reparada. Se necessário, consulte um eletricista para testar a funcionalidade do reparo, garantindo que ele atenda aos padrões de segurança.
Guia de compra de conduítes ENT
Ao adquirir um conduíte ORL, é importante considerar os seguintes fatores:
Qualidade e Conformidade: Ao escolher o ORL, garantir o cumprimento dos regulamentos locais ou internacionais relevantes de segurança e qualidade.
Tamanho e comprimento: Determine o tamanho e o comprimento apropriados do conduíte necessário para sua aplicação específica.
Avaliação: Certifique-se de que o conduíte seja classificado para a aplicação pretendida, como uso interno ou externo.
Custo: Compare preços de diferentes fornecedores, considerando a qualidade e a conformidade do conduíte.
Considerações sobre a marca: A reputação da marca pode ser um fator importante na sua decisão de compra. Procure marcas estabelecidas com um histórico de fabricação de produtos elétricos de alta qualidade. Considere marcas conhecidas por sua expertise, experiência e comprometimento com a excelência do produto.
Tendências futuras na tecnologia de conduítes de PVC flexíveis
A tecnologia de conduítes de PVC flexíveis está evoluindo rapidamente, com novos avanços abordando as crescentes demandas por instalações elétricas mais seguras, inteligentes e sustentáveis. À medida que edifícios e infraestrutura adotam requisitos modernos, os conduítes de PVC flexíveis estão sendo transformados para atender a esses desafios com inovações em ciência de materiais, resiliência ambiental e integração com tecnologias inteligentes.
- Padrões de segurança contra incêndio aprimorados
Com a segurança contra incêndio se tornando um aspecto cada vez mais crítico dos códigos de construção, conduítes de PVC flexíveis estão sendo desenvolvidos com propriedades retardantes de fogo aprimoradas. Revestimentos e materiais avançados resistentes ao fogo estão em andamento para fornecer camadas adicionais de segurança, ajudando a desacelerar a propagação do fogo em ambientes sensíveis. - Integração de Tecnologia Inteligente
O futuro dos conduítes flexíveis de PVC inclui integração perfeita com sistemas inteligentes para monitoramento e diagnóstico em tempo real. Os conduítes futuros podem apresentar sensores incorporados capazes de rastrear condições como temperatura e fluxo de corrente, o que alimentaria dados diretamente em sistemas inteligentes de gerenciamento de edifícios. Essa capacidade não apenas aumenta a segurança, mas também permite manutenção preditiva, reduzindo o tempo de inatividade e melhorando a eficiência energética. - Sustentabilidade e Responsabilidade Ambiental
A sustentabilidade ambiental está remodelando a produção de PVC, com uma mudança em direção a materiais e processos recicláveis e ecologicamente corretos. Esforços estão sendo direcionados para compostos de PVC que podem ser reciclados mais facilmente, reduzindo o desperdício e promovendo o uso responsável de recursos. Alguns fabricantes estão até mesmo explorando alternativas de PVC de base biológica ou de baixo impacto, permitindo instalações ambientalmente conscientes. - Durabilidade avançada e resistência às intempéries
Como as instalações são cada vez mais obrigadas a suportar condições climáticas adversas e exposição a elementos externos, os conduítes de PVC flexíveis estão sendo otimizados para maior resistência a UV e corrosão. Esses avanços garantem que os conduítes possam suportar impactos físicos e desgaste ambiental, oferecendo desempenho confiável mesmo em condições desafiadoras. - Soluções de personalização e sob demanda
A tecnologia de conduítes de PVC flexíveis está se movendo em direção a maiores opções de personalização, apoiadas por técnicas avançadas de fabricação, como impressão 3D. Isso permite que os contratantes produzam formas e tamanhos de conduítes especializados conforme necessário, agilizando o processo de instalação e reduzindo o desperdício de material. A personalização torna possível adaptar soluções para necessidades únicas de construção e layouts elétricos complexos.
Conclusão
O conduíte ENT geral oferece uma solução confiável e flexível para proteger a fiação elétrica em diversas aplicações. Com seu excelente desempenho físico e químico, pode ser uma boa escolha para qualquer sistema elétrico residencial ou comercial. Ao selecionar o conduíte ENT, considere o tamanho, comprimento, código de conformidade, requisitos do projeto e outros fatores necessários para garantir que ele atenda às suas necessidades específicas.
Isso é tudo do post. Se você tiver alguma dúvida sobre o conduíte elétrico ENT, sinta-se à vontade para enviar o formulário de contato ou escrever um e-mail para nós.


