Table des matières
Comprendre l'ORL
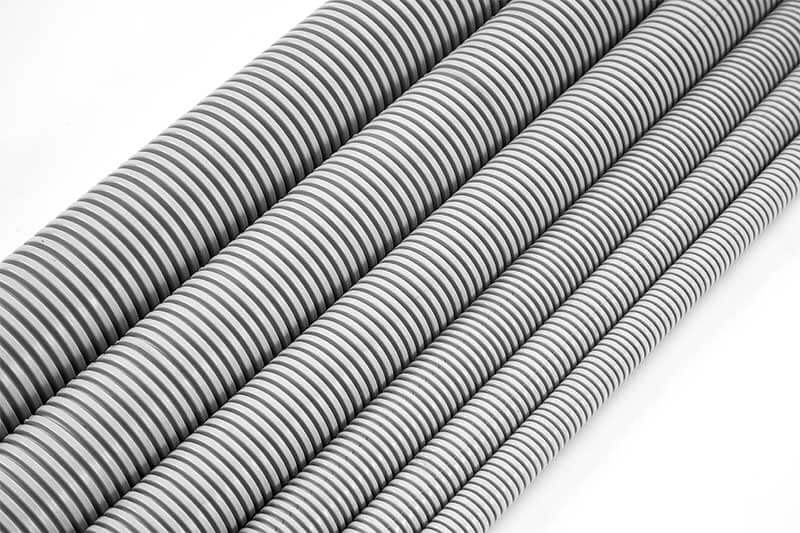
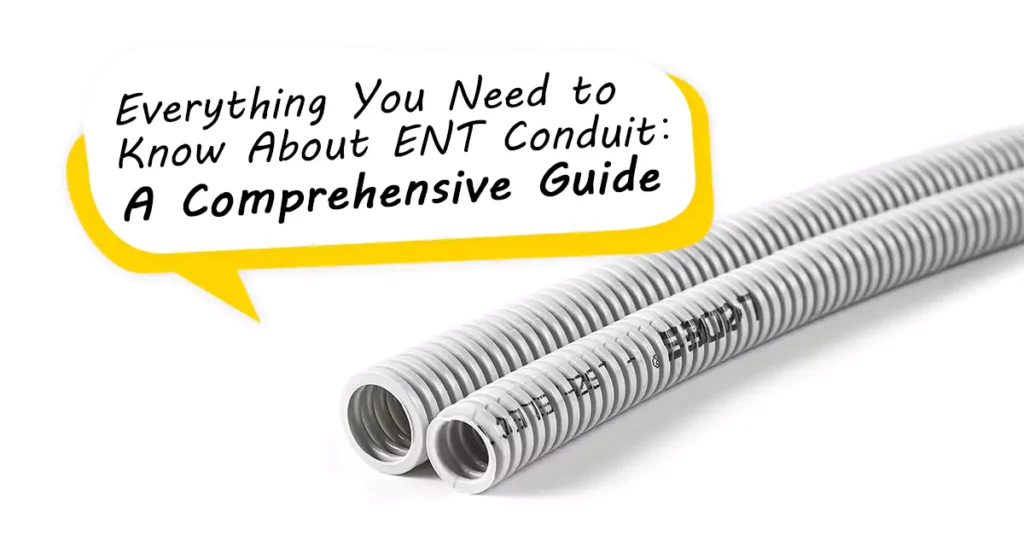
Tubes électriques non métalliques (ENT) est un type de conduit utilisé pour les installations électriques. Il s'agit d'un tube flexible et ondulé fabriqué à partir d'un matériau non métallique, généralement un plastique de haute qualité tel que le PVC (chlorure de polyvinyle). Le conduit ENT offre plusieurs avantages par rapport aux conduits métalliques traditionnels. Il est léger, facile à manipuler et peut être facilement coupé et plié pour s'adapter à diverses exigences d'installation. La flexibilité de l'ENT permet une installation plus facile dans les espaces restreints et autour des obstacles. L'ENT est conçu pour protéger et acheminer les fils et câbles électriques, servant de voie de passage pour le câblage électrique dans les bâtiments résidentiels et commerciaux.
Certificats et normes de test conformes
Les normes de certification et de test requises pour les tubes électriques non métalliques (ENT) peuvent varier en fonction de la région et des codes électriques spécifiques. Cependant, voici quelques normes et tests couramment référencés pour l’ORL :
- UL1653: UL 1653 est la norme reconnue pour les tubes électriques non métalliques (ENT). Il couvre les exigences de sécurité et de performance des produits ORL, y compris les dimensions, la construction, les matériaux et les méthodes de test.
- CSA C22.2 n° 227.1 : La CSA C22.2 n° 227.1 est une norme canadienne qui décrit les exigences relatives tubes non métalliques utilisés pour l'électricité installations, y compris ENT. Il couvre les matériaux, la construction, les dimensions, les performances et les méthodes d'essai spécifiques à l'ENT.
- FT4 : Le test FT4 n'est pas spécifique aux tubes électriques non métalliques (ENT) mais est un test de résistance au feu utilisé pour évaluer les caractéristiques de propagation de la flamme des câbles. Le test FT4 est généralement effectué sur des câbles, y compris ceux qui peuvent être installés à l'intérieur ou à côté de conduits ORL.
Le test FT4 fait partie de la norme C22.2 n° 0.3 de l'Association canadienne de normalisation (CSA), qui couvre les tests de propagation de la flamme et de densité de fumée pour les câbles. Le test mesure l'indice de propagation de la flamme d'un câble en le soumettant à une source d'allumage à flamme verticale. Le test évalue la capacité du câble à résister à la propagation des flammes et son potentiel à provoquer la propagation du feu dans un scénario d'installation verticale.
- NEC (Code national de l'électricité): Le NEC est une norme largement adoptée aux États-Unis qui fournit des lignes directrices et des réglementations pour les installations électriques. Il comprend des exigences relatives à l'utilisation des conduits, y compris ORL, telles que le dimensionnement approprié, les méthodes d'installation et la mise à la terre.
Le respect de ces normes et la possession des certificats de conformité pertinents sont essentiels lors de la sélection d'un conduit ORL.
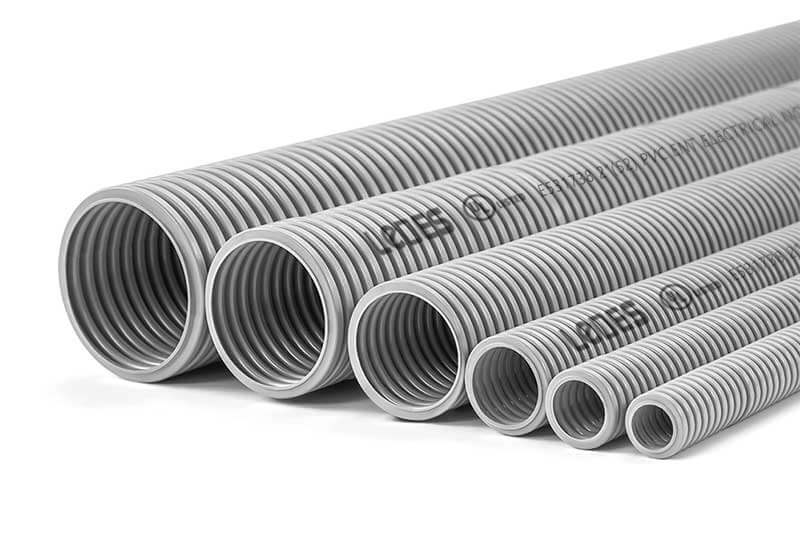
Tailles normales des conduits ORL
Le conduit ORL est disponible en différentes tailles pour répondre à différentes exigences de câblage. Les tailles les plus courantes incluent 1/2 pouce à 2-1/2 pouces. Ces tailles permettent une flexibilité dans le routage et s'adaptent au nombre de fils requis pour une application spécifique.
Procédé de fabrication de conduits ORL
Le conduit ORL est fabriqué par un processus d'extrusion. Pour les conduits ORL en PVC, il vous faudra :
Matériaux:
Résine PVC : la principale matière première pour les conduits en PVC.
Stabilisants : Additifs qui améliorent la stabilité et la durabilité du PVC.
Plastifiants : Substances qui améliorent la flexibilité du PVC.
Lubrifiants : Utilisés pour faciliter le processus d'extrusion.
Pigments : Additifs facultatifs pour la coloration.
Équipement:
Extrudeuse PVC : Machine utilisée pour faire fondre et mélanger la résine PVC avec des additifs.
Matrice d'extrusion : Forme le PVC dans la forme de conduit souhaitée.
Système de refroidissement : Refroidit et solidifie rapidement le PVC extrudé.
Équipement de coupe et de dimensionnement : Coupe le conduit à la longueur souhaitée et assure un dimensionnement approprié.
Matériel d'impression : Si nécessaire, matériel permettant d'imprimer des informations sur le produit ou des marquages sur le conduit.
Le processus de fabrication implique généralement les étapes suivantes :
Préparation: La résine PVC, les stabilisants, les plastifiants, les lubrifiants et les pigments sont pesés et mélangés selon des formulations spécifiques.
Extrusion: Les matériaux mélangés sont introduits dans l'extrudeuse de PVC, où ils sont chauffés et fondus. Le PVC fondu est ensuite forcé à travers la filière d'extrusion, qui lui donne la forme du profilé de conduit.
Refroidissement: Le conduit en PVC extrudé passe dans un système de refroidissement qui le refroidit rapidement pour solidifier sa forme.
Découpe et calibrage : Le conduit refroidi est coupé à la longueur souhaitée et subit un dimensionnement pour garantir qu'il répond aux dimensions requises.
Impression (le cas échéant) : Si des informations ou des marquages sur le produit sont requis sur le conduit, un équipement d'impression peut être utilisé pour les ajouter.
Contrôle de qualité: Le conduit ENT en PVC fini subit des contrôles de qualité pour garantir qu'il répond aux normes et spécifications requises.

Avantages du conduit ORL
Le conduit ORL offre plusieurs avantages par rapport aux options de conduits métalliques traditionnelles. Ceux-ci inclus:
- La flexibilité: Le conduit ORL est très flexible et peut être facilement plié à la main, ce qui facilite son passage dans les espaces restreints et autour des coins, réduisant ainsi le besoin de raccords et simplifiant l'installation.
- Résistance à la corrosion: Contrairement aux conduits métalliques, le conduit ENT est insensible à la corrosion, ce qui le rend adapté aux environnements extérieurs et humides.
- Poids léger: Le conduit ENT est nettement plus léger que les conduits métalliques, ce qui permet une manipulation et une installation plus faciles.
- Rentable: Les conduits ENT sont généralement plus abordables que les conduits métalliques, ce qui en fait un choix rentable pour les installations électriques.
Scénarios d'utilisation courants
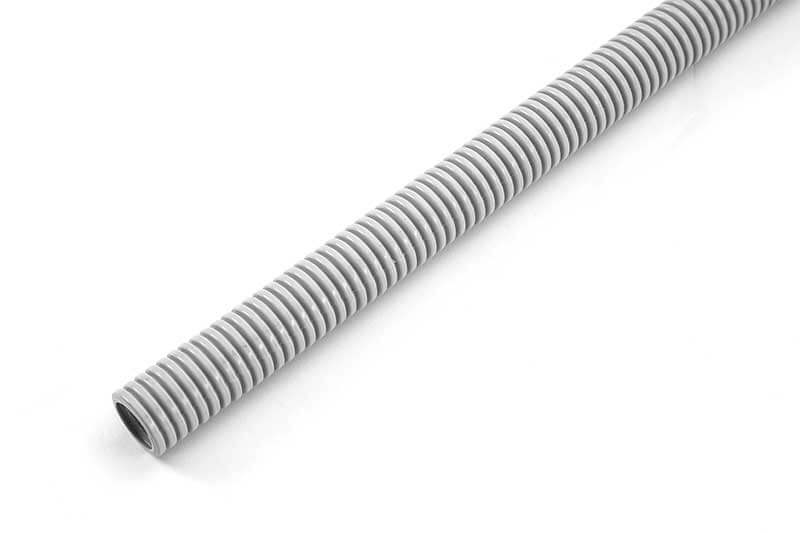
Les tubes électriques non métalliques (ENT) constituent une solution de conduit polyvalente et efficace largement utilisée dans diverses applications de câblage. Sa conception flexible et sa résistance aux facteurs environnementaux en font un choix idéal pour les environnements résidentiels et commerciaux. Vous trouverez ci-dessous des scénarios d'utilisation courants détaillés pour les ENT :
Câblage résidentiel
Le conduit ENT est particulièrement avantageux pour les propriétaires à la recherche de solutions de câblage discrètes et efficaces.
- Systèmes intégrés dans les murs : Le conduit ENT permet un acheminement fluide des câbles électriques à l'intérieur des murs, réduisant ainsi le besoin de réacheminement complexe autour des montants et autres obstacles intégrés.
- Circuits de salle de bain et de cuisine : La résistance à l'humidité et la flexibilité compacte de l'ENT le rendent idéal pour ces zones à forte utilisation, où il supporte en toute sécurité le câblage des prises, de l'éclairage et des appareils électroménagers.
- Circuits dédiés aux appareils électroménagers : ENT permet de réaliser des circuits organisés et dédiés aux gros appareils, garantissant qu'ils sont correctement câblés tout en minimisant l'encombrement, en particulier dans les sous-sols ou les buanderies.
Applications commerciales
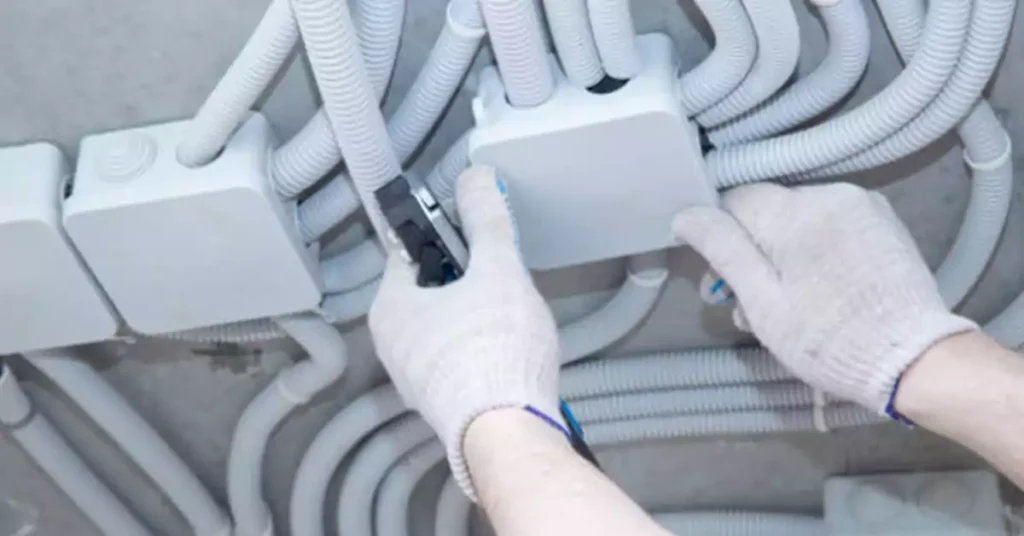
Le conduit ENT est également d'une valeur inestimable dans les bâtiments commerciaux, offrant des solutions de câblage efficaces pour divers besoins commerciaux :
- Câblage de bureau : Dans les environnements de bureau, ENT facilite l'organisation du câblage des postes de travail, des luminaires et des réseaux de données. Sa flexibilité permet des ajustements et des reconfigurations faciles à mesure que l'agencement des bureaux change.
- Espaces commerciaux : Les espaces de vente bénéficient de la capacité d'ENT à créer un système électrique propre et organisé. Il prend en charge le câblage des terminaux de point de vente, l'éclairage des présentoirs, les systèmes de sécurité, etc., garantissant que la configuration électrique ne nuit pas à l'expérience d'achat.
- Bâtiments commerciaux légers : Les petites entreprises, comme les restaurants, les salons et les cliniques, utilisent ENT pour des solutions de câblage fiables. Son adaptabilité le rend adapté à diverses configurations, des équipements de cuisine aux systèmes d'éclairage et de CVC.
Cadres industriels
Bien que l'ENT ne soit peut-être pas le premier choix pour les applications industrielles lourdes en raison de sa résistance limitée, il trouve néanmoins des niches spécifiques :
- Systèmes basse tension : Le conduit ENT fournit un routage sûr et adaptable pour les systèmes de contrôle, l'instrumentation et l'équipement de surveillance, permettant une flexibilité dans les placements et les réglages des capteurs.
- Machines légères et convoyeurs : Dans les environnements contrôlés, les conduits ENT peuvent abriter le câblage de machines plus légères, de capteurs et de panneaux de contrôle, offrant protection et organisation tout en permettant une adaptabilité future.
- Lignes de données et de communication : L'ENT est de plus en plus utilisé pour les lignes de données et de communication basse tension dans les configurations industrielles contrôlées, prenant en charge un hybride de gestion électrique et de données.
Applications extérieures
Le conduit ENT convient également aux installations extérieures, offrant une protection contre l'humidité et les facteurs environnementaux. Cela en fait un choix fiable pour l'éclairage extérieur, l'éclairage paysager et d'autres besoins électriques extérieurs.
Installations de dalles en béton
L'ENT est un choix populaire pour les installations sous dalles de béton. Sa conception lui permet de supporter le poids du béton et de résister aux dommages pendant le processus de durcissement, garantissant ainsi une solution électrique durable.
Conduit ENT vs conduit étanche aux liquides : principales différences
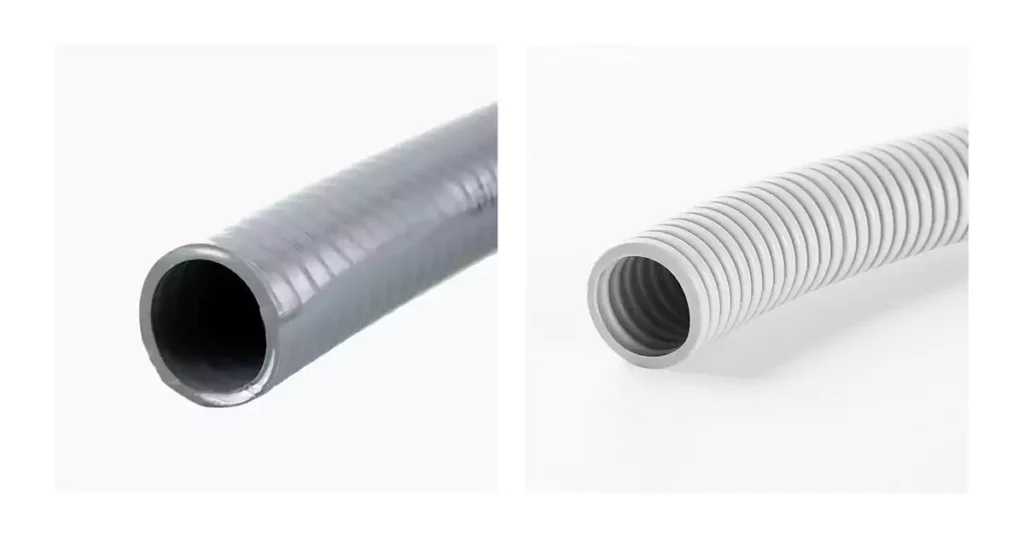
En matière d'installations électriques, le choix du conduit est crucial pour garantir la sécurité, la durabilité et la conformité aux codes électriques. Les deux types de conduits les plus courants sont les tubes électriques non métalliques (ENT) et les conduits étanches aux liquides. Bien que tous deux servent à protéger le câblage électrique, ils possèdent des caractéristiques distinctes qui les rendent adaptés à différentes applications.
6 différences entre les conduits ENT et les conduits étanches aux liquides
- Composition du matériau :
- Conduit ORL : Fabriqué en plastique durable, le conduit ENT est léger et flexible, souvent choisi pour les applications intérieures.
- Conduit étanche aux liquides : Construit avec un noyau métallique flexible et une couche extérieure protectrice, il est très résistant à l'eau, à l'huile et aux produits chimiques, adapté aux environnements extérieurs et humides.
- Construction
- ORL: Présente une surface intérieure lisse qui facilite le tirage des fils et est souvent disponible dans différents diamètres.
- Conduit étanche aux liquides : Comprend une conception étanche avec un extérieur lisse ou ondulé, offrant une protection supplémentaire contre les facteurs environnementaux.
- Résistance au feu
- ORL: A généralement un indice de résistance au feu inférieur, principalement en fonction du produit spécifique et du fabricant.
- Conduit étanche aux liquides : Offre généralement une meilleure résistance au feu, en particulier dans les options métalliques, ce qui le rend plus adapté aux environnements à haut risque.
- Résistance à la corrosion
- ORL: Naturellement résistant à la corrosion, ce qui le rend idéal pour les endroits humides ou mouillés.
- Conduit étanche aux liquides : Ils sont également résistants à la corrosion, mais les versions métalliques peuvent devenir sensibles au fil du temps si elles sont exposées à des produits chimiques agressifs.
- Flexibilité et force
- ORL: Connu pour sa grande flexibilité, il est facile de contourner les obstacles et de passer à l'intérieur des murs. Cependant, il n'a pas la résistance structurelle des conduits métalliques.
- Conduit étanche aux liquides : Offre une flexibilité modérée avec une durabilité accrue, résistant bien dans les environnements nécessitant une résistance aux impacts physiques.
- Tolérance de température
- ORL: Fonctionne mieux dans des environnements à température contrôlée et peut devenir cassant à des températures extrêmes.
- Conduit étanche aux liquides : Conçu pour gérer une plage de températures plus large, il convient à une utilisation dans des conditions intérieures et extérieures, y compris l'exposition aux fluctuations de température.
Applications les mieux adaptées
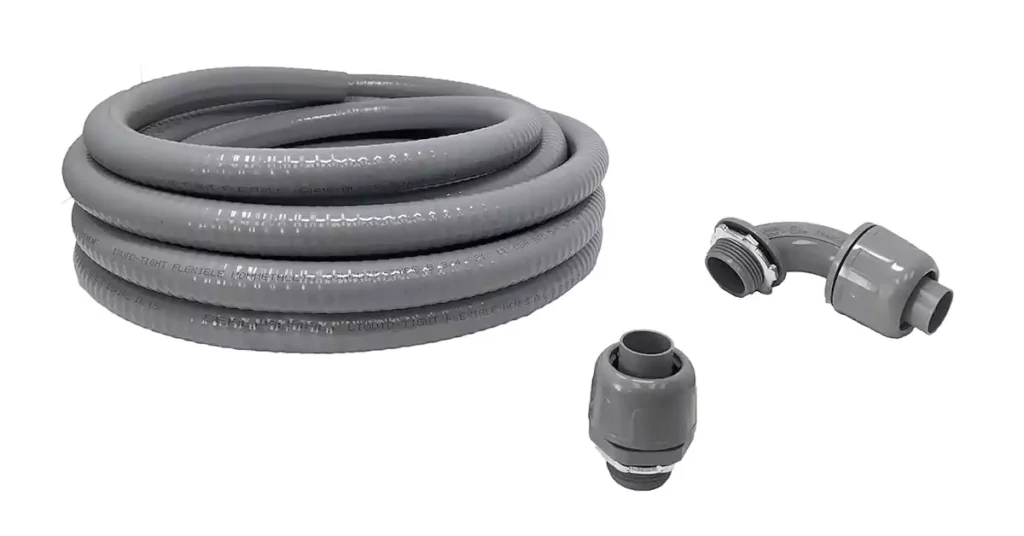
Tubes électriques non métalliques (ENT)
L'ENT est particulièrement adapté aux applications intérieures où la flexibilité et la facilité d'installation sont prioritaires. Les utilisations courantes incluent :
- Câblage résidentiel dans les murs et les plafonds.
- Applications basse tension.
- Zones où l’humidité est présente mais pas excessive.
Conduit étanche aux liquides
Les conduits étanches aux liquides sont idéaux pour les environnements où l'exposition à l'humidité, aux produits chimiques ou aux dommages physiques est un problème. Les applications courantes incluent :
- Installations extérieures et zones exposées.
- Environnements industriels où les équipements électriques peuvent être soumis à des déversements ou à des processus de nettoyage agressifs.
- Emplacements humides tels que définis par le National Electrical Code (NEC).
Exigences du code électrique pour l'installation d'ENT
Une installation correcte est essentielle non seulement pour la longévité du conduit, mais également pour la sécurité et la fonctionnalité du système électrique. Voici quelques étapes et considérations d'installation essentielles pour garantir une configuration sûre et conforme des systèmes ENT.
Étapes clés de l'installation ORL
Le processus d'installation d'un conduit ENT suit généralement ces étapes essentielles pour garantir à la fois la fonctionnalité et la conformité au National Electrical Code (NEC) et à toutes les réglementations locales :
- Planification de l'aménagement : Déterminez l'itinéraire du conduit, en tenant compte des montants muraux, des solives et des autres composants structurels, et en garantissant un minimum de courbures pour réduire la contrainte sur le câblage.
- Découpe et pose du conduit : Coupez le conduit à la longueur appropriée à l’aide d’un coupe-conduit, puis utilisez des raccords approuvés pour connecter les sections et former les angles souhaités.
- Sécurisation du conduit : Montez le conduit à l'aide de pinces, de supports ou de cintres appropriés, en respectant les exigences d'espacement pour le support, généralement tous les 3 à 4 pieds ou comme spécifié par le NEC.
- Connexion aux boîtiers et aux luminaires : Fixez les conduits aux boîtes de jonction ou aux luminaires avec des connecteurs approuvés, en vous assurant que les connexions sont serrées et résistantes à l'humidité pour plus de durabilité et de sécurité.
- Tirer des fils : Faites passer soigneusement les câbles à travers le conduit ENT, en veillant à l'intégrité de l'isolation. Les directives du code peuvent restreindre l'utilisation de types ou de tailles de câbles spécifiques dans les conduits ENT, vérifiez donc la compatibilité.
- Inspection et test : Une fois installé, inspectez l'ensemble du chemin du conduit pour vérifier la continuité, la sécurité des raccords et le respect du code avant de finaliser le câblage.
Considérations clés pour l'installation de conduits ORL
Support et espacement : Respectez l'espacement de support requis pour éviter tout affaissement ou mouvement du conduit, qui pourrait entraîner une tension du câblage ou des dommages à l'isolation. Montez solidement, en particulier dans les parcours horizontaux, où un support supplémentaire peut être nécessaire.
Rayon de courbure : Respectez les directives du code concernant le rayon de courbure maximal pour éviter d'endommager les câbles ou de provoquer une friction excessive lors des tirages. Pensez à utiliser des boîtes de tirage pour les longs parcours ou les parcours comportant plusieurs coudes afin de faciliter l'installation des câbles et de réduire l'usure potentielle.
Limitations environnementales : Le conduit ENT est idéal pour les applications intérieures et sèches, mais peut nécessiter des caractéristiques de conduit ou une protection spécifiques pour les emplacements extérieurs, à forte chaleur ou humides. Consultez les restrictions du code en fonction de l'emplacement pour garantir la compatibilité environnementale.
Qualité de la connexion : Serrez correctement toutes les connexions pour éviter qu'elles ne se desserrent au fil du temps. Des raccords desserrés peuvent exposer les fils ou provoquer des pannes électriques. Veillez donc à sécuriser chaque connexion conformément aux exigences du NEC.
Mise à la terre et liaison : Dans certains cas, l'ENT peut nécessiter une mise à la terre, notamment dans les installations où la continuité des conduits est essentielle. Consultez le NEC ou les codes locaux pour déterminer si des mesures de mise à la terre supplémentaires sont nécessaires en fonction de l'application.
Étiquetage et identification : Pour les installations complexes, l’étiquetage des sections de conduits et des boîtes de jonction améliore l’efficacité de la maintenance et est conforme aux exigences du code en matière de traçabilité.
Dépannage des problèmes courants d'installation de conduits ENT
Même avec une planification minutieuse, les installations ORL peuvent rencontrer des difficultés. Voici quelques problèmes courants et comment les résoudre :
Raccords ou connexions desserrés : Des connexions desserrées peuvent entraîner un déplacement ou des écarts dans les conduits, compromettant ainsi l'intégrité de l'installation. Revérifiez les raccords et les connecteurs, en vous assurant qu'ils sont conformes au code et solidement fixés.
Tirage de fil difficile : Si les câbles sont difficiles à tirer, vérifiez qu'ils ne sont pas trop courbés, qu'ils ne sont pas trop longs et qu'ils ne présentent pas de boîtiers de tirage ou de bords coupés grossièrement. Lubrifiez les câbles si le code le permet ou ajoutez des boîtiers de tirage si nécessaire.
Affaissement du conduit : Si le conduit ENT s'affaisse entre les supports, vérifiez l'espacement et ajoutez des supports supplémentaires si nécessaire. L'affaissement peut exercer une pression sur le câblage, augmentant le risque de dommages à l'isolation ou d'abrasion du fil.
Intrusion d'humidité dans les endroits extérieurs ou humides : Pour les installations dans des environnements humides, assurez-vous que tous les raccords et joints sont étanches et conformes aux exigences du code en matière de protection contre l'humidité. Le conduit ENT est généralement recommandé pour les endroits secs, alors soyez prudent lorsque vous planifiez des environnements humides ou extérieurs.
Dommages aux conduits : Les conduits ENT peuvent être endommagés lors de l'installation ou s'ils sont soumis à des impacts importants. Inspectez le conduit pour détecter toute fissure ou abrasion et remplacez les sections endommagées pour maintenir la sécurité électrique.
Couper un conduit ORL : conseils et techniques
Il est essentiel de réaliser des coupes nettes et précises sur les conduits ENT pour une installation en douceur. Des coupes incorrectes peuvent entraîner des bords irréguliers, ce qui entraîne des difficultés lors de l'installation des connexions et peut compromettre l'intégrité du conduit au fil du temps. De plus, des coupes précises garantissent une connexion sécurisée avec les raccords, réduisant ainsi le risque de dangers électriques, d'intrusion d'humidité et de respect de la conformité NEC.
Outils pour couper les conduits ORL
Plusieurs outils peuvent couper efficacement les conduits ORL, chacun avec des avantages uniques. Voici une liste détaillée :
- ENT Conduit Cutters: These cutters are specifically designed for the task, delivering smooth cuts quickly and with minimal effort.
- Scie à métaux: A more accessible tool, though it can leave rough edges requiring additional deburring.
- Rotary Pipe Cutters: Known for precision, these cutters are often preferred for small-diameter conduit. They work well with softer plastic materials.
- Utility Knife: Useful for scoring smaller conduit diameters; it’s not the most efficient but can be a practical option in a pinch.
Key Techniques for an Efficient Cut

To ensure that ENT conduit cuts are smooth and precise, here are some best practices:
- Measure Twice, Cut Once: Accuracy in measuring is essential for proper installation. Mark your desired cut line clearly with a pencil or marker.
- Stabilize the Conduit: Secure the conduit firmly to prevent movement during cutting, which can lead to uneven edges.
- Rotate the Conduit (If Applicable): For certain cutting methods, rotating the conduit while applying gentle pressure can yield a smoother cut.
- Ébavurer les bords : After cutting, use a deburring tool or sandpaper to smooth any rough edges, which can prevent injuries and ensure a snug fit with fittings.
Safety First
When working with ENT conduit, safety should always be a priority. Here are a few safety tips:
Portez un équipement de protection : Safety goggles, gloves, and a dust mask protect you from sharp edges, debris, and any small particles that may become airborne during cutting.
Secure the Workspace: Ensure your workspace is clear of any obstructions and has good lighting to prevent accidental injuries.
Handle Blades Carefully: Sharp tools require cautious handling, so always use proper technique and store tools securely when not in use.
Securing ENT Conduit to Surfaces: Clamps & Supports
Why Proper Conduit Securing is Essential
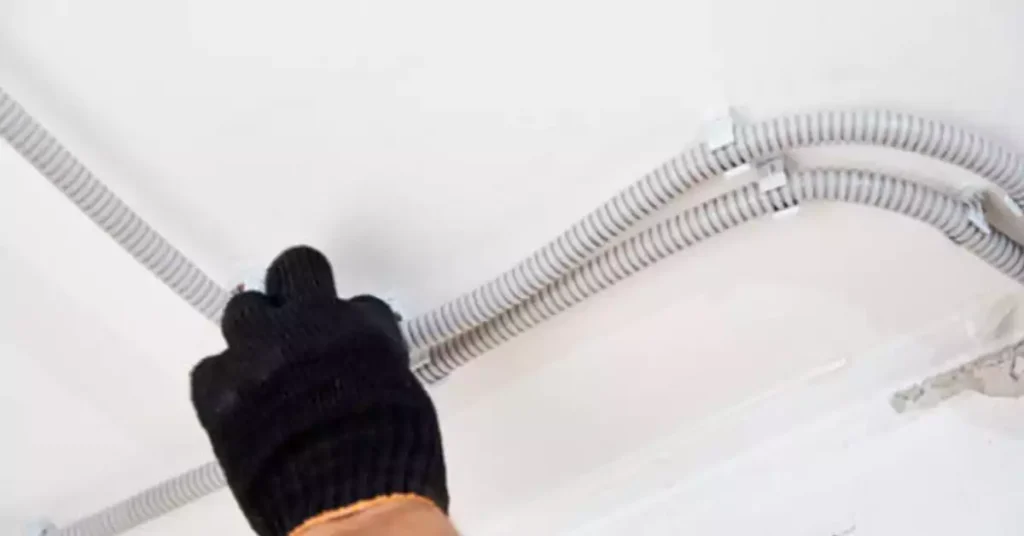
Correctly mounted conduit not only safeguards electrical wiring but also prevents various physical stresses that could otherwise lead to safety risks. ENT conduit that is not adequately secured may swing, sag, or chafe against surfaces, which can damage both the conduit and wiring inside. This type of movement introduces risk factors for electrical hazards and mechanical wear over time, making a reliable mounting strategy crucial.
Functional Stability and Safety
To maintain system integrity, ENT conduit must be fixed securely to resist movement, bending, and sagging. This is particularly critical for heavier wiring loads, as the added weight can pull the conduit downward if left unsupported. Reliable securing minimizes these risks and extends the lifespan of the installation, keeping wiring protected and functional.
Essential Tools and Types of Clamps and Supports
A range of clamps and hangers are designed specifically to keep ENT conduit firmly mounted on surfaces like walls, ceilings, and structural beams. Here’s a look at the most commonly used mounting tools:
Strap Clamps: These versatile, wrap-around clamps provide a straightforward way to secure ENT conduit, typically fastening with a single screw or bolt for quick installation.
C-Clamps: C-shaped clamps offer additional gripping power for stability, particularly useful on installations that may face minor vibrations or pressure.
Conduit Hangers: When ENT conduit is suspended from above (e.g., in basements or under floors), conduit hangers are essential. These come in various types, including:
- Wire Hangers: Loops of wire threaded through the conduit that provide a minimalist solution, often used in lighter load applications.
- Metal Conduit Hangers: For heavier-duty applications, metal hangers offer adjustable arms for precise positioning and secure support, suitable for larger conduit runs.
To attach these components, a drill and correctly sized drill bits are necessary for creating mounting holes in the surfaces and attaching screws or bolts without damaging the conduit or its surrounding materials.
Mounting Techniques for Optimal Stability
For a reliable installation, consider these mounting strategies that enhance security and performance:
Spacing Requirements: Space clamps and hangers appropriately—usually every 4-6 feet—for effective support and to keep the conduit level. This spacing prevents sagging, especially for runs that extend over longer distances.
Adapting to Surface Type: Choose the right mounting hardware based on the type of surface (e.g., masonry, wood, drywall) to prevent mounting failures or slippage.
Avoiding Over-Tightening: Tighten fasteners securely but avoid over-tightening, which can damage both the conduit and the mounting surface, potentially leading to premature failure.
Fittings and Junction Boxes for Professional-Grade Installations
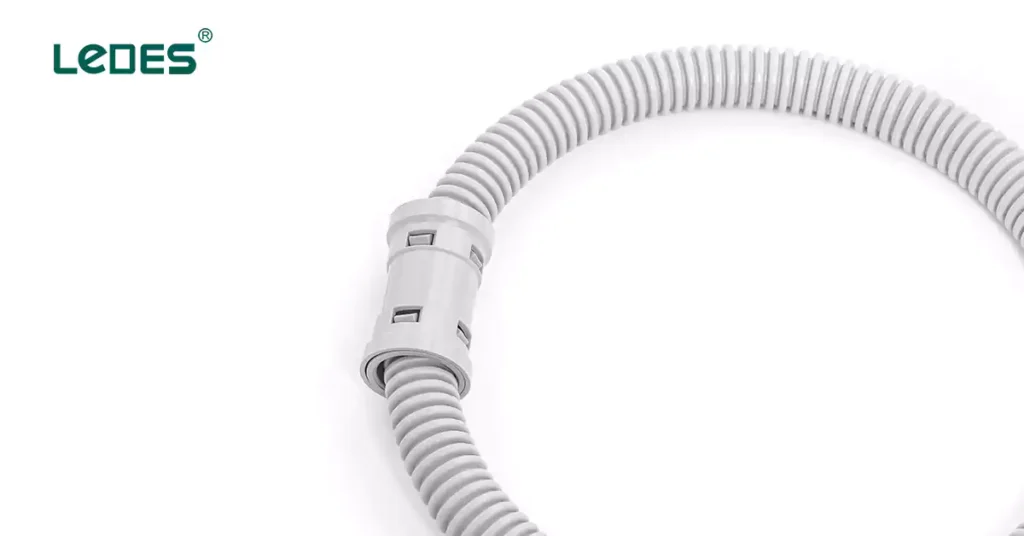
To complete a secure conduit system, fittings and junction boxes are critical components that ensure stable connections and directional changes:
ENT Fittings: Designed to lock conduit in place at joints, corners, and bends, these fittings keep ENT conduit well-aligned and prevent disconnection. Many fittings are also available with weatherproof and corrosion-resistant features for durability.
Boîtes de jonction : Often installed where multiple conduit runs meet or diverge, junction boxes house wiring connections safely and streamline wiring organization. For convenience, pre-wired junction boxes with integrated support for conduit runs can reduce installation time and simplify wiring configurations.
Installation Tips for Long-Term Reliability
To get the most out of your ENT conduit system, consider the following tips:
Consult Building Codes: Local building codes provide specific requirements on conduit spacing, mounting methods, and securing materials to ensure safe and compliant installations.
Weather and Environment Considerations: In outdoor or high-moisture environments, opt for UV-resistant or moisture-proof supports to maintain longevity and avoid damage from exposure.
Avoid Sharp Bends: Use gradual bends and avoid sharp angles in the conduit to protect the wiring from stress or abrasion that can lead to insulation wear.
Junction Boxes and Their Use with ENT Conduit
What is a Junction Box?
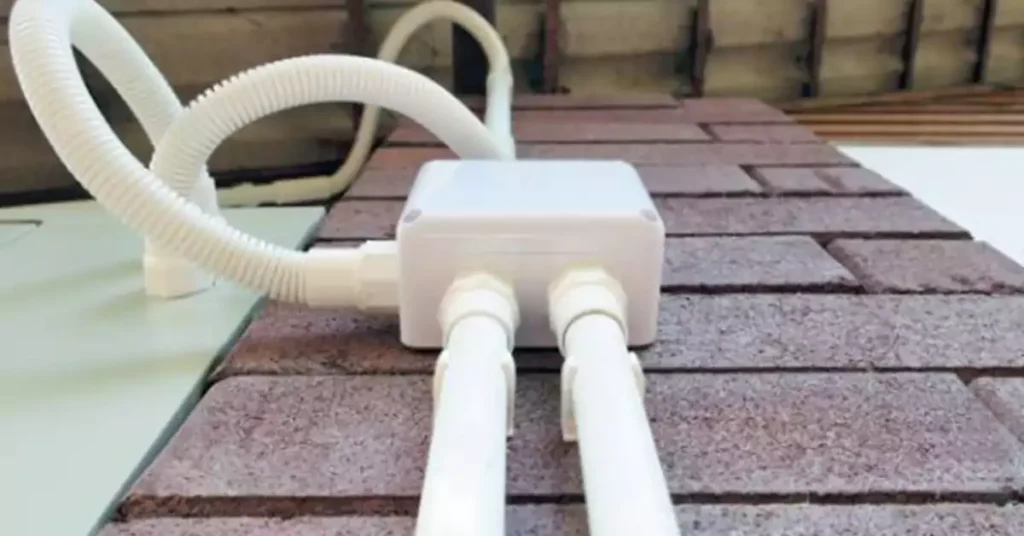
A junction box is a protective enclosure where electrical wiring connections are housed. Commonly made from durable materials like metal or plastic, these boxes shield electrical connections from physical damage, environmental hazards, and unauthorized tampering. When working with ENT (Electrical Nonmetallic Tubing) conduit, junction boxes become essential for both safety and functionality, providing secure junctions where wires meet or branch out. In this guide, we’ll explore why junction boxes are crucial when installing ENT conduit, how to select the best box for your needs, and the steps to safely install them.
Why Use Junction Boxes with ENT Conduit?
Safety
Junction boxes reduce electrical hazards by providing a secure enclosure for wire connections, lowering the risk of electrical shocks or fire. They also prevent accidental contact with live wires and protect against physical wear.
Simplified Maintenance
By centralizing connections, junction boxes allow for easier access to wiring for repairs or upgrades. This is especially useful in large installations where numerous wires converge.
Conformité
In most regions, electrical code compliance requires junction boxes for all wiring splices or joints. This ensures that installations are safe, orderly, and protected from external factors like dust, moisture, and physical damage.
Choosing the Right Junction Box for ENT Conduit
Selecting a suitable junction box involves considering factors like location, size, material, and connection types:
Matériel: Plastic junction boxes are often used with ENT conduit due to their corrosion resistance, while metal boxes are better for areas with high temperatures or stringent fire safety requirements. Ledes’ junction boxes are made from high quality PVC, which are resistant to corrosion, sunlight, and non-conductive, ensuring a safe and reliable electrical installation.
Size: Choose a box large enough to accommodate all wires and fittings without crowding. Crowded boxes can increase heat buildup and make maintenance more challenging.
Ingress Protection (IP) Rating: In damp or outdoor locations, select a box with a high IP rating to ensure it can withstand exposure to moisture or dust.
Installation Steps for Junction Boxes with ENT Conduit
- Plan the Location: Determine where the junction box will be installed, making sure it is easily accessible for future maintenance. For secure installation, use a stud or other structural support.
- Prepare the Conduit and Box: Measure the conduit and cut it to the appropriate length for connecting to the junction box. Use ENT specific fittings for a seamless connection.
- Sécuriser la boîte : Attach the junction box to the mounting surface using screws or bolts, ensuring it is level and secure.
- Connect the Conduit: Insert the ENT conduit into the box openings and fasten with appropriate connectors. Make sure all connections are tight and follow NEC (National Electrical Code) requirements.
- Wire and Close: Inside the box, connect and organize the wiring as required, using wire nuts to cap connections. Carefully fold wires into the box and secure the cover tightly to prevent tampering and protect from dust or moisture.
Safety Tips
Couper l'alimentation : Always switch off power at the circuit breaker before handling electrical components to prevent shock or injury.
Utilisez des outils appropriés : Use tools designed for electrical work, such as insulated screwdrivers and wire strippers, to enhance safety.
Avoid Overcrowding: Ensure that the box is large enough for all wires and connectors. An overcrowded box can lead to overheating and increases fire risk.
Verify Grounding: Proper grounding is essential to prevent electrical shocks and ensure that all connections are secure.
Pulling Wire Through ENT Conduit: Essential Techniques
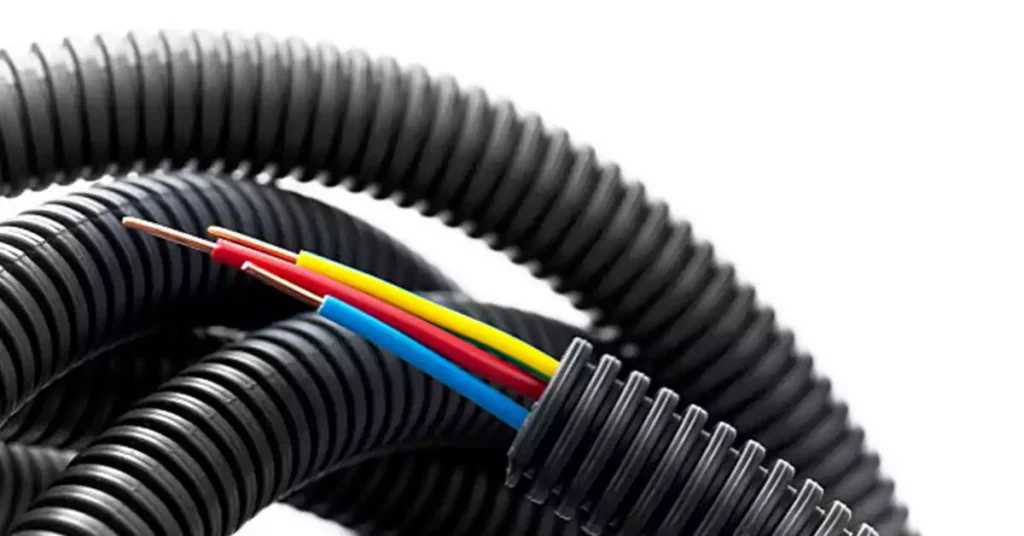
Pulling wire through Electrical Nonmetallic Tubing (ENT) conduit requires careful planning and technique to ensure a smooth, safe installation. ENT conduit, known for its flexibility and lightweight design, can simplify wiring runs, but it also requires specific handling to avoid wire damage or snags. This guide will briefly cover key techniques and tools for efficiently pulling wire through ENT conduit.
Key Techniques for Pulling Wire Through ENT Conduit
- Prepare the Conduit Path
Start by ensuring the conduit is free of obstructions and tightly secured along its path. Properly spaced clamps help keep the conduit straight and prevent unwanted bends or kinks during wire pulling. - Use Pulling Lubricant
Applying a wire-pulling lubricant can reduce friction, especially on longer or complex runs. This helps the wires slide smoothly through the conduit without risking insulation damage. - Select the Right Tools
Use a fish tape or pull line to guide wires through the conduit. Fish tape is particularly useful for shorter runs, while pull lines work well for longer distances or bends. Attach the wires securely and feed them slowly to avoid twists and tangles. - Pull Gently and Consistently
Apply steady, even pressure when pulling to prevent wire binding. If resistance increases, stop and check for obstructions or tight bends in the conduit that may need adjusting. - Avoid Overloading the Conduit
Refer to NEC guidelines to ensure the conduit size matches the wire fill requirements. Overloading can lead to overheating and make future maintenance difficult.
For a more detailed about the wire pulling, please refer to the previous article for how to pull wire through the conduit.
Conduit Fill Calculator: Determining Maximum Capacity
When planning electrical conduit installations, calculating conduit fill is essential to ensure compliance with safety codes and to prevent issues related to overheating or overcrowded wires. A conduit fill calculator helps electricians and installers determine the maximum capacity of wires for each conduit size, factoring in wire type, size, and insulation. Here’s a quick overview of how conduit fill calculations work and why they matter.
Key Points for Using a Conduit Fill Calculator
- Calculate Based on Conduit Type and Size
Different conduit materials (like PVC, ENT, and metal) have varying fill capacities, which change depending on the conduit’s diameter. Conduit fill calculators simplify this by providing tailored calculations for each type and size. - Consider Wire Size and Insulation Type
Wire gauge (size) and insulation type affect how much space each wire occupies within the conduit. Calculators take these into account to ensure wires aren’t packed too tightly, reducing the risk of overheating. - Comply with NEC Guidelines
Conduit fill calculators help ensure compliance with National Electrical Code (NEC) guidelines, which specify maximum fill percentages based on the number of wires. Following these guidelines is critical for a safe and functional installation. - Prevent Overheating and Facilitate Maintenance
Proper conduit fill not only helps in preventing wire insulation damage but also makes future repairs and upgrades easier by allowing sufficient room for wire movement.
For a detailed guide on using a conduit fill calculator and practical examples of conduit fill calculations, please refer to the previous post how to calculating conduit fill.
Repairing Damaged ENT Conduit: Patching Techniques
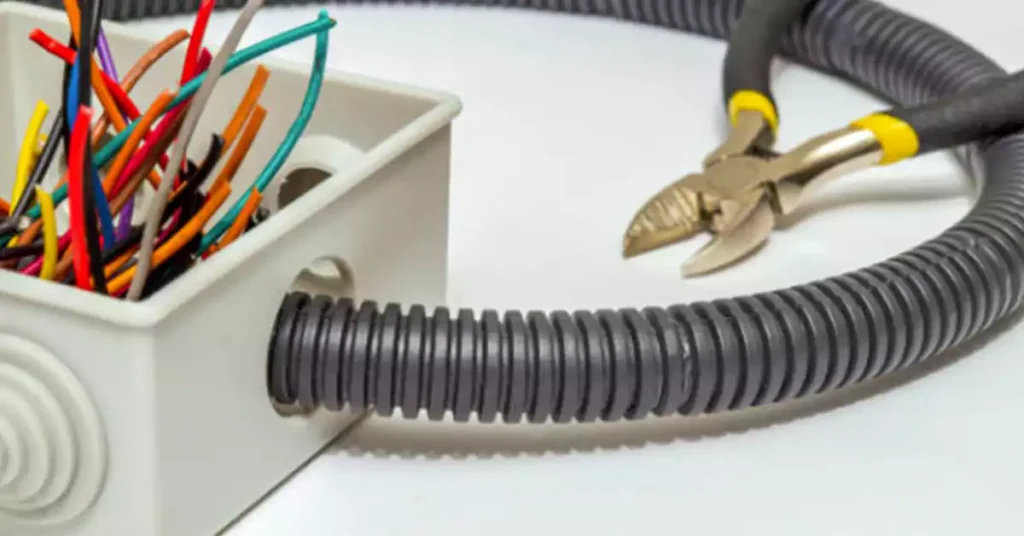
Étapes clés pour réparer un conduit ORL endommagé
- Évaluation des dommages
Commencez par évaluer la gravité des dommages. Les fissures ou les rayures superficielles mineures peuvent souvent être traitées avec un produit d'étanchéité à base d'époxy, conçu pour des réparations rapides et sûres sur de petites surfaces. Pour les coupures ou les cassures plus importantes, des manchons de réparation ou du ruban adhésif spécial peuvent être nécessaires, tandis que les sections gravement endommagées doivent généralement être remplacées pour garantir une fiabilité à long terme.
- Précautions de sécurité
La sécurité est primordiale lorsque vous travaillez sur un composant électrique. Avant de commencer les réparations, débranchez l'alimentation au niveau du disjoncteur pour éviter tout risque d'électrocution. L'utilisation de gants isolants et d'une protection des yeux minimise encore davantage le risque de blessure pendant les réparations, en particulier lors de la manipulation d'arêtes vives ou d'adhésifs.
- Techniques de patching
Différentes techniques sont utilisées en fonction de l’étendue des dégâts :
Réparation de mastic époxy (pour les petites fissures et rayures) : Nettoyez soigneusement la zone endommagée, appliquez uniformément le mastic époxy et laissez-le durcir complètement pour obtenir une étanchéité solide et permanente.
Manchon de réparation de conduit (pour les coupures ou ruptures plus importantes) : Retirez la section endommagée, placez le manchon sur la zone et fixez-le conformément aux instructions du fabricant, en assurant une étanchéité parfaite aux deux extrémités.
Réparation de ruban adhésif pour conduits (pour les espaces plus grands) : Enveloppez la zone endommagée avec des couches de ruban PVC spécialisé, créant ainsi un joint superposé et étanche qui renforce l'intégrité structurelle.
- Inspections après réparation
Une fois la réparation terminée, effectuez une inspection visuelle pour vérifier que toutes les connexions sont sécurisées et qu'il n'y a pas de lacunes ou de faiblesses dans la zone réparée. Si nécessaire, consultez un électricien pour tester la fonctionnalité de la réparation, en vous assurant qu'elle répond aux normes de sécurité.
Guide d'achat des conduits ORL
Lors de l’achat d’un conduit ORL, il est important de prendre en compte les facteurs suivants :
Qualité et conformité : Lors du choix de l'ENT, assurez-vous qu'il respecte les réglementations locales ou internationales en vigueur en matière de sécurité et de qualité.
Taille et longueur : Déterminez la taille et la longueur appropriées du conduit nécessaire à votre application spécifique.
Notation: Assurez-vous que le conduit est conçu pour l’application prévue, comme une utilisation intérieure ou extérieure.
Coût: Comparez les prix de différents fournisseurs tout en prenant en compte la qualité et la conformité du conduit.
Considérations relatives à la marque : la réputation de la marque peut être un facteur important dans votre décision d’achat. Recherchez des marques établies ayant fait leurs preuves dans la fabrication de produits électriques de haute qualité. Envisagez des marques connues pour leur expertise, leur expérience et leur engagement envers l’excellence des produits.
Tendances futures dans la technologie des conduits flexibles en PVC
La technologie des conduits flexibles en PVC évolue rapidement, avec de nouvelles avancées répondant aux demandes croissantes d'installations électriques plus sûres, plus intelligentes et plus durables. À mesure que les bâtiments et les infrastructures adoptent des exigences modernes, les conduits flexibles en PVC sont transformés pour répondre à ces défis grâce à des innovations dans la science des matériaux, la résilience environnementale et l'intégration aux technologies intelligentes.
- Normes de sécurité incendie renforcées
La sécurité incendie devenant un aspect de plus en plus critique des codes de construction, des conduits flexibles en PVC sont développés avec des propriétés ignifuges améliorées. Des revêtements et matériaux résistants au feu avancés sont en cours d'élaboration pour fournir des niveaux de sécurité supplémentaires, contribuant ainsi à ralentir la propagation du feu dans les environnements sensibles. - Intégration de technologies intelligentes
L'avenir des conduits flexibles en PVC comprend une intégration transparente avec des systèmes intelligents pour une surveillance et un diagnostic en temps réel. Les conduits du futur pourraient être dotés de capteurs intégrés capables de suivre des conditions telles que la température et le flux de courant, qui alimenteraient directement les systèmes de gestion de bâtiments intelligents. Cette capacité améliore non seulement la sécurité, mais permet également une maintenance prédictive, réduisant les temps d'arrêt et améliorant l'efficacité énergétique. - Durabilité et responsabilité environnementale
La durabilité environnementale transforme la production de PVC, avec une évolution vers des matériaux et des processus recyclables et respectueux de l'environnement. Les efforts sont orientés vers des composés de PVC plus facilement recyclables, réduisant ainsi les déchets et favorisant une utilisation responsable des ressources. Certains fabricants explorent même des alternatives au PVC biosourcé ou à faible impact, permettant des installations respectueuses de l'environnement. - Durabilité et résistance aux intempéries avancées
Les installations devant de plus en plus résister aux intempéries et aux éléments extérieurs, les conduits flexibles en PVC sont optimisés pour une meilleure résistance aux UV et à la corrosion. Ces avancées garantissent que les conduits peuvent résister à la fois aux impacts physiques et à l'usure environnementale, offrant des performances fiables même dans des conditions difficiles. - Personnalisation et solutions à la demande
La technologie des conduits flexibles en PVC évolue vers des options de personnalisation plus nombreuses, soutenues par des techniques de fabrication avancées comme l'impression 3D. Cela permet aux entrepreneurs de produire des formes et des tailles de conduits spécialisées selon les besoins, simplifiant ainsi le processus d'installation et réduisant le gaspillage de matériaux. La personnalisation permet d'adapter les solutions aux besoins uniques des bâtiments et aux configurations électriques complexes.
Conclusion
Dans l'ensemble, le conduit ENT offre une solution fiable et flexible pour protéger le câblage électrique dans diverses applications. Avec ses excellentes performances physiques et chimiques, il pourrait constituer un bon choix pour tous les systèmes électriques résidentiels ou commerciaux. Lors de la sélection d'un conduit ORL, tenez compte de la taille, de la longueur, du code de conformité, des exigences du projet et d'autres facteurs nécessaires pour garantir qu'il répond à vos besoins spécifiques.
C'est tout pour l'article. Si vous avez des questions sur le conduit électrique ORL, n'hésitez pas à remplir le formulaire de contact ou à nous écrire un e-mail.


