
Table des matières
L'installation de boîtiers électriques est une étape cruciale dans les projets de câblage électrique. Ces boîtiers servent d'enceintes pour les connexions électriques, garantissant sécurité, organisation et accès facile pour la maintenance. Ce guide d'installation complet couvrira différents types de boîtiers électriques, y compris les variantes en PVC et en métal, en fournissant des instructions étape par étape et les meilleures pratiques pour leur installation. En suivant ces directives, vous pouvez garantir une installation électrique sûre et efficace.
Présentation des boîtes électriques en PVC :
Coffrets électriquesLes boîtiers de jonction, également appelés boîtiers ou enceintes, sont des composants essentiels des systèmes électriques. Ils servent de boîtiers de protection pour les connexions électriques, empêchant tout contact accidentel, minimisant les risques d'incendie et facilitant la maintenance et le dépannage. Les boîtiers électriques sont conçus pour abriter divers appareils électriques tels que des interrupteurs, des prises, des disjoncteurs ou des épissures de fils.
Définition et fonction des boîtes électriques :
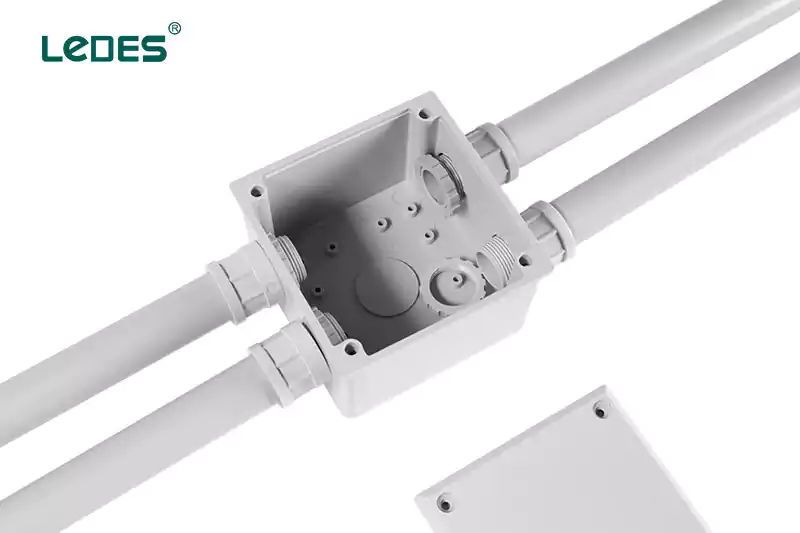
Un boîtier électrique est un contenant composé de matériaux conducteurs ou non conducteurs, conçu pour enfermer les connexions électriques de manière sécurisée. Son objectif principal est de protéger les connexions et les composants des câbles électriques contre les dommages physiques, les dangers environnementaux et les accès non autorisés. Les boîtiers électriques fournissent une plate-forme stable pour le montage d'appareils électriques et garantissent la conformité aux codes électriques et aux réglementations de sécurité.
Importance d'une installation correcte :
Une installation correcte des boîtiers électriques est de la plus haute importance pour plusieurs raisons :
1. Sécurité :
L'installation adéquate de boîtiers électriques minimise le risque de décharges électriques, de courts-circuits et d'incendies causés par des fils exposés ou mal connectés. Elle fournit une barrière sécurisée entre les composants électriques sous tension et l'environnement environnant.
2. Organisation :
Les boîtiers électriques favorisent l'organisation en contenant les fils et les composants dans un espace désigné. Cela facilite le dépannage, les réparations et les modifications et minimise les risques de dommages accidentels au système électrique.
3. Conformité aux codes :
Les codes et réglementations électriques imposent des exigences spécifiques pour l'installation de boîtiers électriques. Le respect de ces codes garantit que le système électrique répond aux normes de sécurité et est conforme aux réglementations locales, régionales et nationales.
Exigences du code et considérations de sécurité :
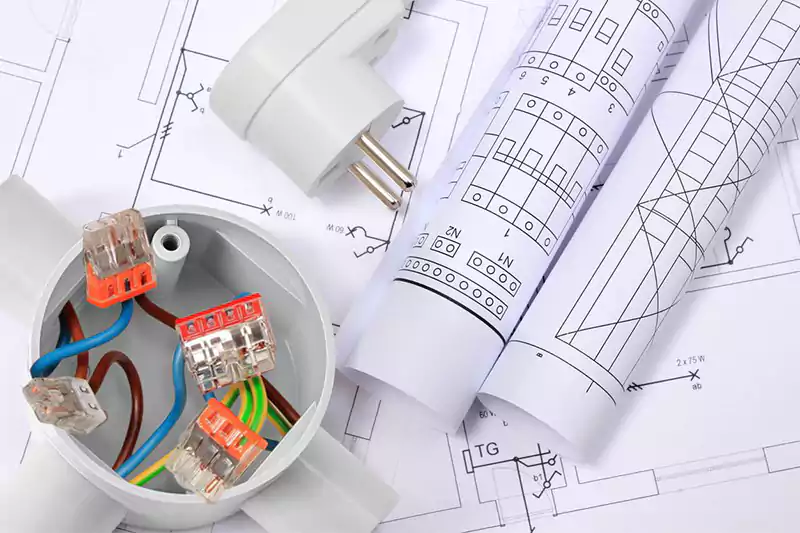
Lors de l'installation de boîtiers électriques, il est essentiel de respecter les codes électriques et les règles de sécurité en vigueur. Ces règles peuvent inclure :
1. Taille et capacité de la boîte :
Les codes électriques précisent les exigences minimales en matière de taille et de capacité des boîtiers électriques en fonction du nombre et de la taille des fils et des appareils à loger à l'intérieur. Le respect de ces exigences évite le surpeuplement, réduit l'accumulation de chaleur et garantit un espace suffisant pour des connexions de fils appropriées.
2. Mise à la terre :
Les boîtiers électriques doivent être correctement mis à la terre pour établir un chemin sûr pour les courants électriques et protéger contre les défauts électriques. Les exigences de mise à la terre varient en fonction du type de boîtier électrique et de l'application spécifique.
3. Emplacement et accessibilité de la boîte :
Les codes électriques peuvent dicter l'emplacement et l'accessibilité appropriés des boîtiers électriques. Par exemple, ils peuvent exiger certains dégagements par rapport aux matériaux combustibles ou spécifier la distance minimale entre les boîtiers et d'autres composants.
4. Matériau de la boîte :
Les boîtiers électriques sont disponibles dans divers matériaux tels que le métal, le PVC ou la fibre de verre. Chaque matériau possède des propriétés différentes et peut convenir à des applications spécifiques. Les codes peuvent spécifier les matériaux approuvés pour différents environnements et conditions électriques.
5. Couvertures de boîtes :
L'installation de couvercles de boîtier appropriés est essentielle pour protéger les connexions électriques contre tout contact accidentel, empêcher l'accumulation de poussière ou de débris et respecter les normes de sécurité. Le type de couvercle requis peut varier en fonction du type de boîtier et de l'application spécifique.
Types de boîtes électriques en PVC couramment utilisées :
Lors de l'installation de systèmes électriques, de nombreux types de boîtiers électriques différents sont généralement utilisés, mais leurs utilisations et exigences d'installation sont différentes. Lorsque vous les utilisez, vous devez choisir le bon type de boîtier électrique et suivre la bonne méthode d'installation. Voici quelques types courants de boîtiers électriques.
Boîte adaptable :
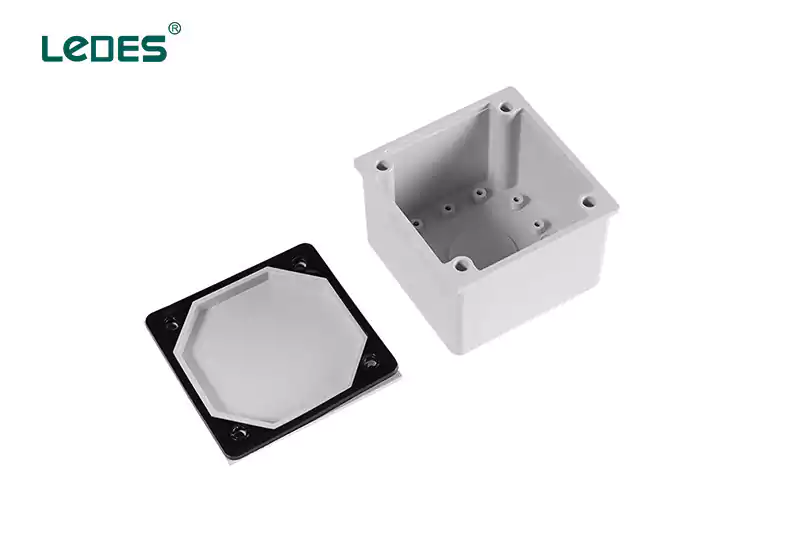
Un boîtier adaptable, également appelé boîtier utilitaire ou boîtier pratique, est un boîtier électrique polyvalent utilisé à diverses fins. Il est généralement de petite taille et comporte plusieurs ouvertures pour s'adapter à différentes configurations de câblage. Les boîtiers adaptables sont couramment utilisés pour les luminaires, les interrupteurs, les prises et les installations de câblage basse tension.
Boîte de jonction :
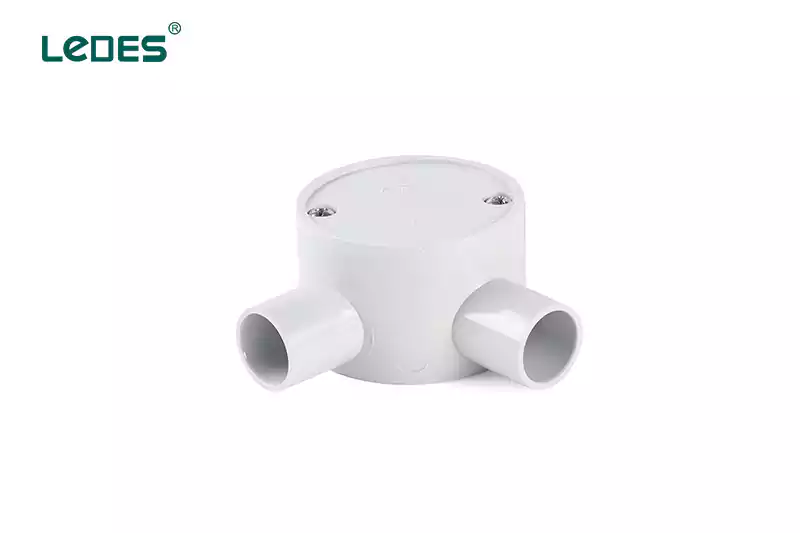
Une boîte de jonction sert de plaque tournante centrale pour les connexions électriques. Son objectif principal est de fournir un boîtier sécurisé pour les épissures ou les connexions de fils, garantissant ainsi leur protection et leur organisation. Les boîtes de jonction sont disponibles dans différentes tailles et configurations, et elles sont couramment utilisées dans les applications résidentielles, commerciales et industrielles.
Boîtier de commutation :

Un boîtier de commutation est spécialement conçu pour abriter des interrupteurs. Il fournit un boîtier sécurisé pour les connexions électriques associées à l'interrupteur, telles que le câblage et les bornes. Les boîtiers de commutation sont disponibles en différentes tailles et configurations pour s'adapter à différents types d'interrupteurs, notamment les interrupteurs unipolaires, bipolaires ou à trois voies.
Boîte de sortie :
Un boîtier de prise de courant, également appelé boîtier de prise de courant, est conçu pour abriter des prises électriques ou des réceptacles. Ces boîtiers offrent un boîtier sûr et protégé pour les connexions de câblage associées aux prises. Les boîtiers de prise de courant sont disponibles en différentes tailles et configurations pour s'adapter à différents types de prises, telles que les prises standard, les prises GFCI ou les prises USB.
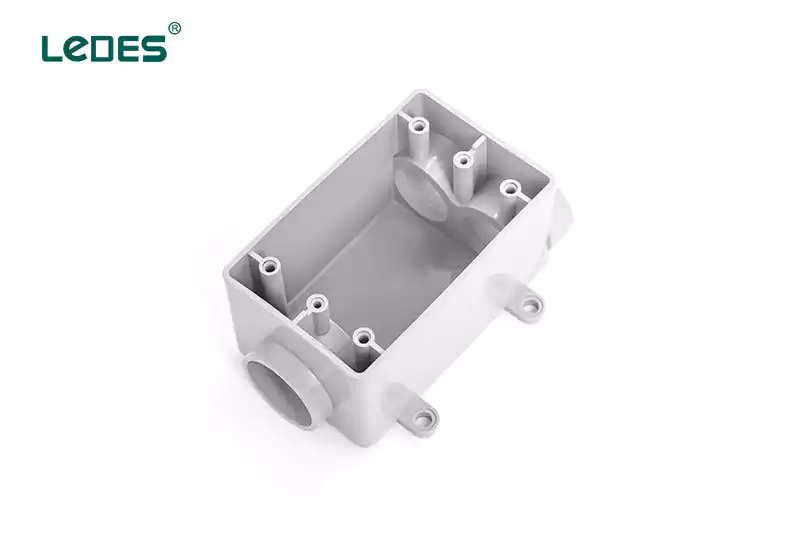
Un coffret électrique, également appelé coffret multi-coffret, est un coffret électrique plus grand qui peut accueillir plusieurs interrupteurs ou prises dans une seule unité. Les coffrets électriques sont couramment utilisés dans les zones où plusieurs interrupteurs ou prises doivent être installés ensemble, comme dans les cuisines ou les salons. Ils offrent une solution pratique et organisée pour le câblage de plusieurs appareils dans un seul endroit.
Coffret de plafond :
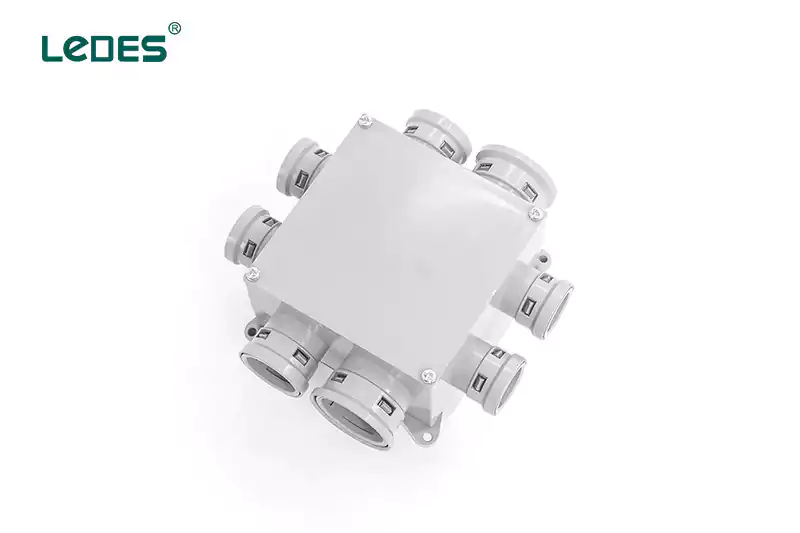
Un boîtier de plafond est spécialement conçu pour les connexions électriques dans les installations au plafond. Il est généralement utilisé pour le montage de luminaires, de ventilateurs de plafond ou d'autres appareils électriques suspendus. Les boîtiers de plafond sont conçus pour supporter le poids de l'appareil et fournir un boîtier sécurisé pour les connexions de câblage.
Boîte de sol :
Un boîtier de sol est un boîtier électrique conçu pour les installations dans le sol. Il offre une solution pratique et sûre pour les prises de courant, les ports de données ou d'autres connexions électriques dans les zones où un accès au sol est nécessaire. Les boîtiers de sol sont couramment utilisés dans les environnements commerciaux, tels que les bureaux, les salles de conférence ou les espaces publics.
Installation de coffret électrique
Différents types de boîtiers peuvent nécessiter différentes étapes et exigences d'installation. Il est donc toujours recommandé de consulter un électricien professionnel pour obtenir de l'aide. Voici quelques directives d'installation générales auxquelles vous pouvez vous référer :
Installation pour boîtiers adaptables :
Applications et environnements appropriés :
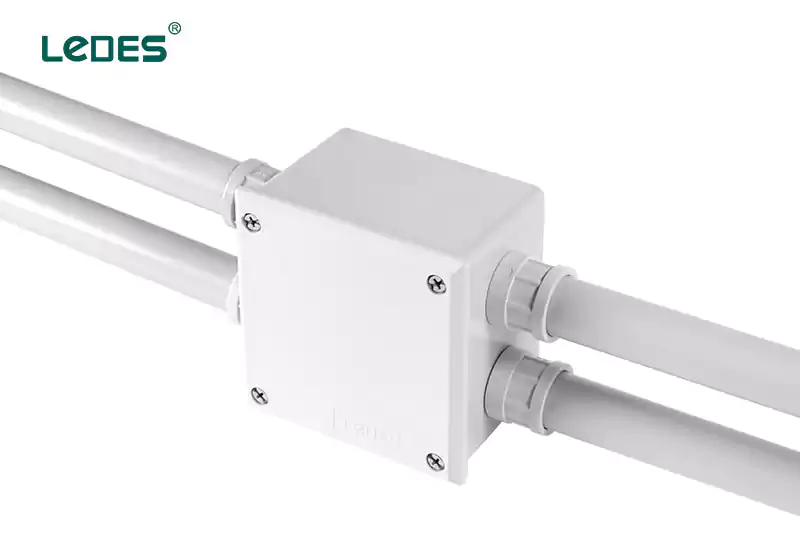
Bâtiments commerciaux : les boîtiers adaptables sont couramment utilisés dans les bâtiments commerciaux, tels que les bureaux, les magasins de détail ou les hôpitaux, pour gérer les connexions électriques des systèmes d'éclairage, des prises de courant ou du câblage de données.
Contextes industriels : Ils trouvent des applications dans les environnements industriels, notamment les usines et les installations de fabrication, pour organiser les connexions électriques des machines, des panneaux de commande ou des commandes de moteurs.
Installations résidentielles : Des boîtiers adaptables peuvent être installés dans les maisons pour gérer les connexions électriques dans les pièces, les cuisines ou les espaces extérieurs, offrant une solution flexible pour les modifications ou ajouts futurs.
Comment installer les boîtiers adaptables : 8 étapes
- Sélectionnez l'emplacement : Choisissez un emplacement approprié pour le boîtier adaptable, en tenant compte de l’accessibilité, des exigences d’acheminement des câbles et de la conformité aux codes et réglementations électriques.
- Préparez la surface de montage : Assurez-vous que la surface de montage, comme un mur ou un plafond, est solide et offre un support adéquat au boîtier. Effectuez les préparatifs nécessaires, comme le perçage de trous ou l'installation de supports de montage.
- Installer les presse-étoupes d'entrée de câble : Selon la conception du boîtier, installez des presse-étoupes ou des conduits d'entrée de câbles aux emplacements appropriés pour acheminer les câbles dans le boîtier.
- Monter la boîte : Fixez le boîtier adaptable sur la surface de montage à l'aide de vis ou de supports de montage adaptés. Assurez-vous qu'il est solidement fixé en place.
- Connectez les câbles : Acheminez les câbles à travers les points d'entrée de câbles ou les conduits et effectuez les connexions électriques nécessaires à l'intérieur du boîtier conformément au schéma de câblage ou aux exigences du projet.
- Sécuriser et organiser les câbles : Utilisez des serre-câbles internes ou des attaches de câble pour fixer et organiser les câbles à l'intérieur du boîtier, évitant ainsi toute tension ou tout dommage.
- Fermez la boîte : Placez le couvercle du boîtier sur le boîtier et fixez-le à l'aide des attaches ou des mécanismes de verrouillage fournis. Assurez-vous que le couvercle est correctement fermé et scellé.
- Tester et vérifier : Une fois l’installation terminée, effectuez des procédures de test et de vérification pour garantir des connexions électriques et une fonctionnalité appropriées.
Comment installer la boîte de jonction : 6 étapes

- Sélection de boîte : Choisissez une boîte de jonction adaptée à l'application spécifique. Tenez compte de facteurs tels que la taille, le matériau (par exemple, plastique ou métal) et le nombre de connexions de fils nécessaires. Assurez-vous que la boîte est conforme aux codes et réglementations électriques en vigueur.
- Emplacement: Déterminez l'emplacement approprié de la boîte de jonction. Elle doit être facilement accessible pour les opérations d'entretien et de réparation ultérieures. Respectez les codes électriques locaux concernant l'emplacement, les exigences de dégagement et la proximité d'autres objets ou matériaux.
- Montage: Montez solidement la boîte de jonction sur une surface appropriée, comme un mur ou un plafond. Utilisez le matériel approprié, comme des vis ou des chevilles, pour garantir une installation sûre et stable. La boîte doit être au ras de la surface et solidement fixée pour éviter tout mouvement.
- Connexions de câblage : Acheminez soigneusement les fils électriques dans la boîte de jonction. Dénudez les fils pour obtenir une longueur appropriée pour les connexions. Suivez les techniques d'épissure de fils appropriées (par exemple, en utilisant des écrous de fil) pour joindre les fils en toute sécurité. Assurez-vous que toutes les connexions sont correctement isolées et protégées.
- Mise à la terre : Si les codes électriques l'exigent, assurez-vous que la mise à la terre est adéquate dans la boîte de jonction. Connectez les fils de terre aux points de mise à la terre désignés dans la boîte, tels que les vis ou les bornes de mise à la terre. Une mise à la terre adéquate permet de se protéger contre les pannes électriques et d'assurer la sécurité.
- Pose du couvercle : Une fois toutes les connexions de câblage effectuées, fixez solidement la plaque de recouvrement ou le couvercle à la boîte de jonction. Le couvercle doit être compatible avec la boîte et assurer une étanchéité parfaite. Cela protège les fils et évite tout contact accidentel.
11 étapes pour installer les boîtiers d'interrupteurs, de prises et de groupe :
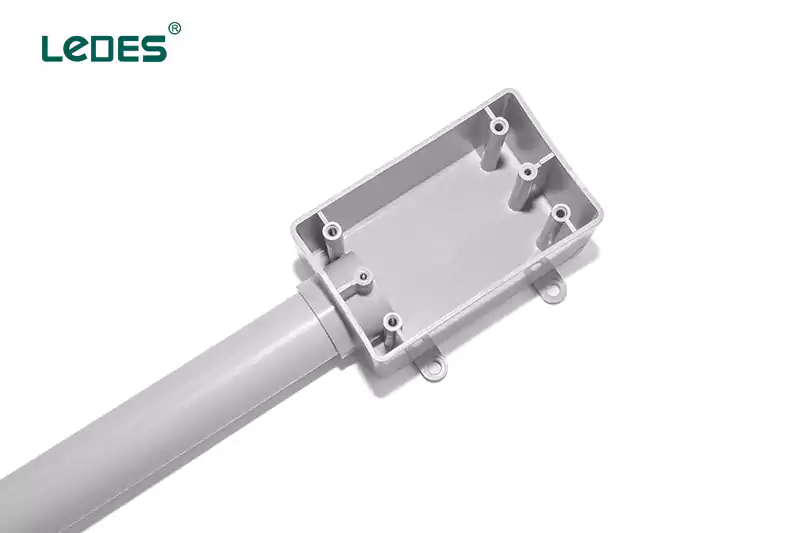
Le processus d'installation des boîtiers de commutation et des boîtes de sortie présente certaines similitudes, mais il existe également des différences importantes. Voici les étapes d'installation combinées pour les deux types.
- Couper l'alimentation : Avant de commencer tout travail électrique, coupez l'alimentation du circuit où sera installé le boîtier. Pour ce faire, vous pouvez couper le courant en désactivant le disjoncteur ou en retirant le fusible correspondant.
- Choisissez l'emplacement : Choisissez un emplacement approprié sur le mur ou au plafond pour le boîtier, en tenant compte de la fonctionnalité et de l'accessibilité. Assurez-vous de respecter les codes et réglementations électriques.
- Marquer la position : Utilisez un crayon ou un marqueur pour marquer le contour de la boîte sur le mur ou le plafond. Assurez-vous qu'elle est de niveau et correctement alignée.
- Couper l'ouverture : À l'aide d'un cutter ou d'une scie à cloison sèche, découpez soigneusement le long du contour marqué pour créer une ouverture pour le boîtier. Veillez à ne pas couper les fils électriques derrière le mur ou le plafond.
- Monter la boîte :
- Boîtier de commutation : insérez le boîtier de commutation dans l'ouverture et assurez-vous qu'il est bien fixé. Fixez le boîtier au mur à l'aide de vis ou de clous. Assurez-vous que le boîtier est au ras de la surface du mur.
- Boîtier de sortie : insérez le boîtier de sortie dans l'ouverture et assurez-vous qu'il est bien fixé. Fixez le boîtier au mur avec des vis ou en utilisant des ailes de montage réglables. Assurez-vous que le boîtier est au ras de la surface du mur.
- Boîtier de raccordement : insérez le boîtier de raccordement dans l'ouverture et assurez-vous qu'il est bien fixé. Pour les boîtiers fixés au mur, fixez-le aux montants du mur ou à l'aide d'ailettes de montage réglables. Pour les boîtiers fixés au plafond, utilisez des supports ou des systèmes de support appropriés pour fixer le boîtier.
- Préparez le câblage : Si nécessaire, dénudez les extrémités des fils électriques pour exposer les conducteurs à connecter. Assurez-vous que les fils sont suffisamment longs pour atteindre le boîtier.
- Connectez les fils :
- Boîtier de commutation : connectez le fil sous tension (ligne) et le fil commuté aux bornes appropriées du commutateur à l'intérieur du boîtier. En général, les fils noirs sont connectés aux bornes de couleur laiton.
- Boîtier de sortie : connectez les fils sous tension (ligne), neutre et de terre aux bornes correspondantes de la prise à l'intérieur du boîtier. En général, les fils noirs sont connectés aux bornes de couleur laiton, les fils blancs aux bornes de couleur argent et les fils verts ou en cuivre nu à la vis de mise à la terre verte.
- Boîtier de raccordement : connectez les fils électriques selon les besoins de votre application spécifique. Cela peut impliquer de raccorder des fils ensemble à l'aide de connecteurs de fils ou d'établir des connexions à des appareils ou des luminaires à l'intérieur du boîtier.
- Sécuriser les appareils ou les luminaires :
- Boîtier de commutation : fixez l'interrupteur au boîtier de commutation en l'alignant avec les trous de vis et en serrant les vis. Assurez-vous que l'interrupteur est solidement fixé et ne bouge pas.
- Boîtier de sortie : fixez la prise au boîtier de sortie en l'alignant avec les trous de vis et en serrant les vis. Assurez-vous que la prise est solidement fixée et ne bouge pas.
- Boîtier de raccordement : installez les appareils ou les luminaires dans le boîtier de raccordement conformément aux instructions du fabricant. Utilisez des vis ou d'autres éléments de fixation fournis pour fixer les appareils en place.
- Installer le couvercle du boîtier :
- Boîtier de commutation : installez un couvercle de plaque d'interrupteur sur l'interrupteur en l'alignant avec les trous de vis et en serrant les vis. Assurez-vous que le couvercle est droit et de niveau.
- Boîtier de sortie : installez un couvercle de plaque de sortie sur la prise en l'alignant avec les trous de vis et en serrant les vis. Assurez-vous que le couvercle est droit et de niveau.
- Coffret électrique : installez un couvercle de coffret approprié. Il peut s'agir d'une plaque de recouvrement vierge pour les coffrets électriques non utilisés ou de couvercles spécifiques pour des appareils tels que des interrupteurs ou des prises.
- Allumer l'appareil : Une fois le boîtier, les appareils et les connexions de câblage solidement installés, remettez le courant en marche en activant le disjoncteur ou en remplaçant le fusible.
- Testez les connexions : Testez les interrupteurs, les prises ou les appareils à l’intérieur des boîtes pour vous assurer qu’ils fonctionnent correctement.
11 étapes pour installer les boîtiers de plafond :
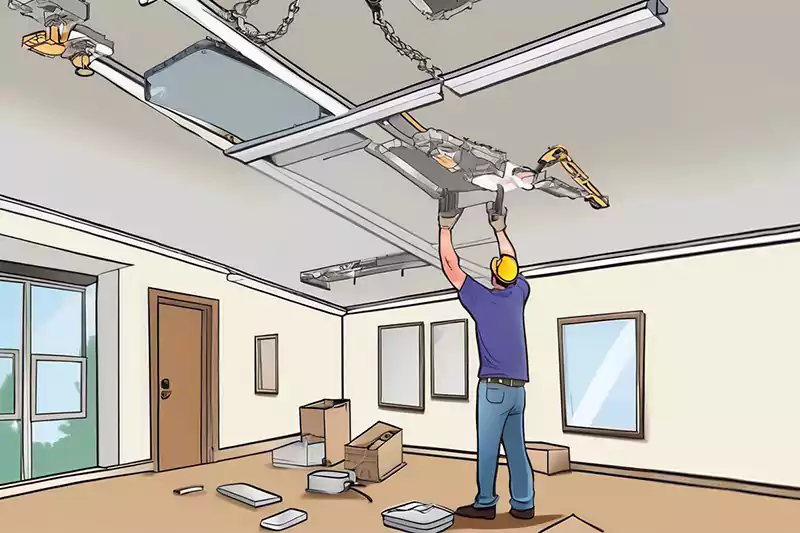
- Couper l'alimentation : Avant de commencer tout travail électrique, coupez l'alimentation du circuit où sera installé le boîtier de plafond. Pour ce faire, coupez le disjoncteur ou retirez le fusible correspondant.
- Choisissez l'emplacement : Déterminez l'emplacement souhaité au plafond pour le boîtier. Tenez compte du type d'appareil ou de luminaire qui sera installé et assurez-vous que la structure du plafond est correctement soutenue.
- Marquer la position : Utilisez un crayon ou un marqueur pour marquer le contour du boîtier de plafond sur la surface du plafond. Assurez-vous qu'il est centré et aligné correctement.
- Couper l'ouverture : À l'aide d'un détecteur de montants, localisez les solives de plafond ou les supports structurels autour de la position marquée. Si nécessaire, utilisez un couteau utilitaire ou une scie à cloison sèche pour couper soigneusement le long du contour marqué, en vous assurant que l'ouverture est suffisamment large pour accueillir la taille du boîtier de plafond.
- Monter la boîte : Insérez le boîtier de plafond dans l'ouverture et assurez-vous qu'il est bien fixé. Pour les boîtiers métalliques, fixez le boîtier aux solives ou aux supports du plafond à l'aide de vis ou de clous à travers les trous de montage ou les supports fournis. Pour les boîtiers en plastique ou en PVC, utilisez des supports de montage réglables ou d'autres méthodes appropriées pour fixer le boîtier à la structure du plafond.
- Préparez le câblage : Si nécessaire, dénudez les extrémités des fils électriques pour exposer les conducteurs à connecter. Assurez-vous que les fils sont suffisamment longs pour atteindre le boîtier de plafond.
- Connectez les fils : À l'intérieur du boîtier de plafond, connectez les fils électriques selon les besoins de votre application spécifique. Cela peut impliquer de raccorder des fils ensemble à l'aide de connecteurs de fils ou d'établir des connexions au luminaire ou à l'appareil qui sera installé.
- Fixer le luminaire ou l'appareil : Si vous installez un plafonnier ou un ventilateur, suivez les instructions du fabricant pour fixer et sécuriser le luminaire au boîtier de plafond. En règle générale, cela implique d'aligner le support de montage du luminaire avec les vis ou les trous de montage fournis sur le boîtier et de les serrer fermement.
- Installer le couvercle du boîtier : Une fois tous les raccordements de câbles et l'installation des luminaires terminés, installez le couvercle de boîtier approprié. Il peut s'agir d'une plaque de recouvrement vierge pour les boîtiers de plafond inutilisés ou de couvercles spécifiques conçus pour le type de luminaire ou d'appareil installé.
- Allumer l'appareil : Une fois le boîtier de plafond, les connexions de câblage et les installations de luminaires sécurisés, remettez le courant en marche en activant le disjoncteur ou en remplaçant le fusible.
- Testez les connexions : Testez le luminaire ou l’appareil de plafond pour vous assurer qu’il fonctionne correctement.
Comment installer le boîtier de sol : 5 étapes
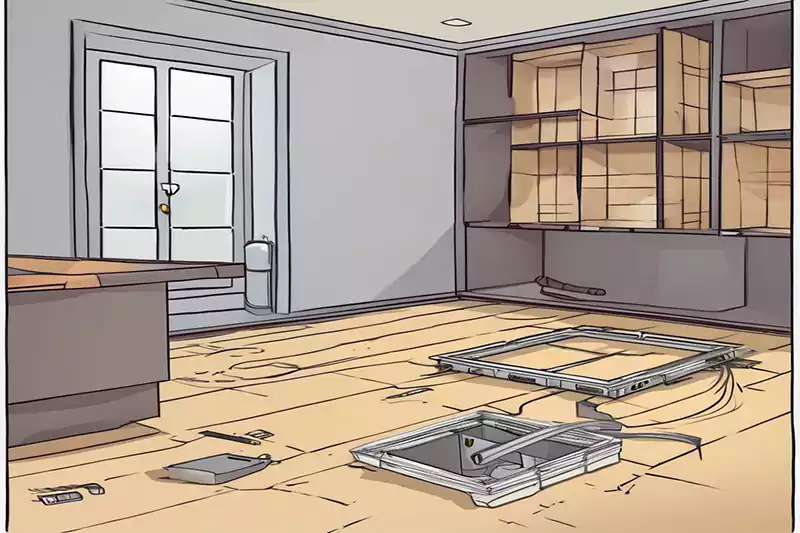
Le processus d'installation des boîtes de sol est similaire à celui des boîtes de sortie. Mais il existe quelques différences, en voici quelques-unes des principales distinctions :
- Montage: Les boîtes de sortie sont généralement montées sur la surface d'un mur, tandis que les boîtes de sol sont encastrées dans le sol. Les méthodes de montage et le matériel utilisé diffèrent entre les deux. 2. Les boîtes de sortie peuvent être fixées aux poteaux muraux ou à d'autres supports structurels, tandis que les boîtes de sol ont souvent des supports réglables ou des mécanismes pour les fixer en place dans le sol.
- Orientation: Les boîtes de sortie sont installées verticalement sur le mur, tandis que les boîtes de sol sont installées horizontalement dans le sol. Cette différence d'orientation affecte les connexions de câblage et le positionnement des appareils ou des prises.
- Accessibilité: Les boîtes de sortie sont généralement plus accessibles pour l'installation et l'entretien car elles sont montées à une hauteur pratique sur le mur. Les boîtes de sol, en revanche, nécessitent de découper une ouverture dans le sol et peuvent impliquer de travailler dans un espace plus confiné.
- Couvertures de boîtes : Les couvercles de boîtier utilisés pour les boîtes de sortie et les boîtes de sol sont conçus différemment. Les couvercles de boîtier de sortie peuvent inclure des plaques frontales ou des plaques de recouvrement qui correspondent à la surface du mur environnant. Les couvercles de boîtier de sol sont généralement au ras de la surface du sol lorsqu'ils sont fermés pour offrir une surface de marche sûre et plane.
- Considérations relatives au câblage : Bien que les boîtes de sortie et les boîtes de sol nécessitent des connexions de câblage appropriées, les configurations de câblage peuvent varier. Les boîtes de sortie sont principalement utilisées pour les prises et les interrupteurs, tandis que les boîtes de sol peuvent accueillir une plus large gamme d'appareils et de connexions, notamment des prises de courant, des ports de données ou des connexions AV.
N'oubliez pas de suivre les instructions du fabricant et de respecter les codes et réglementations électriques locaux lors de l'installation de ce type de boîtiers. Si vous n'êtes pas sûr ou mal à l'aise avec les travaux électriques, il est recommandé de demander l'aide d'un électricien agréé.
4 facteurs à prendre en compte avant l'installation de boîtiers électriques
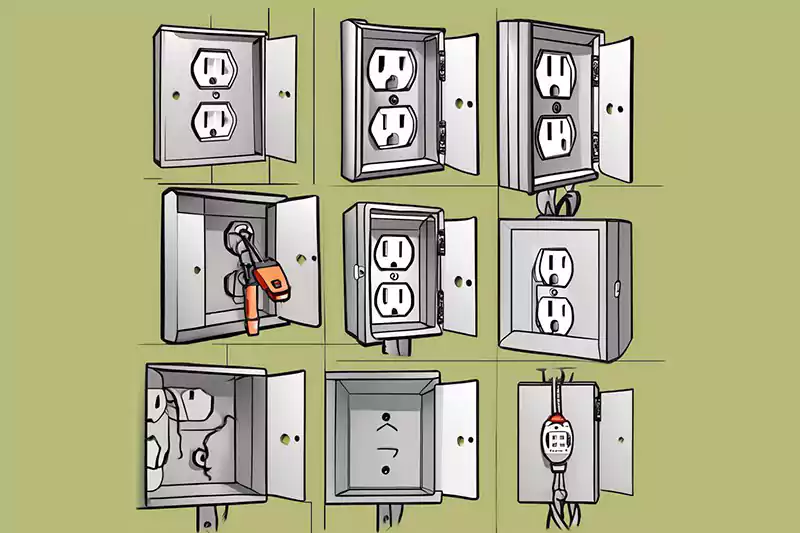
En ce qui concerne les facteurs d'installation de ces boîtiers couramment utilisés, plusieurs considérations clés doivent être prises en compte. Voici les principaux facteurs à garder à l'esprit :
▲Fixation aux matériaux de mur/plafond :
Il est essentiel de fixer correctement le boîtier au mur ou au plafond pour garantir la stabilité et la sécurité. Selon le matériau utilisé (cloison sèche, bois ou béton), vous aurez peut-être besoin de matériel spécifique, comme des vis, des ancrages ou des supports, pour garantir une fixation sûre. Suivez les instructions du fabricant et utilisez les outils et techniques appropriés pour fixer le boîtier au matériau spécifique du mur ou du plafond.
▲Sélection et installation des opercules :
Les boîtes de sortie et certaines boîtes de plafond sont dotées de trous défonçables qui permettent l'entrée et la sortie des câbles électriques. Il est important de sélectionner la taille de trou défonçable adaptée aux câbles utilisés et de les installer correctement. Des poinçons ou des pinces peuvent être utilisés pour créer les trous, et les trous défonçables qui ne sont pas utilisés doivent être fermés avec des couvercles ou des bouchons défonçables pour maintenir l'intégrité du boîtier.
▲Cintrage et décharge de traction appropriés des fils :
Lors de l'installation de câbles électriques dans les boîtiers, des techniques de pliage de câbles appropriées doivent être suivies pour éviter d'endommager les câbles et assurer leur propreté. Utilisez des outils de pliage de câbles appropriés, tels que des pinces à dénuder et des pinces, pour façonner les fils et maintenir un espace approprié dans le boîtier. De plus, fournissez une décharge de traction pour les câbles en utilisant des serre-câbles ou des connecteurs pour les fixer au boîtier, évitant ainsi une tension excessive ou une traction sur les fils.
▲Travail avec des ferrures/supports de boîte :
Les raccords et supports de boîtier sont essentiels pour organiser et sécuriser les connexions électriques à l'intérieur du boîtier. Il peut s'agir de connecteurs de câbles, de connecteurs de conduits, de vis de mise à la terre ou de supports de montage. Suivez les instructions du fabricant pour installer et utiliser correctement ces raccords et supports, en vous assurant qu'ils sont compatibles avec le boîtier et qu'ils respectent les codes et réglementations électriques nécessaires.
Directives NEC et d'inspection pour l'installation de boîtes électriques

En ce qui concerne les boîtes de sortie, les boîtes de plafond et les boîtes de sol, etc., le Code national de l'électricité (NEC) fournit des directives et des réglementations pour garantir une installation et une utilisation sûres. Voici quelques points clés concernant le NEC et les directives d'inspection pour ces boîtes :
▲Règles d'emplacement des boîtes :
Le NEC fournit des directives sur le placement et l'emplacement des boîtiers. Par exemple, les boîtiers de sortie doivent être installés à des intervalles appropriés le long des murs, avec des règles spécifiques concernant les distances entre les boîtiers. Les boîtiers de plafond doivent être solidement fixés aux composants structurels et les boîtiers de sol doivent être installés dans des endroits accessibles. Le respect de ces règles permet de garantir des connexions de câblage appropriées et l'accessibilité pour l'entretien et les réparations.
▲Boîtes pour zones dangereuses :
Certains environnements, comme les zones contenant des gaz ou des poussières inflammables, nécessitent une attention particulière pour l'installation des boîtiers. Le NEC fournit des réglementations pour les boîtiers pour emplacements dangereux, y compris les types de boîtiers et les matériaux adaptés à ces environnements. Ces boîtiers doivent être correctement classés et installés conformément à des exigences spécifiques pour atténuer les risques potentiels.
▲Exigences d’inspection :
Les installations électriques, y compris les boîtes de sortie, les boîtes de plafond et les boîtes de sol, sont soumises à une inspection par les autorités électriques locales. Les inspections permettent de garantir la conformité avec le NEC et les codes locaux, en vérifiant que les boîtes sont installées correctement et en toute sécurité. Les inspections peuvent impliquer la vérification de l'emplacement du boîtier, des connexions de câblage, de la mise à la terre, des supports du boîtier et de la conformité générale aux codes et réglementations électriques.
▲ Violations courantes :
Plusieurs infractions courantes liées aux boîtes de sortie, aux boîtes de plafond et aux boîtes de sol peuvent être identifiées lors des inspections. Ces infractions comprennent un support de boîte inapproprié, un espace insuffisant autour de la boîte, une mise à la terre inadéquate, une utilisation incorrecte des entrées défonçables, des calculs de remplissage de boîte incorrects et une mauvaise fixation des câbles. Ces infractions peuvent compromettre la sécurité et la fonctionnalité de l'installation électrique.
Il est essentiel de consulter les directives NEC spécifiques et les codes électriques locaux applicables à votre région pour obtenir des informations détaillées et les exigences concernant ces boîtiers. Le respect de ces directives et réglementations est essentiel pour garantir la sécurité électrique et réussir les inspections. En cas d'incertitude ou de préoccupation, il est conseillé de demander conseil à un électricien agréé ou à l'autorité électrique locale.
Les méthodes d’installation des boîtiers électriques en PVC et en métal sont-elles les mêmes ?

Oui, les méthodes d'installation des boîtiers électriques en PVC (polychlorure de vinyle) et en métal sont généralement les mêmes pour ces types de boîtiers. Les facteurs clés à prendre en compte, tels que les règles d'emplacement des boîtiers, les exigences relatives aux emplacements dangereux, les directives d'inspection et les infractions courantes, s'appliquent aux boîtiers en PVC et en métal.
Les étapes d'installation, les techniques de montage, les connexions de câblage et le respect des codes et réglementations électriques sont similaires pour les deux types de boîtiers. Cependant, il peut y avoir de légères différences dans le matériel ou les outils spécifiques utilisés pour fixer les boîtiers en raison des variations des matériaux.
Pour les boîtes en PVC, des chevilles ou des vis en plastique conçues pour les applications en PVC peuvent être utilisées pour fixer les boîtes au mur, au plafond ou au sol. Les boîtes métalliques, en revanche, peuvent nécessiter différents types de vis, d'ancrages ou de supports adaptés à une installation en métal.
Conclusion
En conclusion, l'installation de boîtes électriques, y compris les boîtes de sortie, les boîtes d'interrupteur, les boîtes adaptables, les boîtes de groupe, les boîtes de plafond et les boîtes de sol, nécessite le respect des meilleures pratiques et la conformité aux codes électriques. En suivant ces directives, la sécurité et la fonctionnalité du système électrique sont assurées.
La conformité aux normes est de la plus haute importance lors de l'installation. Le respect du National Electrical Code (NEC) et des codes électriques locaux garantit que l'installation répond aux normes de sécurité et aux exigences réglementaires nécessaires. Les inspections effectuées par les autorités électriques locales valident davantage la conformité aux normes et contribuent à maintenir la sécurité électrique.
C'est tout. Si vous avez encore des questions, n'hésitez pas à nous contacter pour soumettre le formulaire de contact ou envoyez plutôt un e-mail. Notre chargé d'affaires vous répondra au plus tard dans les 24 heures.

