Tabla de contenido
Have you ever looked at a complex wiring project and felt intimidated by the intricate network of electrical conduit? Don’t worry, you’re not alone! Mastering electrical conduit bending might seem daunting at first, but with the right tools, knowledge, and a dash of patience, it can become a rewarding skill in your electrical toolkit. Whether you’re a DIY enthusiast tackling home projects or an aspiring electrician starting your journey, this comprehensive guide will walk you through the conduit bending, empowering you to confidently navigate complex installations.
Understanding Electrical Conduit: The Backbone of Electrical Systems
Electrical Conduit, simply put, is a protective pipe that encases electrical wiring, safeguarding it from physical damage and environmental hazards. Think of it as the highway system for your electrical current, ensuring safe and reliable power distribution throughout your home or building.
Different types of electrical conduits serve specific purposes based on their material and application:
EMT (Electrical Metallic Tubing)
A lightweight, galvanized steel option known for its ease of installation. Commonly used in residential and light commercial wiring due to its flexibility and cost-effectiveness.
Conducto metálico rígido (RMC)
A stronger, heavier-duty conduit made from rigid steel or aluminum. Ideal for areas requiring high durability and protection, such as underground installations or industrial settings.
PVC (Polyvinyl Chloride) Conduit
A non-metallic conduit offering corrosion resistance and affordability. Primarily used in residential wiring where aesthetics are a consideration and ground fault protection is desired.
Choosing the Right Bender: Your Key to Precision Bending

Conduit benders are specialized tools designed to shape metal conduit into specific angles, ensuring clean, professional-looking bends.
Manual Benders:
These lever-operated tools offer affordability and portability, making them suitable for occasional use or smaller projects. They require manual force to bend the conduit, offering a good starting point for beginners. Popular brands include Greenlee and Klein Tools.
Dobladoras hidráulicas:
Powered by hydraulic fluid, these benders provide greater bending power and accuracy, ideal for larger-diameter conduit or professional applications.
Selecting the appropriate bender depends on factors like project scale, frequency of use, and your budget.
Safety First: Protecting Yourself While Bending

Electrical conduit bending involves working with sharp tools and potentially hazardous materials. Prioritizing safety is paramount throughout the process:
Wear Safety Glasses:
Protect your eyes from flying debris or metal shards during cutting and bending.
Invest in Sturdy Gloves:
Leather work gloves will shield your hands from cuts, scrapes, and heat generated during bending.
Protect Your Hearing:
Use earplugs or earmuffs when operating noisy hydraulic benders to prevent hearing damage.
Understanding Conduit Angles & Bending Radii: A Clear Blueprint for Success
Before you begin bending, familiarize yourself with key terms:
Angle:
The degree of the bend measured in degrees (e.g., 45°, 90°, 135°). Common angles are used for various applications, like creating corners or transitions between runs of conduit.
Radio de curvatura:
The curved distance from the center of the conduit to the outer edge of the bend. A smaller radius creates a tighter curve, while a larger radius results in a more gradual bend.
Step-by-Step Bending: From Measurement to Masterpiece
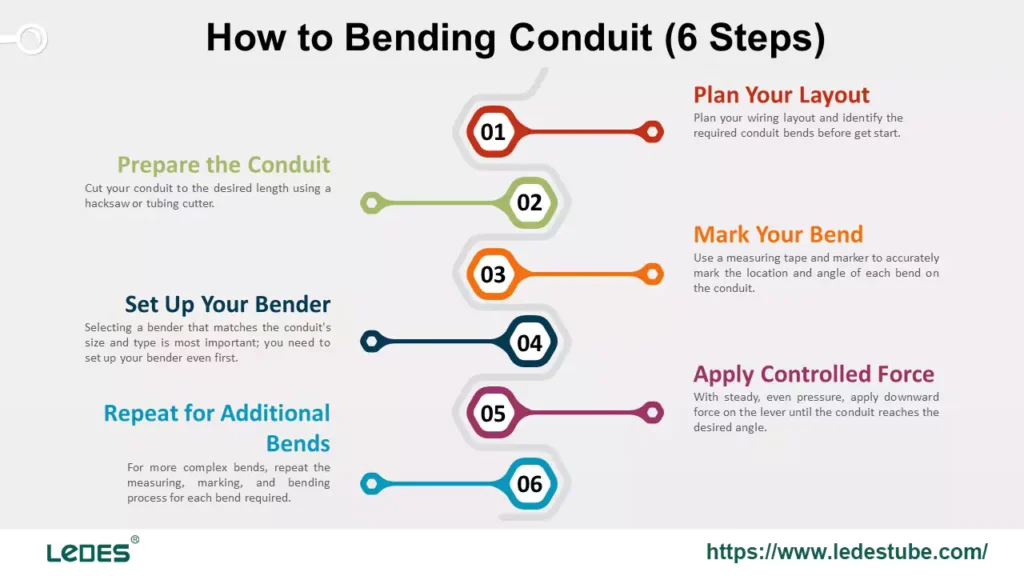
Plan Your Layout:
Before you even touch a bender, meticulously plan your wiring layout and identify the required conduit bends. Accurate measurements are crucial for a successful outcome.
Prepare el conducto:
Cut your conduit to the desired length using a hacksaw or tubing cutter. Ensure a clean, square cut to prevent uneven bending.
Mark Your Bend:
Use a measuring tape and marker to accurately mark the location and angle of each bend on the conduit. Refer to your layout diagram for precise placement.
Align the Mark: Line up the mark you made on the conduit with the correct bending point on the bender.
Foot Placement: Place your foot firmly on the bender’s foot pedal or lever arm to secure the conduit during bending.
Set Up Your Bender:
Select a bender that matches the conduit’s size and type is most important, and the next step should be set up your bender.
Manual Benders: Align the bender’s die (the curved steel section) with the marked bending point. Secure the conduit in place using a vise or the bender’s holding mechanism.
Dobladoras hidráulicas: Position the conduit into the bender’s die and ensure it aligns correctly. Connect the hydraulic pump and adjust pressure according to the conduit size and desired bend angle.
Adjust the Bender (if necessary): Some benders require adjustments based on the angle of the bend. Consult the manufacturer’s instructions.
Apply Controlled Force:
Manual Benders: With steady, even pressure, apply downward force on the lever until the conduit reaches the desired angle. Avoid jerking or twisting motions, as this can cause damage.
Dobladoras hidráulicas: Gradually increase hydraulic pressure to achieve the bend. Monitor the process closely and stop once the desired angle is reached. Release the pressure slowly to avoid stress on the conduit.
Release Carefully: Once the bend is complete, gently release the pressure from the bender (manual or hydraulic).
Inspect Your Work: Check the bend for accuracy and smoothness. Ensure that the radius is consistent throughout the curve and that there are no kinks or flattening. If needed, repeat the bending process to achieve the desired result.
Repeat for Additional Bends:
For more complex bends, repeat the measuring, marking, and bending process for each bend required.
How to Make Offset Bend?
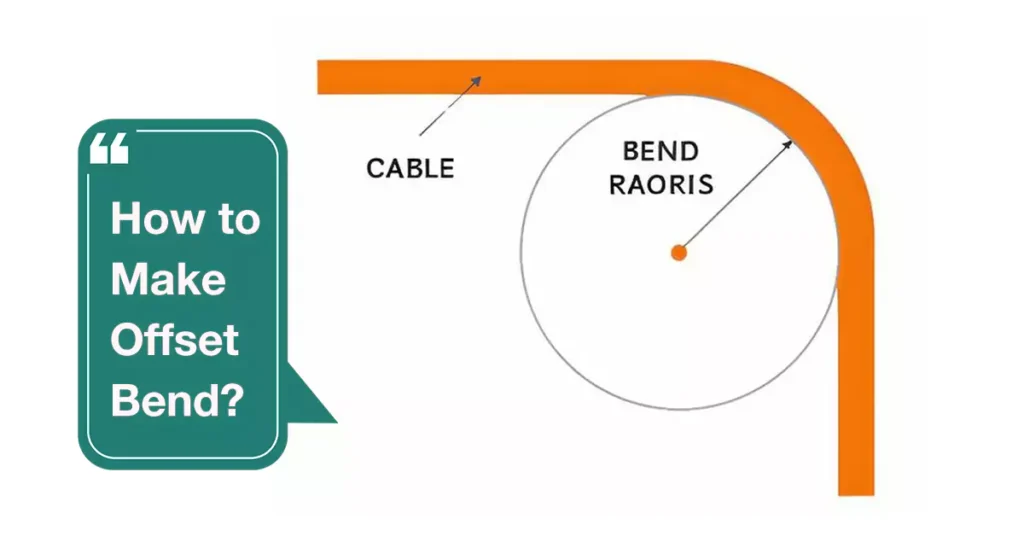
What is an Offset Bend?
An offset bend involves creating two bends in opposite directions to change the conduit’s path around an obstruction, like a wall stud or pipe. Imagine you need to run conduit from one point to another, but there’s a vertical obstacle in the way. An offset bend allows you to gracefully steer the conduit around this obstruction without compromising its path.
Why Choose an Offset Bend?
Offset bends offer several advantages:
Obstacle Navigation: They efficiently guide your conduit around walls, pipes, and other obstructions that would otherwise require complex routing.
Optimización del espacio: By adjusting the conduit’s direction, offset bends can save valuable space within tight enclosures or crowded areas.
Professional Aesthetics: Offset bends create a clean and aesthetically pleasing look compared to haphazardly routed conduits.
The Anatomy of an Offset Bend:
Offset bends consist of two interconnected bends:
First Bend: This initial bend sets the direction for the offset, moving the conduit away from the obstacle.
Second Bend: This reverse bend returns the conduit to its original path after clearing the obstacle.
Mastering the Art of Offset Bending:
Creating a perfect offset bend requires precision and attention to detail. Follow these steps:
Medir dos veces, doblar una vez:
Distance to Obstacle: Measure the distance between your starting point and the center of the obstacle.
Offset Distance: Determine how far you need to move the conduit’s path to clear the obstacle. This is your offset distance.
Choose Your Angles:
Select appropriate bend angles based on your offset distance and the location of the obstacle. Common offset angles include 22.5 degrees, 30 degrees, 45 degrees, and 60 degrees. Consult a conduit bending chart to find the correct angle for your situation.
Calculate Shrinkage:
Conduit material naturally shrinks slightly when bent. Use a conduit bending chart to determine the shrinkage per inch of offset based on your chosen angles.
Mark Your Conduit:
First Bend Mark: Add the total shrinkage to the distance to the object’s center. Measure and mark this distance from the end of your conduit.
Second Bend Mark: Multiply the offset distance by a constant multiplier (found on the bending chart) to determine the distance for your second mark from the first.
Make the Bends:
First Bend: Using your marked position, bend the end of the conduit to the required angle using your bender.
Second Bend: Carefully flip the conduit upside down and bend it to the same degree as the first bend. Rotate the bender 180 degrees for this second bend to ensure both bends return the conduit to the original plane.
4 Tips for Success:
- Use a Sturdy Floor: Bending on a solid surface provides better support and prevents flattening.
- Avoid Excessive Pressure: Too much pressure can damage your conduit. Apply even, controlled force throughout the bending process.
- Double-Check Your Measurements: Accuracy is paramount. Measure each mark twice before bending to avoid costly mistakes.
- La práctica hace al maestro: Offset bends might seem intimidating at first, but with practice and attention to detail, you’ll master this essential skill and create clean, professional electrical installations.
How to Make Back-to-Back Bends?
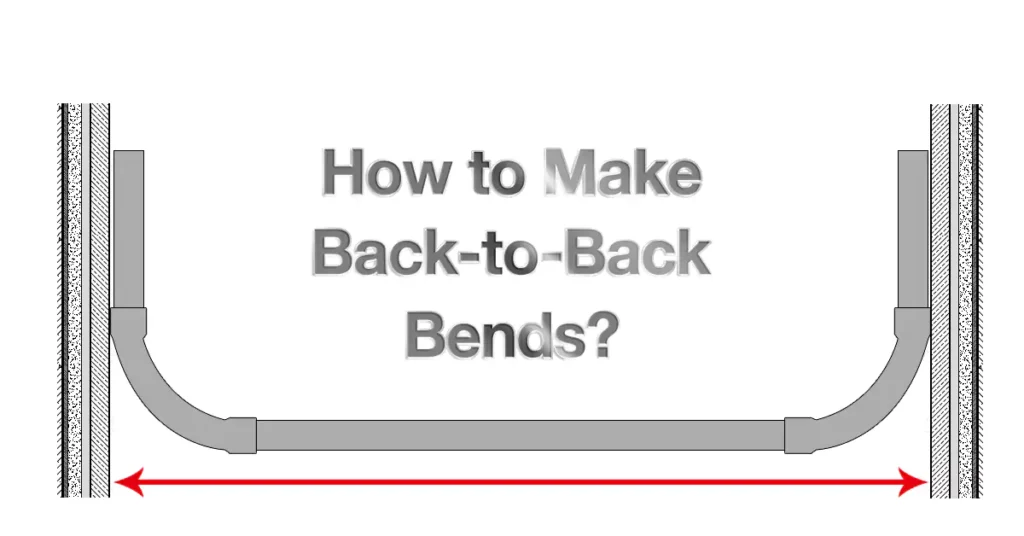
What is a Back-to-Back Bend?
A back-to-back bend involves creating two consecutive 90-degree bends using a single piece of conduit. Imagine you need to route conduit down a wall, across the floor, and then back up another wall. This is where a back-to-back bend shines! It creates a widened “U” shape, enabling your conduit to seamlessly transition between these vertical surfaces.
Why Choose Back-to-Back Bends?
Optimización del espacio: Back-to-back bends efficiently utilize space when navigating corners and transitions between walls or structures.
Clean Aesthetics: They create a professional look by ensuring a consistent path for your conduit, avoiding messy routing around corners.
El cumplimiento del Código: Properly executed back-to-back bends meet code requirements for safe and reliable electrical installations.
Steps to Create a Perfect Back-to-Back Bend:
Measure Twice, Bend Once: Accuracy is paramount!
Vertical Distance: Measure the distance between the two parallel surfaces (walls or fixtures) where your back-to-back bends will occur. This measurement determines the length of each stub you’ll create.
Create Accurate Stubs: Divide the total measured distance by two to determine the length of each stub required for the bends. Mark these lengths accurately on your conduit.
Position and Secure:
Place the first marked section (the first stub) into your bender, aligning it with the star marking on the tool. Ensure the conduit is securely held in place.
Apply firm pressure using your foot on the bender’s heel while pushing down on the conduit to create the first 90-degree bend, ensuring it reaches the arrow marking on the bender.
Repeat for the Second Bend:
Flip the conduit over and repeat step 3, using the remaining stub length and aligning it with the star marking on the bender. Apply pressure to achieve a second 90-degree bend.
3 Tips for Success:
Sturdy Surface: Always bend conduit on a solid, flat surface like concrete or a workbench. This provides stability and prevents damage.
Controlled Pressure: Apply even, controlled pressure throughout the bending process. Avoid excessive force, which can cause flattening or cracking in your conduit.
Visualize Your Bend: Before you start, clearly visualize the final shape you want to achieve. This mental picture will guide your measurements and ensure a successful bend.
By mastering back-to-back bends, you’ll add another valuable tool to your electrical bending repertoire, allowing you to tackle diverse installation challenges with precision and efficiency.
Troubleshooting Common Bending Issues: Turning Problems into Solutions
Even experienced benders encounter occasional hiccups. Here’s how to address common issues:
Kinks:
Caused by applying uneven pressure during bending or using a bender that’s too small for the conduit size. Try using a larger bender or re-bending the section with more even pressure.
Flattening:
Occurs when the bender is not positioned correctly or excessive force is applied. Reposition the conduit in the die and apply pressure more gradually.
Practice Makes Perfect: Hone Your Bending Skills!
7 Common Mistakes in Electrical Conduit Bending
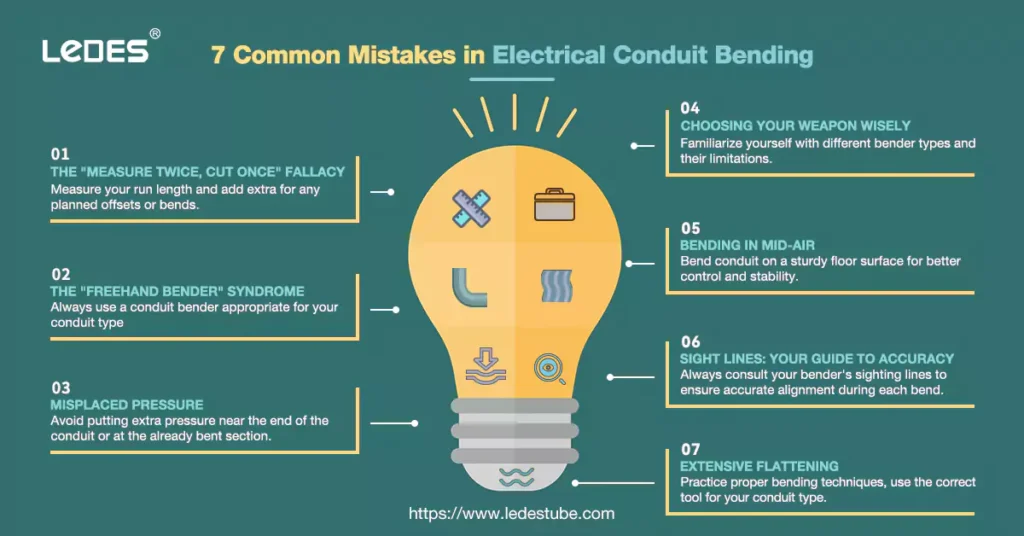
Don’t let these blunders derail your next project! This guide dives into the seven most common conduit bending errors, offering expert tips on how to avoid them and achieve flawless results every time.
1. The "Measure Twice, Cut Once" Fallacy:
While a fundamental rule in woodworking, it applies even more fiercely to conduit bending.
Why it’s a mistake: Cutting the conduit too short means starting over or patching things up, wasting time and materials. Conversely, cutting it too long makes bending awkward and can lead to unsightly kinks or uneven bends.
The Fix: Measure your run length and add extra for any planned offsets or bends. Aim for at least 6 inches of excess, allowing room for adjustments during the process. Double-check your measurements against your layout diagram before cutting.
2. The "Freehand Bender" Syndrome:
Resist the temptation to eyeball it! Conduit benders are designed for precision; free handing leads to inconsistent results and potential safety issues.
Why it’s a mistake: Without the bender’s guiding structure, you risk creating bends that are too sharp, too flat, or simply not aligned correctly. This can compromise wiring integrity and even create fire hazards.
The Fix: Always use a conduit bender appropriate for your conduit type (EMT, RMC) and desired bend angle.
3. Misplaced Pressure: A Recipe for Flattening
Why it’s a mistake: Applying too much pressure to the wrong spot can distort the conduit, causing flattening or buckling. This weakens the conduit and makes for an unprofessional look.
The Fix: Ensure you’re applying pressure directly behind the bending die, keeping the force even throughout the bend. Avoid putting extra pressure near the end of the conduit or at the already bent section.
4. Tool Talk: Choosing Your Weapon Wisely
Why it’s a mistake: Using the wrong tool for the job can lead to frustration and damage. For example, using a hickey (designed for rigid conduit) on EMT conduit can crimp it.
The Fix: Familiarize yourself with different bender types (e.g., hand benders, hydraulic benders) and their limitations. Understand which tools are best suited for specific conduit materials (EMT, RMC, etc.) and desired bends.
5. The "Floor is Lava" Fallacy: Bending in Mid-Air
Why it’s a mistake: While sometimes unavoidable, bending conduit without proper support can result in the conduit slipping inside the bender or collapsing under its own weight.
The Fix: Whenever possible, bend conduit on a sturdy floor surface for better control and stability. If you must bend in mid-air, ensure you have a secure grip and adequate support to prevent the conduit from moving unexpectedly.
6. Sight Lines: Your Guide to Accuracy
Why it’s a mistake: Not using the sighting lines on benders or improperly marking your conduit can result in bends that are off-center or at incorrect angles. This impacts installation accuracy and can cause problems down the line.
The Fix: Always consult your bender’s sighting lines to ensure accurate alignment during each bend. Double-check your marks before bending, using a marker and straightedge for precision.
7. Extensive Flattening: A Sign of Trouble
Why it’s a mistake: Excessive flattening occurs when too much pressure is applied or the wrong tools are used. It weakens the conduit and compromises its structural integrity.
The Fix: Practice proper bending techniques, use the correct tool for your conduit type, and avoid applying excessive force. Inspect bends after completion to ensure they are smooth and even.
By avoiding these common mistakes, you’ll elevate your conduit bending skills, create professional-looking installations, and ensure a safe and efficient electrical setup every time.
Mastering conduit bending takes time and practice.
Start with simple exercises:
90-Degree Bends: Practice creating consistently accurate 90-degree bends at various radii to build a foundation.
Offset Bends: Gradually increase complexity by incorporating offset bends, where the conduit is bent twice in different directions.
Conclusión
This guide has equipped you with the foundational knowledge of conduit bending.
Continue your electrical journey by exploring advanced techniques like fish-tailing and saddle bends, delve deeper into electrical codes and regulations (like the NEC), and consider pursuing formal training or apprenticeships to enhance your skills and professional prospects.
Remember, every electrician’s journey begins with a single bend. Embrace the process, stay curious, and you’ll be well on your way to mastering this essential skill.
Contact Ledes if you are still has any questions here.


