Tabla de contenido
¿Alguna vez ha visto un proyecto de cableado complejo y se ha sentido intimidado por la intrincada red de conductos eléctricos? No se preocupe, ¡no está solo! Dominar el doblado de conductos eléctricos puede parecer abrumador al principio, pero con las herramientas adecuadas, el conocimiento y una pizca de paciencia, puede convertirse en una habilidad gratificante en su caja de herramientas eléctricas. Ya sea un entusiasta del bricolaje que se enfrenta a proyectos domésticos o un aspirante a electricista que comienza su andadura, esta guía completa le guiará a través del doblado de conductos, lo que le permitirá realizar instalaciones complejas con confianza.
En pocas palabras, un conducto eléctrico es una tubería protectora que recubre el cableado eléctrico y lo protege de daños físicos y peligros ambientales. Piense en él como el sistema de autopistas para su corriente eléctrica, que garantiza una distribución de energía segura y confiable en toda su casa o edificio.
Diferentes tipos de conductos eléctricos cumplir propósitos específicos en función de su material y aplicación:
Una opción liviana de acero galvanizado conocida por su facilidad de instalación. Se utiliza comúnmente en cableado residencial y comercial ligero debido a su flexibilidad y rentabilidad.
Conducto más resistente y resistente fabricado con acero rígido o aluminio. Ideal para áreas que requieren alta durabilidad y protección, como instalaciones subterráneas o entornos industriales.
A conducto no metálico Ofrece resistencia a la corrosión y es asequible. Se utiliza principalmente en cableado residencial donde la estética es una consideración y se desea protección contra fallas a tierra.

Las dobladoras de conductos son herramientas especializadas diseñadas para dar forma a conductos metálicos en ángulos específicos, garantizando curvas limpias y de aspecto profesional.
Estas herramientas accionadas por palanca son económicas y portátiles, lo que las hace adecuadas para uso ocasional o proyectos más pequeños. Requieren fuerza manual para doblar el conducto, lo que ofrece un buen punto de partida para principiantes. Las marcas populares incluyen Greenlee y Klein Tools.
Impulsadas por fluido hidráulico, estas dobladoras proporcionan mayor potencia y precisión de doblado, ideales para conductos de mayor diámetro o aplicaciones profesionales.
La selección de la dobladora adecuada depende de factores como la escala del proyecto, la frecuencia de uso y su presupuesto.

El doblado de conductos eléctricos implica trabajar con herramientas afiladas y materiales potencialmente peligrosos. Priorizar la seguridad es primordial durante todo el proceso:
Proteja sus ojos de escombros o fragmentos de metal que salgan volando durante el corte y el doblado.
Los guantes de trabajo de cuero protegerán sus manos de cortes, raspaduras y calor generado al doblar.
Utilice tapones o protectores auditivos al operar dobladoras hidráulicas ruidosas para evitar daños auditivos.
Antes de comenzar a doblar, familiarícese con los términos clave:
El grado de curvatura medido en grados (por ejemplo, 45°, 90°, 135°). Los ángulos comunes se utilizan para diversas aplicaciones, como la creación de esquinas o transiciones entre tramos de conductos.
Distancia curva desde el centro del conducto hasta el borde exterior de la curva. Un radio más pequeño crea una curva más cerrada, mientras que un radio más grande da como resultado una curva más gradual.
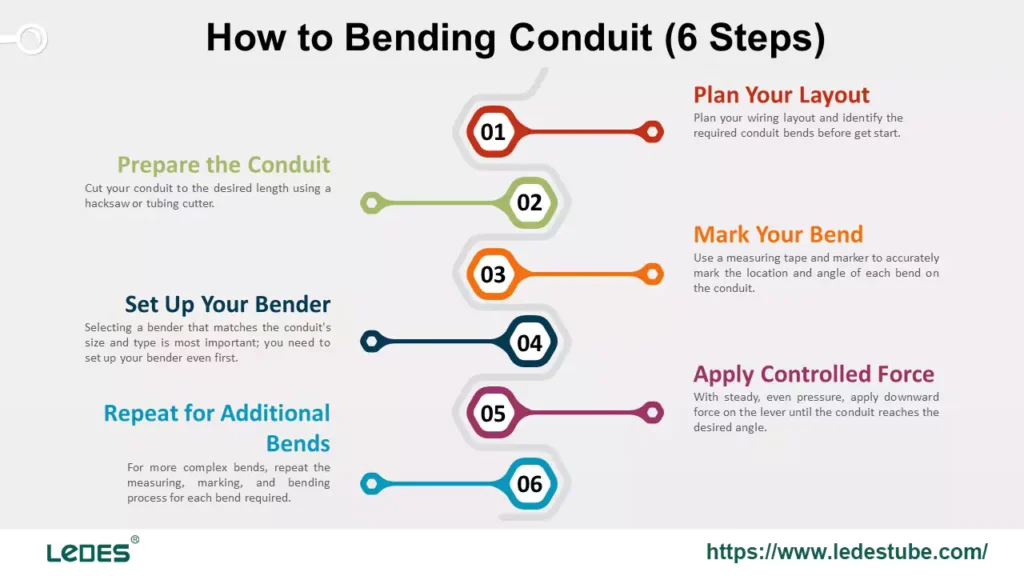
Antes de siquiera tocar una dobladora, planifique meticulosamente el diseño del cableado e identifique las curvas de conducto necesarias. Las mediciones precisas son cruciales para obtener un resultado exitoso.
Corte el conducto a la longitud deseada con una sierra para metales o un cortador de tubos. Asegúrese de realizar un corte limpio y recto para evitar curvaturas desiguales.
Utilice una cinta métrica y un marcador para marcar con precisión la ubicación y el ángulo de cada curva del conducto. Consulte el diagrama de distribución para ver la ubicación precisa.
Alinear la marca: Alinee la marca que hizo en el conducto con el punto de curvatura correcto en el doblador.
Colocación del pie: Coloque el pie firmemente sobre el pedal o el brazo de palanca de la dobladora para asegurar el conducto durante el doblado.
Lo más importante es seleccionar una dobladora que coincida con el tamaño y tipo del conducto, y el siguiente paso debe ser configurar la dobladora.
Dobladoras manuales: Alinee la matriz de la dobladora (la sección de acero curvada) con el punto de doblado marcado. Fije el conducto en su lugar utilizando una prensa de banco o el mecanismo de sujeción de la dobladora.
Dobladoras hidráulicas: Coloque el conducto en la matriz de la dobladora y asegúrese de que esté correctamente alineado. Conecte la bomba hidráulica y ajuste la presión según el tamaño del conducto y el ángulo de curvatura deseado.
Ajuste el doblador (si es necesario): Algunas dobladoras requieren ajustes según el ángulo de la curva. Consulta las instrucciones del fabricante.
Dobladoras manuales: Con una presión constante y uniforme, aplique fuerza hacia abajo sobre la palanca hasta que el conducto alcance el ángulo deseado. Evite movimientos bruscos o de torsión, ya que esto puede causar daños.
Dobladoras hidráulicas: Aumente gradualmente la presión hidráulica para lograr la curva. Supervise el proceso de cerca y deténgase una vez que se alcance el ángulo deseado. Libere la presión lentamente para evitar la tensión en el conducto.
Suelte con cuidado: Una vez completada la curva, libere suavemente la presión de la dobladora (manual o hidráulica).
Inspeccione su trabajo: Compruebe la precisión y la suavidad de la curva. Asegúrese de que el radio sea uniforme en toda la curva y de que no haya dobleces ni aplanamientos. Si es necesario, repita el proceso de doblado para lograr el resultado deseado.
Para curvas más complejas, repita el proceso de medición, marcado y doblado para cada curva requerida.
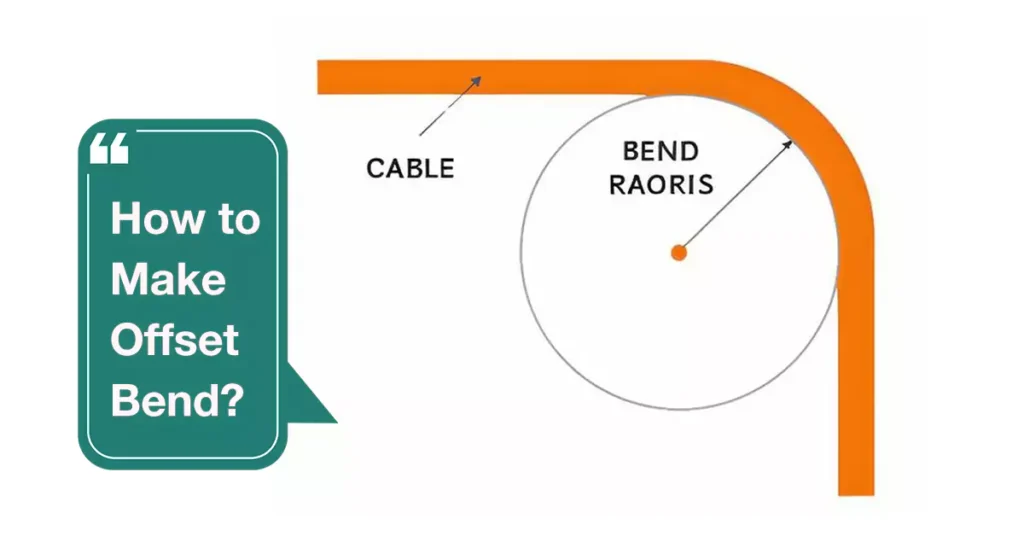
Una curva descentrada implica crear dos curvas en direcciones opuestas para cambiar la trayectoria del conducto alrededor de una obstrucción, como un montante de pared o una tubería. Imagina que necesitas tender un conducto de un punto a otro, pero hay un obstáculo vertical en el camino. Una curva descentrada te permite dirigir con elegancia el conducto alrededor de esta obstrucción sin comprometer su trayectoria.
Las curvas desplazadas ofrecen varias ventajas:
Navegación con obstáculos: Guían eficientemente su conducto alrededor de paredes, tuberías y otras obstrucciones que de otro modo requerirían un enrutamiento complejo.
Optimización del espacio: Al ajustar la dirección del conducto, las curvas desplazadas pueden ahorrar espacio valioso dentro de recintos estrechos o áreas concurridas.
Estética Profesional: Las curvas desplazadas crean una apariencia limpia y estéticamente agradable en comparación con los conductos colocados de manera desordenada.
Las curvas desplazadas constan de dos curvas interconectadas:
Primera curva: Esta curva inicial establece la dirección del desplazamiento, alejando el conducto del obstáculo.
Segunda curva: Esta curva inversa devuelve el conducto a su trayectoria original después de superar el obstáculo.
Para crear un pliegue perfecto se necesita precisión y atención a los detalles. Siga estos pasos:
Distancia al obstáculo: Mide la distancia entre tu punto de partida y el centro del obstáculo.
Distancia de desplazamiento: Determina la distancia que debes recorrer con el conducto para despejar el obstáculo. Esta es la distancia de desplazamiento.
Seleccione los ángulos de curvatura adecuados en función de la distancia de desplazamiento y la ubicación del obstáculo. Los ángulos de curvatura más comunes son 22,5 grados, 30 grados, 45 grados y 60 grados. Consulte una tabla de curvatura de conductos para encontrar el ángulo correcto para su situación.
El material de los conductos se encoge de forma natural cuando se dobla. Utilice una tabla de doblado de conductos para determinar la contracción por pulgada de desplazamiento en función de los ángulos elegidos.
Primera marca de curva: Sume la contracción total a la distancia hasta el centro del objeto. Mida y marque esta distancia desde el extremo del conducto.
Segunda marca de curva: Multiplique la distancia de desplazamiento por un multiplicador constante (que se encuentra en la tabla de curvatura) para determinar la distancia de su segunda marca desde la primera.
Primera curva: Utilizando la posición marcada, doble el extremo del conducto hasta el ángulo requerido utilizando el doblador.
Segunda curva: Con cuidado, dé vuelta el conducto y dóblelo en el mismo ángulo que el primer doblez. Gire la dobladora 180 grados para este segundo doblez a fin de asegurarse de que ambos dobleces devuelvan el conducto al plano original.
- Utilice un suelo resistente: Doblarse sobre una superficie sólida proporciona un mejor soporte y evita el aplanamiento.
- Evite la presión excesiva: Demasiada presión puede dañar el conducto. Aplique una fuerza uniforme y controlada durante todo el proceso de doblado.
- Vuelva a comprobar sus medidas: La precisión es fundamental. Mida cada marca dos veces antes de doblarla para evitar errores costosos.
- La práctica hace al maestro: Las curvas desplazadas pueden parecer intimidantes al principio, pero con práctica y atención a los detalles, dominarás esta habilidad esencial y crearás curvas limpias. Instalaciones eléctricas profesionales.
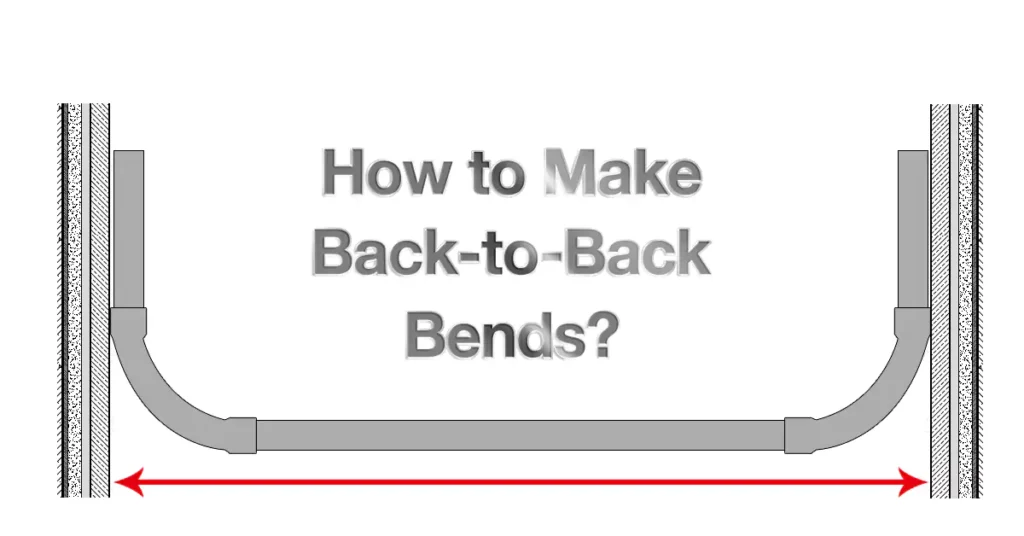
Una flexión consecutiva implica crear dos curvas consecutivas. Curvas de 90 grados Usando un solo trozo de conducto. Imagina que necesitas pasar un conducto por una pared, por el piso y luego por otra pared. ¡Aquí es donde brilla una curvatura consecutiva! Crea una forma de "U" ensanchada, lo que permite que el conducto pase sin problemas entre estas superficies verticales.
Optimización del espacio: Las curvas consecutivas utilizan el espacio de manera eficiente al navegar por esquinas y transiciones entre paredes o estructuras.
Estética limpia: Crean una apariencia profesional al garantizar una ruta consistente para su conducto, evitando un trazado desordenado en las esquinas.
El cumplimiento del Código: Las curvas consecutivas ejecutadas correctamente cumplen con los requisitos del código para instalaciones eléctricas seguras y confiables.
Distancia vertical: Mida la distancia entre las dos superficies paralelas (paredes o accesorios) donde se realizarán los dobleces consecutivos. Esta medida determina la longitud de cada trozo que creará.
Crear stubs precisos: Divida la distancia total medida por dos para determinar la longitud de cada ramal necesario para las curvas. Marque estas longitudes con precisión en el conducto.
Coloque la primera sección marcada (el primer trozo) en la dobladora, alineándola con la marca de estrella de la herramienta. Asegúrese de que el conducto esté bien sujeto en su lugar.
Aplique una presión firme con el pie sobre el talón del doblador mientras empuja hacia abajo el conducto para crear la primera curva de 90 grados, asegurándose de que alcance la marca de flecha en el doblador.
Da vuelta el conducto y repite el paso 3, utilizando el trozo restante del conducto y alineándolo con la marca de estrella del doblador. Aplica presión para lograr una segunda curva de 90 grados.
Superficie resistente: Siempre doble el conducto sobre una superficie sólida y plana, como hormigón o un banco de trabajo. Esto proporciona estabilidad y evita daños.
Presión controlada: Aplique una presión uniforme y controlada durante todo el proceso de doblado. Evite aplicar una fuerza excesiva, que puede provocar que el conducto se aplaste o agriete.
Visualiza tu curva: Antes de comenzar, visualice claramente la forma final que desea lograr. Esta imagen mental guiará sus medidas y garantizará un doblado exitoso.
Al dominar los curvados consecutivos, agregará otra herramienta valiosa a su repertorio de curvado eléctrico, lo que le permitirá abordar diversos desafíos de instalación con precisión y eficiencia.
Incluso los que doblan con más experiencia se enfrentan a problemas ocasionales. A continuación, se explica cómo solucionar los problemas más comunes:
Esto se debe a que se aplica una presión desigual durante el doblado o se utiliza una dobladora demasiado pequeña para el tamaño del conducto. Intente utilizar una dobladora más grande o vuelva a doblar la sección con una presión más uniforme.
Se produce cuando la dobladora no está colocada correctamente o se aplica una fuerza excesiva. Vuelva a colocar el conducto en la matriz y aplique presión de forma más gradual.
La práctica hace al maestro: ¡Perfecciona tus habilidades de flexión!
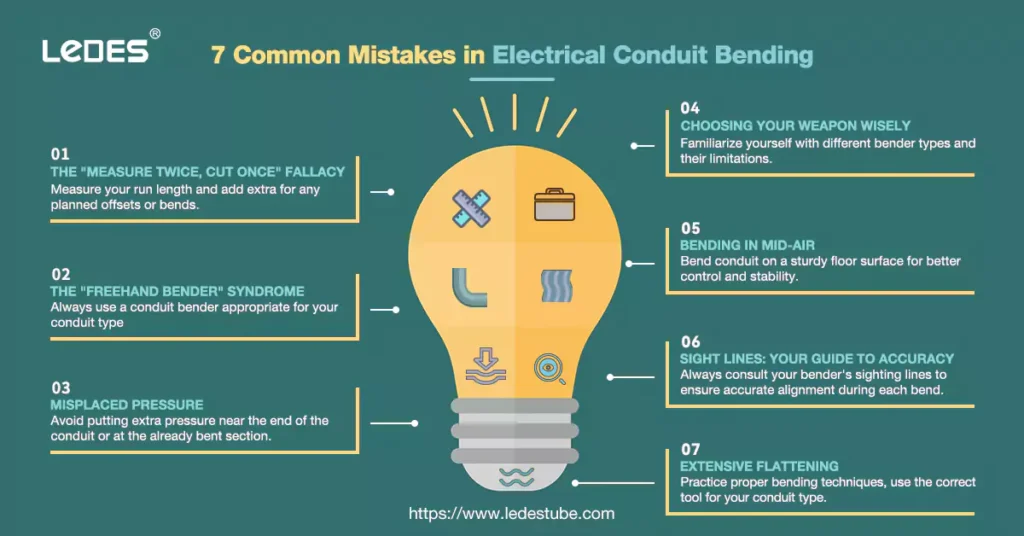
¡No permita que estos errores arruinen su próximo proyecto! Esta guía analiza en profundidad los siete errores más comunes al doblar conductos y ofrece consejos de expertos sobre cómo evitarlos y lograr resultados impecables en todo momento.
Si bien es una regla fundamental en la carpintería, se aplica aún más estrictamente al doblado de conductos.
Por qué es un error: Cortar el conducto demasiado corto significa empezar de nuevo o hacer parches, desperdiciando tiempo y materiales. Por el contrario, cortarlo demasiado largo hace que sea difícil doblarlo y puede generar torceduras antiestéticas o curvas desiguales.
La solución: Mida la longitud de la tirada y agregue más para cualquier desviación o curvatura planificada. Trate de que haya al menos 6 pulgadas de exceso, dejando espacio para realizar ajustes durante el proceso. Verifique nuevamente sus medidas con el diagrama de diseño antes de cortar.
Resista la tentación de calcularlo a ojo. Las dobladoras de conductos están diseñadas para lograr precisión; el uso de herramientas manuales puede generar resultados inconsistentes y posibles problemas de seguridad.
Por qué es un error: Sin la estructura de guía de la dobladora, se corre el riesgo de crear curvas demasiado cerradas, demasiado planas o simplemente no alineadas correctamente. Esto puede comprometer la integridad del cableado e incluso generar peligros de incendio.
La solución: Utilice siempre una dobladora de conductos adecuada para su tipo de conducto (EMT, RMC) y el ángulo de curvatura deseado.
Por qué es un error: Aplicar demasiada presión en el lugar incorrecto puede deformar el conducto, lo que puede provocar que se aplane o se deforme. Esto debilita el conducto y le da un aspecto poco profesional.
La solución: Asegúrese de aplicar presión directamente detrás de la matriz de doblado, manteniendo la fuerza uniforme durante todo el doblado. Evite aplicar presión adicional cerca del extremo del conducto o en la sección ya doblada.
Por qué es un error: El uso de la herramienta incorrecta para el trabajo puede provocar frustración y daños. Por ejemplo, el uso de un punzón (diseñado para conductos rígidos) en un conducto EMT puede doblarlo.
La solución: Familiarícese con los distintos tipos de dobladoras (p. ej., dobladoras manuales, dobladoras hidráulicas) y sus limitaciones. Comprenda qué herramientas son las más adecuadas para materiales de conductos específicos (EMT, RMC, etc.) y las curvaturas deseadas.
Por qué es un error: Si bien a veces es inevitable, doblar un conducto sin el soporte adecuado puede provocar que el conducto se deslice dentro de la dobladora o colapse por su propio peso.
La solución: Siempre que sea posible, doble el conducto sobre una superficie firme para lograr un mejor control y estabilidad. Si debe doblarlo en el aire, asegúrese de tener un agarre seguro y un soporte adecuado para evitar que el conducto se mueva inesperadamente.
Por qué es un error: No utilizar las líneas de observación en las dobladoras o marcar incorrectamente el conducto puede provocar que las curvas queden descentradas o en ángulos incorrectos. Esto afecta la precisión de la instalación y puede causar problemas en el futuro.
La solución: Consulte siempre las líneas de observación de su dobladora para garantizar una alineación precisa durante cada curva. Vuelva a comprobar las marcas antes de realizar la curva, utilizando un marcador y una regla para lograr precisión.
Por qué es un error: El aplastamiento excesivo se produce cuando se aplica demasiada presión o se utilizan herramientas inadecuadas. Esto debilita el conducto y compromete su integridad estructural.
La solución: Practique las técnicas de doblado adecuadas, utilice la herramienta correcta para el tipo de conducto y evite aplicar una fuerza excesiva. Inspeccione las curvas una vez finalizadas para asegurarse de que estén suaves y uniformes.
Al evitar estos errores comunes, mejorará sus habilidades para doblar conductos, creará instalaciones de aspecto profesional y garantizará una configuración eléctrica segura y eficiente en todo momento.
Comience con ejercicios sencillos:
Curvas de 90 grados: Practique la creación de curvas de 90 grados consistentemente precisas en distintos radios para construir una base.
Curvas desplazadas: Aumente gradualmente la complejidad incorporando curvas desplazadas, donde el conducto se dobla dos veces en diferentes direcciones.
Esta guía le ha proporcionado los conocimientos básicos sobre el doblado de conductos.
Continúe su viaje eléctrico explorando técnicas avanzadas como el giro en cola de pez y las curvas en silla de montar, Profundizar en los códigos y regulaciones eléctricas. (como el NEC), y considere realizar capacitación formal o aprendizajes para mejorar sus habilidades y perspectivas profesionales.
Recuerde que el camino de cada electricista comienza con una sola curva. Acepte el proceso, mantenga la curiosidad y estará en el camino correcto para dominar esta habilidad esencial.
Contacta con Ledes si aún tienes alguna pregunta aquí.


